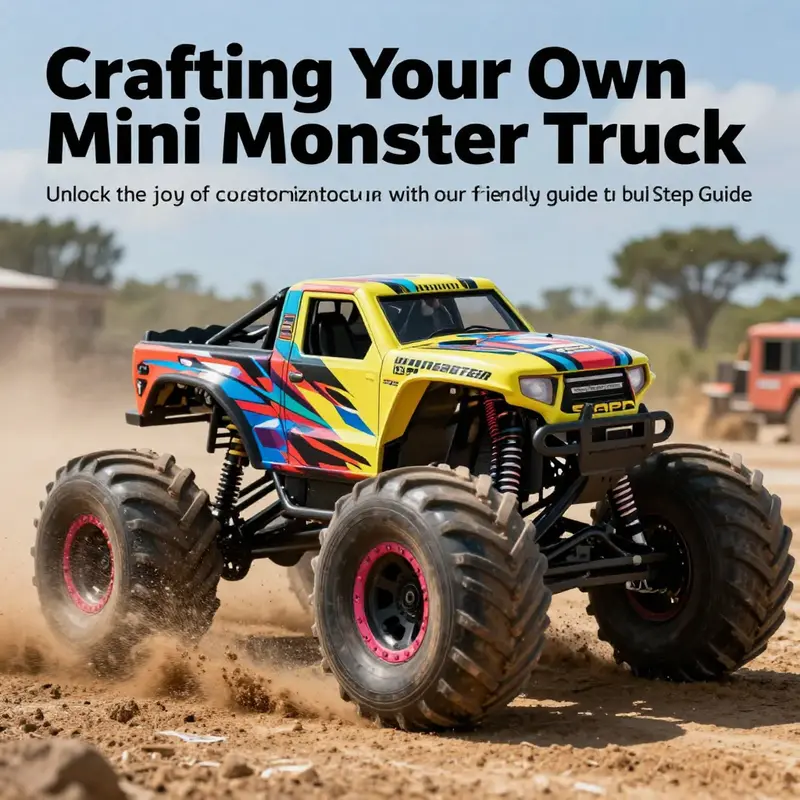
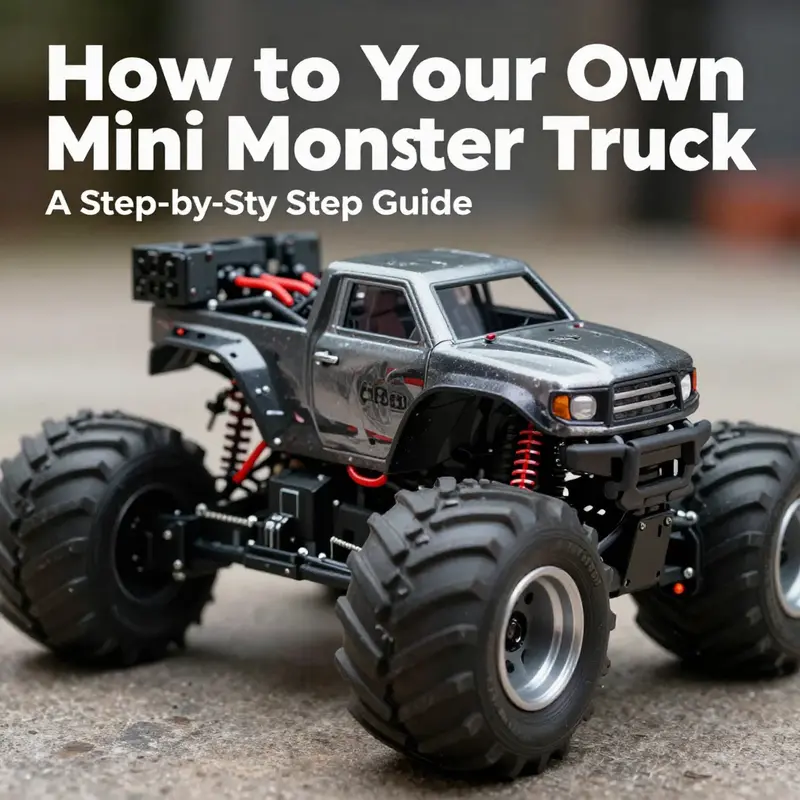
Have you ever dreamed of driving a mini monster truck? Whether you’re a small business owner looking to attract attention at events, a residential property owner hoping to impress your neighbors, or a mini truck enthusiast ready to dive into a hands-on project, constructing a mini monster truck is an exciting endeavor! Each chapter of this guide will take you through essential steps, from gathering materials to tweaking the final design. Let’s get started on your journey to create a monster truck that’s not just fun to look at, but also functional and uniquely yours.
Under the Hood: Materials, Setup, and the Craft of Building a Mini Monster Truck
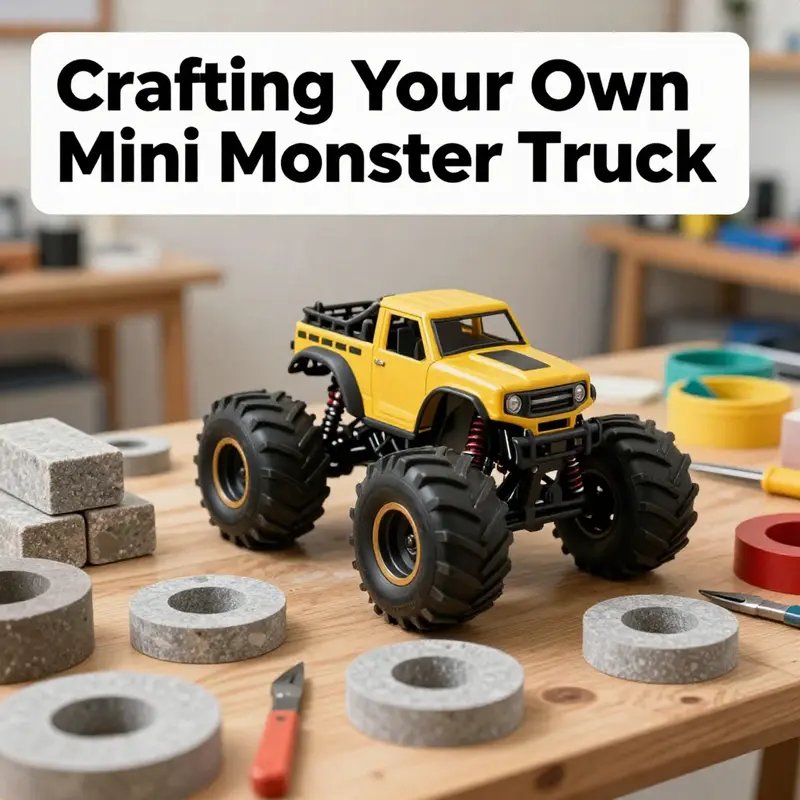
A mini monster truck is more than a quirky silhouette on blocky wheels. It is a test of how design choices translate into durability, performance, and personality within a compact, interactive world. In this chapter we move beyond the look and into the bones—the materials you imagine, the setup you engineer, and the subtle decisions that let a tiny vehicle feel confident on rough tracks. The aim is to blend practical engineering sense with the playful observation that in Mini World, like any arena of imagination, form follows function only when both align with the terrain and the rules of the game. This approach helps you build something that isn’t just eye-catching but sturdily conceived for the stunts and scrambles you’re likely to attempt on the track.
Materials are your first conversation with the truck’s future. In a real-world monster truck, builders talk about chassis rigidity, impact resistance, and weight distribution. They choose materials that can withstand the jolts of landings, the heat of a tire’s friction, and the torque of high-powered drivetrains. In a digital space, you translate that logic into the blocks and textures at hand. The chassis becomes a framework composed of blocks with a visual and structural sense of heft. You lean toward blocks that read as strong and stable: stone-like textures or dark woods can convey a heavy, rugged core. The goal is to create a base that looks and feels capable of taking a pounding, even when the truck is just a model on a flat world or a piece of a larger obstacle course.
Suspension is where realism meets play. Real monsters rely on oil-filled shocks, tuned springs, and carefully angled control arms to keep tires in contact with uneven ground. In the game, you don’t bend metal and rubber; you sculpt geometry and assign the impression of resilience. Think of suspension as the space you give the wheels to move relative to the chassis. A solid front-to-back clearance can be achieved by elevating the chassis slightly and using staggered block placement so the wheels have room to respond to bumps without binding. The mental image you carry should be of a system that can soak up a jump, then land squarely, with the wheels still aligned to the ground. If you want to push one step further toward realism, you can mirror the idea of adjustable shocks by using blocks that can be repositioned or removed to change the ride height in response to different terrains, then restore them for a different run.
Drivetrain and wheels anchor the vehicle’s performance. Real monster trucks rely on powerful motors, robust gearings, and tires with aggressive tread for traction across mud, sand, rocks, and gravel. In Mini World, you fictionalize this through the wheel scale, the balance of mass, and the way you enable movement. At the base, four oversized wheels provide the visual anchor and the ground contact needed to convey stability. Large, chunky wheels—whether built from stacked blocks that emulate a thick hub or from sphere-like textures that suggest round, heavy mass—are key. The alignment matters; uneven spacing or misalignment will look odd and may limit how the truck sits and moves on the track. When it comes to propulsion in a game context, you can pair the chassis with a simple control system that imitates a drivetrain. For many builders, that means wiring a basic motorized or remote-controlled feeling through in-game mechanisms that simulate throttle response and steering. The result is a truck that not only looks the part but responds with a sense of purpose when you tilt the stick or press the trigger.
The body and hood carry the monster truck’s personality. After you’ve established a strong chassis and capable suspension, the aesthetics become the stage for drama. A raised front section—or a hood with sharp angles—suggests a powerplant ready to unleash energy even before the first jump. A grille offers a focal point that communicates aggression without overwhelming the silhouette. To add flair, you can introduce glass blocks, tinted panels, or color accents that imply detail without interfering with structural clarity. This is the moment to add visual rhythm: the contrast between dark, rugged materials and brighter highlights creates a vehicle that reads as both tough and fast, a thing you’d see at the edge of a stadium as it revs up for a run.
Details, while optional, matter for that sense of realism. Lighting fixtures, small flags, or banners can turn a solid model into something that looks alive on a track. The glow of light blocks near the front can mimic headlights that cut through dust, while rear lighting hints at a working tail-end that might signal a controlled approach to a jump. If your world allows texture customization, flame decals or team insignia can transform a generic chassis into a character rather than a mere object. The trick here is restraint: a few well-chosen details carry more weight than a flood of decoration. The goal is to reinforce the sense of scale and purpose and to maintain a coherent vibe with the surrounding world.
As a practical matter, you also want to consider how your mini monster truck will be used. If your aim is to test performance on a simulated track, you want a setup that feels predictable and forgiving. If you prefer showmanship, then your emphasis can tilt toward drama and speed, with bolder silhouettes and brighter textures. In either case, the initial materials and design logic you apply will guide every subsequent choice. And because the point of the build is to balance form with function, you want to keep the frame light enough to maneuver while heavy enough to convey presence. In real-world terms, that balance translates into a chassis that doesn’t bend or twist under stress while still offering enough mass to keep the truck planted. In your Mini World project, that translates into ensuring the blocks forming the frame create a visually convincing core that anchors the wheels and the body, while leaving space for the suspension to “perform” during your runs.
One practical path is to imagine the build in layers. Start with a solid, low-profile base that acts as the core. Layer the chassis with stronger materials at the edges to suggest reinforcement without adding unnecessary bulk. Then add the wheel wells and the mounting points for the suspension under the frame. Place the four wheels in positions that imply symmetry and balance; uneven spacing will break the illusion of a disciplined machine. The body sits atop this structure, but you might push the front up a notch to hint at clearance for big tires during jumps. Finally, add the details—the lights, texture accents, and decals—that endow the model with a unique identity while still respecting its rugged character. The result is a mini monster truck that looks ready to hit a ramp and stay in control, even in a world that doesn’t always cooperate with physics.
If you’re curious about real-world references that align with this blend of durability and performance, the community around remote-controlled and scale models offers a wealth of practical perspective. They discuss material grades, the way suspension geometry affects handling, and the subtle ways light and texture communicate weight and capability. While you won’t replicate every nuance in a game, you can carry the same spirit forward: the idea that the truck is a tool for exploration, a platform for creativity, and a statement of design as you test it against the roughness of a track, a ramp, or a loop of obstacle courses.
For builders seeking a broader sense of how others push the aesthetics and mechanics of mini builds, the community blog serves as a map of ideas and experiments. It’s a place where players share screens, block choices, and the small adjustments that change a model’s behavior on a track. If you want a starting point, you can explore the community notes and project notes on the blog to see how fellow builders balance look and function, what materials they favor for different effects, and how they tackle stability with limited space. minitrucksocala blog.
The initial setup is where your craft begins to take shape in earnest. Imagine the chassis as a firm spine. You place the base rectangle, perhaps ten to twelve blocks long and four to five blocks wide, and you elevate it slightly using vertical supports to create the necessary clearance. This small lift is your first signal that the model will accommodate larger wheels without scraping the ground. Then you craft the four wheels at each corner, using stacked blocks or large rounded textures to imitate the thick, chunky tires that define the monster category. You take care to align them with the chassis so the truck reads as stable and symmetrical from every angle. This alignment matters not only for aesthetics but for how the model will sit as you test it in your track. A skewed wheel can produce a lop-sided look and an awkward tilt when the track’s surface tilts or when you attempt a jump.
Next comes the body and hood. A raised front section with sharp angles can evoke aggression without overwhelming the silhouette. The grille is a focal point, constructed from regular blocks that form a grid-like pattern, with color contrasts that draw the eye toward the truck’s face. Glass blocks or tinted panels add a twitch of personality, suggesting windows or cockpit elements without blocking the truck’s bulk. When you’re ready to add details, position light blocks near the front and rear to simulate illumination on a racing machine. A couple of banners or flags can give the truck a sense of identity, as if it’s part of a team or a custom crew with a story on the paths it travels.
The alignment of the wheels, the height of the chassis, and the proportion between the body and the base all feed into how the model behaves on the track. In a game with physics that you can influence, you might enable a simple throttle and steering system, or you could pursue a redstone-inspired mechanism to simulate movement. If you want to push realism further, you can adopt a step-by-step calibration mindset: test the steering, test the throttle response, and check for any wobble in the chassis. Do the wheels stay square as you accelerate? Does the truck maintain a straight line on a flat surface, or does it drift when you hit a bump? These questions guide your refinements. Small adjustments—tightening a corner here, lowering a block there—can have outsized effects on stability and control. The aim is to deliver a vehicle that feels sturdy under load and responsive at speed, a creature of both mass and motion in a world that thrives on motion rather than stillness.
In practice, the initial setup is rarely a one-and-done moment. It’s an iterative conversation between form and function. You test, you tweak, you test again. If the truck wobbles on rough terrain, you might adjust the wheel spacing or the height of the suspension to dampen the movement. If the vehicle feels slow or unresponsive, you refine the control scheme and perhaps emphasize a lighter frame in the reenvisioned build. The cycle of refinement is part of what makes a mini monster truck project so engaging. You’re not just building a model; you’re training your own eye to notice the relationship between block choice, geometry, and the feel of the ride. This process, though simplified in the game, mirrors the real-world mindset that engineers bring to the design—and is exactly what turns a simple block arrangement into a believable machine.
The collaborative spirit of the hobby adds another layer of depth. You watch how others interpret the same challenge—how they choose materials to express strength, how they layout chassis supports for visibility and robustness, and how they stage the overall mass to communicate speed and power. Sharing your own approach invites feedback, which you then fold back into your design. The loop of design, test, critique, and refine is not merely a sequence of steps; it is a creative discipline that helps you see more clearly what works and why. By leaning into this process, you grow more confident in your ability to push the boundaries of what a tiny vehicle can represent on screen.
If you’re after more technical context or wish to broaden your understanding of how professionals think about materials and performance, you can consult a trusted set of resources that discuss materials selection, suspension behavior, and drivetrain efficiency. These sources provide real-world frameworks you can translate into your build language, even if you’re applying them to a digital model. For a broader technical perspective on material standards and performance testing, you may find value in industry-focused guides and articles, which help illuminate why certain choices matter when a vehicle is taxed by rough terrain and high-speed maneuvers. Finally, to connect with a broad audience of builders who share your fascination with mini machines, the community resources cited above can be an ongoing well of inspiration and practical technique.
External resource for deeper engineering context: https://www.rccaraction.com
In short, your mini monster truck begins with a clear sense of material reality, then rides through a thoughtful setup that respects both form and function. The materials you imagined become the frame, the suspension, and the tires; the setup becomes the choreography of movement and control; the final look, the details, and the decals become the personality that makes the truck memorable on any track. With attention to these layers, your tiny machine can not only look the part of a monster but feel capable of the kind of rugged performance that players and observers alike admire on the course.
Forging the Foundation: Crafting the Chassis and Giant Wheels for Your Mini Monster Truck
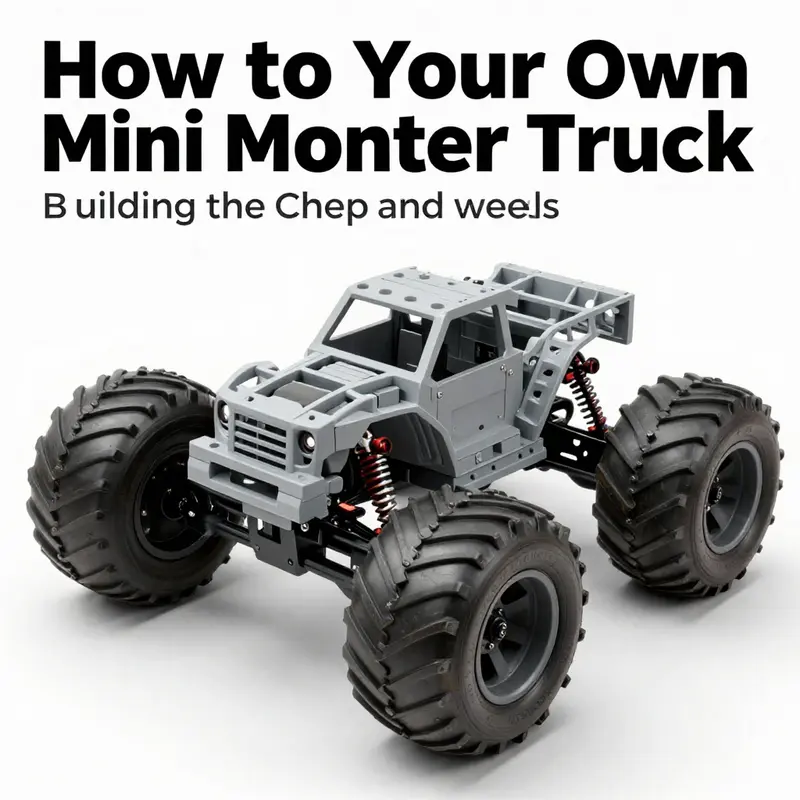
Forging the Foundation: Crafting the Chassis and Giant Wheels for Your Mini Monster Truck
Everything a mini monster truck does starts with what lies beneath: the chassis and the wheels. These two elements determine stability, suspension behavior, and the vehicle’s ability to absorb impacts during jumps or rough play. Treat this stage as both engineering and sculpture. Plan with purpose, build with strength, and finish with balance so your mini monster truck performs and looks the part.
Begin by choosing a donor vehicle or a conceptual base. In virtual or physical builds, a compact car or small truck frame offers a sensible starting point. It sets the proportions and provides mounting points. If you are working in a game environment, pick a block layout that mimics a real frame. Think in terms of length, width, and ground clearance. Consider wheel size early. Oversized wheels need extra clearance and strong mounting points. Decide these dimensions before committing to the chassis design.
Material selection comes next. Use strong, rigid materials for the chassis. In real-world builds, steel tubing and aluminum alloys are common for their strength-to-weight ratio. In a game or model setting, simulate that strength with dense or rugged-looking blocks. The goal is a frame that resists torsion when the truck lands or climbs. Reinforce stress points where the suspension and axles attach. These areas bear the highest loads during stunts.
A well-built chassis distributes forces evenly. Imagine the forces during a jump: the wheels compress, the suspension transfers load to the frame, and the chassis must not bend. Add crossmembers to limit flex. Use triangulation where possible. In practical terms, weld or bolt triangular gussets at corners and at suspension mounts. In block-based designs, add internal braces and thicker sections under the wheel wells. Precision here prevents misalignment down the line.
Alignment is critical. If mounts are misaligned by a few degrees, wheels will bind and handling will suffer. Measure twice and position mounts carefully. Use jigs or temporary fixtures while you weld or glue components. In virtual builds, use grid lines and symmetry tools. The axles should be parallel and the chassis should sit level when the suspension is at its neutral position. Proper alignment improves straight-line stability and reduces tire wear.
Consider using a pre-fabricated chassis kit if you need speed or consistency. Kits often include correctly spaced mounts, known-strength materials, and tested geometry. They save time and remove guesswork. However, kits limit customization. If you want a unique look or tailored performance, custom fabrication is the better path. Either approach can produce a strong foundation when executed with care.
Suspension design ties directly into chassis choices. Monster trucks rely on long-travel suspension to absorb big impacts. For mini builds, simulate this with shock absorbers proportioned to the scale. Choose a suspension type—solid axle, independent, or hybrid—based on your goals. Solid axles offer durability and predictable articulation. Independent setups provide better handling on uneven terrain. Regardless of type, ensure the chassis provides adequate travel and robust mounting surfaces. Include bump stops to prevent bottoming out.
Once the chassis and suspension geometry are decided, design the wheel mounting system. Hubs and axles must be engineered for high loads. Use reinforced hubs and thick axles. If building in a game, create hubs as layered, thick blocks. For physical models, pick bearings that handle radial and axial loads. Secure them with lock nuts and thread-locking compound. For oversized wheels, increase hub diameter and use multiple fasteners.
The wheels are the signature of a monster truck. Oversized, thick, and aggressive, they define the vehicle’s personality and capability. Choose tires with deep, blocky treads for traction. In a model or game, recreate that tread visually with stacked blocks or textured materials. Consider tire width and overall diameter carefully. Larger diameter increases ground clearance and rollover resistance, but it also raises the center of gravity. Balance is essential.
Rim selection impacts both strength and weight. Forged or cast rims work well in real builds due to strength and weight savings. For mini builds, emulate heavy-duty rims by using solid, well-supported structures. Thick spokes and a reinforced hub will reduce deformation under load. The rim-tire interface must be secure. If tires are glued or mechanically fastened, ensure the bond can handle sudden torque spikes during acceleration or a hard landing.
Wheel mounting must allow rotation without wobble. Balance each wheel to minimize vibration. Trim uneven mass and, if possible, counterbalance heavy spots. In real-world projects, static and dynamic balancing tools are used. In games, symmetry and uniform construction reduce imbalance. Proper balancing also reduces stress on the suspension and drivetrain.
Mounting geometry determines handling. Track width and wheelbase affect stability. Wider track width reduces rollover risk. Longer wheelbase improves straight-line stability. Test different configurations in your planning stage. If building physically, mock up the truck with adjustable mounting points. This lets you experiment with stance and alignment before final welding or gluing.
Clearances around the wheels are often overlooked. Ensure the wheel wells are large enough for full travel and articulation. Add fender edges that prevent debris from striking the chassis or suspension. In block-based environments, add internal padding or buffer blocks to simulate protective liners. Small clearances can cause catastrophic failures during a jump or when hitting obstacles.
Hubs, axles, and bearings should be easily serviceable. Design access panels or removable sections so you can repair damaged parts quickly. Monster truck stunts cause frequent wear and occasional breakage. A design that simplifies maintenance saves hours and preserves momentum in the build process.
Testing is iterative. Begin with low-speed trials to check for binding and wobble. Observe wheel alignment under load and watch for frame flex. Gradually increase speed and height of jumps. After each test, inspect mounting points and fasteners. Tighten, reinforce, or redesign any part showing stress. In virtual builds, use movement scripts or physics tools to simulate loads and watch for visual distortion.
Balance performance goals with aesthetics. Monster trucks are as much theater as engineering. Giant wheels and a bold stance command attention. Use wheel spacing and chassis proportion to convey power. But never sacrifice structural integrity for looks. A dramatic hood or exaggerated fenders must still allow adequate access and not interfere with suspension travel.
If you want visual references or step-by-step fabrication insights, this video series offers practical, hands-on guidance and real-world assembly tips: https://www.youtube.com/watch?v=examplepintochassis_part1. It demonstrates chassis layout, reinforcement techniques, and wheel installation in close detail.
Finally, tap into community resources as you refine your build. A mini truck community blog contains project logs, tips, and parts references that can inspire design choices and troubleshooting steps. For curated community builds and ideas you can adapt, see the mini truck community blog. By combining careful planning, strong materials, and iterative testing, your chassis and wheels will form a reliable and dramatic foundation for the rest of your mini monster truck.
Carving the Frame and Fashioning the Beast: A Deep Dive into the Body and Details of a Mini Monster Truck
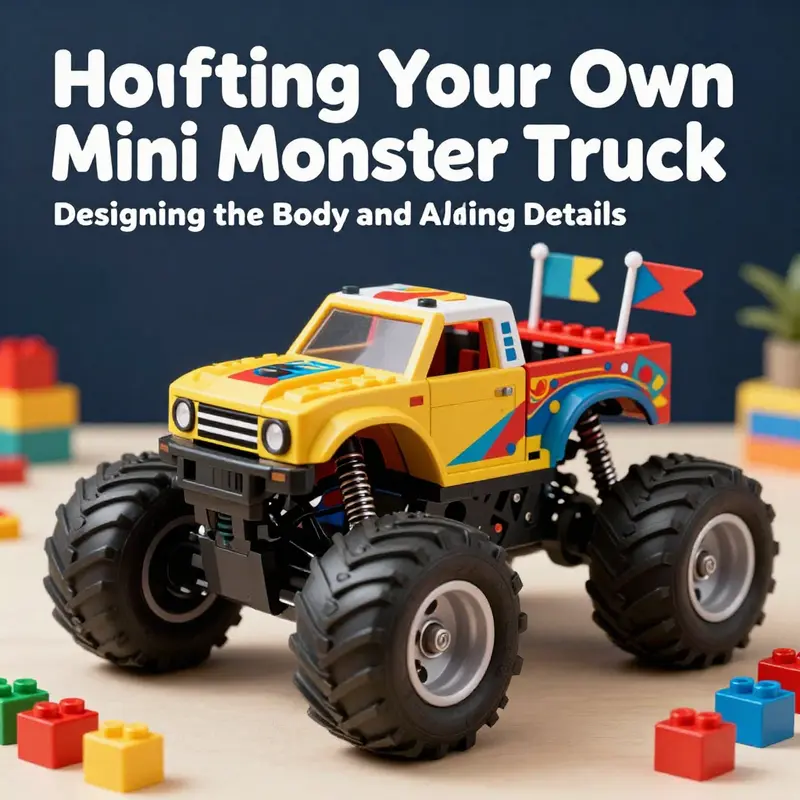
Designing the body of a mini monster truck sits at the crossroads of durability, scale, and personality. The body isn’t merely a shell that covers the chassis; it is the core that defines how the vehicle will perform on rough ground, how it absorbs impact from jumps, and how it reads on the track from a distance. In this chapter, the aim is to braid practical engineering with bold visual storytelling, so the model not only endures the punishment of a rough course but also communicates its intention with every silhouette, line, and lighting cue. The body becomes the stage and the driver’s seat in miniature reality, a place where every choice sends a message about strength, control, and style.
Design begins with a clear set of goals. You want a silhouette that instantly reads as a monster truck—heavy, oversized, and ready for action—while keeping the model within a manageable scale. Real-world inspiration helps here, not to copy an exact replica but to capture the essence of a vehicle built to lift its front end, swallow terrain, and carry the weight of its own audacity. Think of an iconic, oversized competition rig rather than a showroom sports car. Use this as a guide to balance mass distribution with maneuverability. The key is to translate the feeling of power into a proportion that remains playable in your chosen medium. That means not just widening the tires and raising the ride height, but shaping the panels to suggest stiffness and resilience even before any functional considerations.
From a design perspective, the body must be durable enough to support the performance you envision. In the real world, builders often push materials to their limits. They specify hard, rigid skins and reinforce critical zones with braces so that a crash doesn’t translate into a cascade of bent parts. For a mini model, those same ideas translate into deliberate material choices and thoughtful joinery. If your project exists in a sandbox that simulates real physics, you want a frame that can resist flexing under the load of large wheels and high ground clearance. If you’re working within a game that uses modular blocks, the effect is achieved by selecting sturdy base materials and reinforcing key edges with thicker or differently colored blocks to visually imply increased strength. Either way, the message must read as “built to last” when the truck returns to the track after a hard landing.
In the material selection phase, the goal is to combine realism with practicality. In a serious scale model, aerospace-grade aluminum or carbon fiber composites would be your gold standard for their strength-to-weight ratio. They allow you to keep the vehicle light enough to feel agile and responsive while maintaining structural rigidity. Translating that into a game or a DIY build means choosing blocks or plates that convey the same idea: a shell that looks tough but is achievable without sacrificing playability. In practice, you might lean on a combination of dense, heavy-looking blocks for the main panels and lighter, thinner components for accent parts. The result should give the illusion of a strong, intentionally engineered canopy and body, without overloading the design with fragile-looking elements that could hinder handling or aesthetics.
Reinforcement is the quiet conductor of the entire build. If you want a chassis that remains stable during high-speed turns and aggressive landings, you reinforce the body’s core with center braces and a slightly wider track. In a physical model, this translates into extra internal bracing that keeps the frame rigid. In a virtual or block-based build, you mimic this by ensuring the main spine is solid and the body sides are anchored to the chassis with visible, sturdy connections. These choices matter because, even at a miniature scale, a strong frame reduces wobble and preserves alignment as the wheels traverse uneven terrain. When you look at the finished model, you should be able to see evidence of deliberate engineering—the lines of the panels align, the edges meet at right angles where needed, and the overall shape looks like it could survive a rugged run across a dirt track.
The body’s front end—its hood and grille area—plays a crucial role in shaping the truck’s aggressive personality. Raise the front, angle the hood, and sculpt sharp lines that hint at the vehicle’s capability to surge forward with purpose. In real competition machines, the hood styling isn’t just about aesthetics; it helps with aerodynamics, heat management, and an intimidating appearance. For a mini build, you can achieve a similar effect with geometric angles and contrasting materials that emphasize the forward momentum. Add a front grille that communicates strength through a tight grid or a bold, blocked motif. If you’re using colored blocks or textures, consider a high-contrast scheme that makes the grille pop from a distance, reinforcing the truck’s ready-for-action identity.
Lighting and visibility are more than decorative touches; they are cues that communicate the truck’s role on the course. In a real-world setting, headlights and auxiliary lights not only aid vision but also serve as strategic signals for drivers and crews. In a miniature or simulated environment, light elements can dramatize the vehicle’s stance and help it stand out against a busy backdrop. Small glow accents near the front and rear can simulate LED lighting, while well-placed glass or translucent blocks can mimic windows and windscreens. The goal is to create a cohesive reading of the truck’s silhouette in motion—light catching the edges, illuminating the grille, and drawing the eye along the length of the chassis as if you were watching the truck speed toward a jump. These choices matter when you want your build to feel alive, not static.
Details matter because the eye reads complexity as quality. A good monster-truck body is a sum of many small decisions. Start with the visual language: bold color blocks, racing stripes, sponsor decals, and a few sharp accents that break up the mass. In the real design world, fans recognize the look immediately; in a mini build, the same recognition comes from consistent texture work and thoughtful texture placement. Use contrasting textures to suggest different materials while maintaining a unified color palette. For example, a glossy hood paired with a matte side panel can imply the presence of heat-dissipating metal and rugged outer skin. In a digital or block-based medium, you can leverage the game’s texture options to imply metallic sheen, weathering, and grip-ready surfaces along rock-scarred panels. The effect is not merely decoration; it communicates how the truck would feel to operate under stress—heavy, deliberate, and built to take punishment.
The concept of no hidden welds and straightforward construction guides is particularly important when you want to maintain inspectability and serviceability. In a real-world context, clean welds and accessible joints are essential for maintenance. For a mini model, the analogue is clean seams and visible, logical attachment points. This makes it easier to check alignment after a rough run and to replace a damaged panel without disassembling half the truck. It also helps someone evaluating the build to understand where the major structural lines are and how the assembly fits together. While you may not literally weld components in a digital or toy environment, you can emulate this clarity by choosing joint locations that feel intuitive and by avoiding overly complex, hidden connections. The result is a build that invites inspection and experimentation rather than mystery and frustration.
As you shape the body, you should also think ahead to the suspension and the chassis that will carry this shell. A robust body thrives when paired with a matching chassis. The body’s strength and rigidity can balance with a well-designed suspension to deliver a predictable, controllable ride. If you’re translating this into a game build, plan your joints, braces, and mounts so that the body appears securely attached to the underlying framework. If you’re constructing in real life, design around a chassis that can absorb the same kind of shocks and keep the vehicle upright when it lands from a jump. The result is a cohesive system where the body communicates purpose and resilience, and the chassis actively supports that message with stability and control.
When it comes to adding those final touches, the devil is in the details that do not slow you down but accelerate the impression of capability. Visual flourishes such as oversized tires, a rugged-looking front bumper, and accent lighting should be balanced against maintenance accessibility. You want impression without sacrificing practicality. In practice, you might install large, chunky fenders or wheel arches that reinforce the sense of mass while leaving enough clearance for the tires to rotate freely. In the digital realm, this can be achieved by choosing block placements that clearly define the wheel wells and by painting or texturing those areas to read as robust, protective enclosures. It’s in the interplay of mass and margin—the thick silhouette with purposeful gaps—that the monster truck’s character reveals itself.
To help tie all these threads together, it can be useful to consider a quick design-checklist as you prototype. Confirm that the chassis base sees a long, stable footprint with the wheels aligned precisely at the corners. Check the front hood’s angle and grille’s geometry for aggressive but balanced reading. Review the color palette for contrast that pops from afar yet remains cohesive up close. Verify that the textures imply different materials where appropriate—metal for panels, rubber-like texture for tires, and transparent or semi-transparent blocks for lights and windows. Finally, ensure the build remains accessible for any future tweaks: stiff enough to hold its shape, but modular enough to swap a panel, adjust a brace, or extend a bumper without disassembling half the vehicle. The thoughtfulness you apply at this stage pays dividends when the truck actually hits the track.
In addition to the hands-on craft, remember that knowledge is a spectrum. There is a broader community of builders and designers who share approaches, challenges, and solutions. If you’re curious about how others balance the competing demands of aesthetics and performance, consider exploring more general discussions about monster-truck design and model-building. For a focused look at comparing different modeling approaches and features, you can explore discussions that compare monster-truck models and features. This kind of comparative view helps you calibrate your own build against a wider standard, giving you a sense of what is possible and what is practical within your chosen medium. comparing monster-truck models specs and features.
As you advance toward completion, the final act is to ensure the body and its details work harmoniously with the rest of the build. A well-designed body should read as a single, purposeful entity, not a pile of parts. It should invite a second look, a closer inspection of the lines, the textures, and the way the light plays across the panels. It should also invite play—after all, the purpose of a mini monster truck is not only to look impressive but to perform within the constraints of your world, whether that world is a sandbox game, a classroom project, or a personal workshop build. With a sturdy chassis, a body that communicates strength, and a set of details that tell a story of rugged capability, your mini monster truck will feel like it is ready to conquer the course, no matter how small the scale.
Maintenance and careful inspection are the invisible gears that keep your model reliable over time. In the real-world scenario, engineers stress that there should be no hidden welds in critical areas, both for inspection ease and to prevent undetected failures. Translated to a model or game-based project, you can apply the same principle by choosing join points that are easy to access and replace. If you are working with a physical build, regular checks of joints and braces, as well as the suspension connections, will prolong the model’s life. For a digital or block-based build, periodic updates—retexturing, re-sculpting, or reattaching elements after stress tests—are the equivalents of ongoing maintenance. The aim is a build that endures, not one that collapses under a minor push or a simulated rough ride.
The journey to a standout mini monster truck body is not a single leap but a sequence of careful, deliberate moves. Start with a bold silhouette shaped to convey mass and purpose. Add a durable, believable shell with thoughtful material choices, reinforced joints, and a front that shouts aggression without sacrificing balance. Layer in lighting, textures, and decals that tell a story, and then test the whole assembly against the terrain you’ve imagined. Throughout, keep the design readable from a distance while rewarding closer inspection with subtle clues about construction and intent. When you combine imagination with disciplined craft, the body becomes more than a shell—it becomes a character in its own right, ready to take on the world, one rugged mile at a time.
Finally, remember that every successful build has a companion guide in the form of plans or community wisdom. For those seeking a more structured, plan-driven approach, there are digital resources that outline chassis design, suspension setup, and body detailing in step-by-step detail. These guides can provide a scaffold for your own design choices while still leaving room for personal adaptation and creative flair. The combination of thoughtful design, careful material selection, and crisp detailing creates a mini monster truck that not only looks the part but behaves as a convincing, entertaining model on any terrain you choose to explore. For further reading and more technical breadth, the field guide and community resources are a valuable complement to the hands-on practice described here. As you integrate these ideas, you’ll find your own workflow emerging—one that embraces both the art of scale and the science of stability, yielding a mini monster truck that stands tall, both literally and figuratively, on every surface you dare to challenge.
External resource: The Mini Monster Truck Plans (Digital Download) offers a detailed, step-by-step approach to chassis design, suspension setup, and body detailing for enthusiasts looking to deepen their craft. https://www.minimontytruckplans.com/
Final Tuning and Motion Systems: Making Your Mini Monster Truck Drive and Dominate
Fine-tuning the chassis and integrating reliable movement systems transforms a static build into a functioning mini monster truck. This stage is where structure meets motion: you secure the frame, tune suspension and wheel geometry, choose motors and power delivery, and then test repeatedly until handling, durability, and responsiveness match your goals. Approach this phase methodically. Treat each adjustment as a small experiment that affects traction, balance, and efficiency. Keep parts accessible so you can swap components quickly during testing.
Begin with the chassis and drivetrain. The chassis must be rigid where needed and flexible where suspension travel is required. Reinforce key junctions with extra plates or beams, and double-up the blocks around motor mounts and gearboxes. A secure drivetrain starts with correct placement: center motors longitudinally to balance torque vectors. If your in-game model uses a simulated drivetrain, mimic this balance by aligning power sources evenly along the centerline. For physical mini models, fasten motors with vibration-damping mounts to protect wiring and maintain alignment under load.
Suspension geometry is the next priority. Even in simplified game builds, the principles still apply: suspension points should create predictable arcs for wheel travel and keep the wheels roughly perpendicular to the terrain. Fine-tune link lengths and pivot positions so that weight shifts forward under braking and rearward under acceleration without causing extreme camber changes. If you can, simulate a four-link setup to achieve stable axle control. Small changes to link angle alter roll center and anti-squat characteristics, so adjust in small increments and observe handling differences.
Wheel alignment determines straight-line tracking and steering neutrality. Ensure each wheel sits square to the body and that opposing wheels are parallel. In a physical mini truck, toe and camber adjustments make a large difference: set slight toe-in for high-speed stability and watch for uneven tire wear. For virtual builds, use precise block placement to keep wheels aligned and symmetrical. Check tailshaft geometry—if your build includes a driveshaft equivalent, ensure it runs as straight as possible with correct pivot angles. Misaligned tailshafts bind and sap power. If you notice jerky rotation or binding in corners, loosen coupling points and realign the shaft until rotation is smooth across the full range of motion.
Motor selection must match the tasks you expect your truck to perform. High-torque brushless motors are the best choice where acceleration and hill-climbing matter. Gear the motor appropriately: use a lower gear ratio for torque and a higher ratio for speed, depending on your priorities. Match the motor’s kV or speed rating to the voltage you plan to run so it doesn’t overheat or stall under load. Pair the motor with a capable electronic speed controller (ESC) that supports the current draw and offers smooth throttle curves to prevent sudden jerks. For any ESC, set braking settings conservatively until you have tested stopping distances and handling.
Battery choice dictates runtime and peak power. Lithium Polymer (LiPo) batteries provide high discharge rates and compact weight, but they require proper voltage management and charging discipline. Choose a battery with adequate capacity and a discharge rating that comfortably exceeds peak demand. Keep the battery mounted low and centered to lower the center of gravity. For in-game models, mirror this by keeping heavy decorative elements balanced around the chassis centerline to avoid unrealistic tipping.
A reliable differential system is crucial for predictable turning. Locked differentials can provide traction in straight lines but cause understeer and drivetrain stress in turns. Open differentials allow slipping, which helps cornering but can lose traction on uneven terrain. Consider a limited-slip or geared differential for a compromise—this maintains traction while allowing differences in wheel speed when turning. In a virtual build, simulate differential behavior with cleverly placed couplings or scripted movement so power distribution mimics a real-world system.
Material choices affect longevity and crash resistance. Use reinforced polycarbonate or aluminum equivalents where impact absorption and flex resistance are necessary. In the game, select sturdy block types for load-bearing areas and decorative blocks for non-structural elements. Reinforce the wheel wells and lower chassis edges to handle jumps or collisions. Keep repairability in mind: design so damaged sections can be removed and replaced without rebuilding the entire truck.
Once the mechanical and electrical systems are in place, begin a structured testing routine across multiple surfaces. Start slow on flat, predictable ground to confirm straight-line performance and steering response. Progress to uneven surfaces—gravel, grass, and dirt—to evaluate suspension and torque delivery. For each test, record observations: understeer, oversteer, wheel slip, motor temperature, and battery voltage sag. Adjust spring rates, shock damping, and weight distribution iteratively. If the truck nosedives under braking, shift weight rearward or soften the front springs. If it squats under acceleration, stiffen the rear or redistribute mass forward.
Iterative adjustments should be small and deliberate. Change one variable at a time to isolate its effect. For example, adjust shock damping without altering spring rates first; observe the difference, then change spring rates if necessary. Keep a simple log of settings and results so you can revert to previous configurations that performed well. Testing and tuning are cyclical: adjust, test, log, and repeat until the handling characteristics meet your target.
Performance verification follows successful tuning. Verify acceleration, braking, cornering, and climbing ability. Run timed laps or controlled courses to ensure the truck performs consistently. Look for signs of component stress: stripped gears, loose mounts, overheating motors, or frayed wiring. Address these immediately to prevent catastrophic failure during more aggressive trials.
Small cosmetic and functional touches can yield big gains. Install lighting for night runs, use low-profile bumpers to protect bodywork, and add quick-release body clips for fast repairs. If your system supports automated movement, refine the control scripts or ESC throttle curves for smoother starts and stops. On programmable platforms, implement safety cutoffs for low battery voltage and overcurrent conditions.
Throughout tuning, prioritize balance between performance and durability. Aggressive setups may yield faster lap times but often at the cost of part longevity. If you plan to run the truck frequently or in rough conditions, favor slightly conservative settings that reduce stress on motors and the chassis. Conversely, if the goal is short bursts of speed for competition, optimize for peak performance and have spare parts ready.
If you want inspiration or reference builds that handle similar challenges, consult an in-depth model review that covers drivetrain layouts and chassis performance. One useful example discussion can be found in the FMS 1-10 FCX10 review, which examines scale drivetrain behavior and tuning tricks that translate well to mini monster truck projects: https://minitrucksocala.com/fms-1-10-fcx10-range-rover-review/.
For a practical, stepwise guide on final assembly and movement integration that complements this tuning approach, the detailed instructions at the external Instructables page provide additional diagrams and testing tips that may be helpful: https://www.instructables.com/How-to-Build-a-Mini-Monster-Truck/.
Tuning a mini monster truck is an iterative, hands-on process. Careful chassis reinforcement, correct suspension geometry, precise wheel alignment, matched motor and ESC choices, sensible battery selection, and a balanced differential all combine to produce a truck that not only looks imposing but performs reliably across varied terrain. Test methodically, adjust deliberately, and keep durability in mind. With patience, your mini monster truck will go from a static creation to a capable machine that dominates courses and survives the crashes that come with pushing its limits.
Final thoughts
Congratulations! You’ve taken the plunge into building your very own mini monster truck. By following these steps—starting from gathering materials and constructing the chassis to applying your unique designs and finalizing movement—you’ve not only crafted a multi-functional model but also embarked on a creative journey. Remember, building isn’t just about the end product; it’s about the joy of creation and the thrill of riding your unique truck. Whether it’s for events, shows, or just for fun, your mini monster truck is sure to impress!