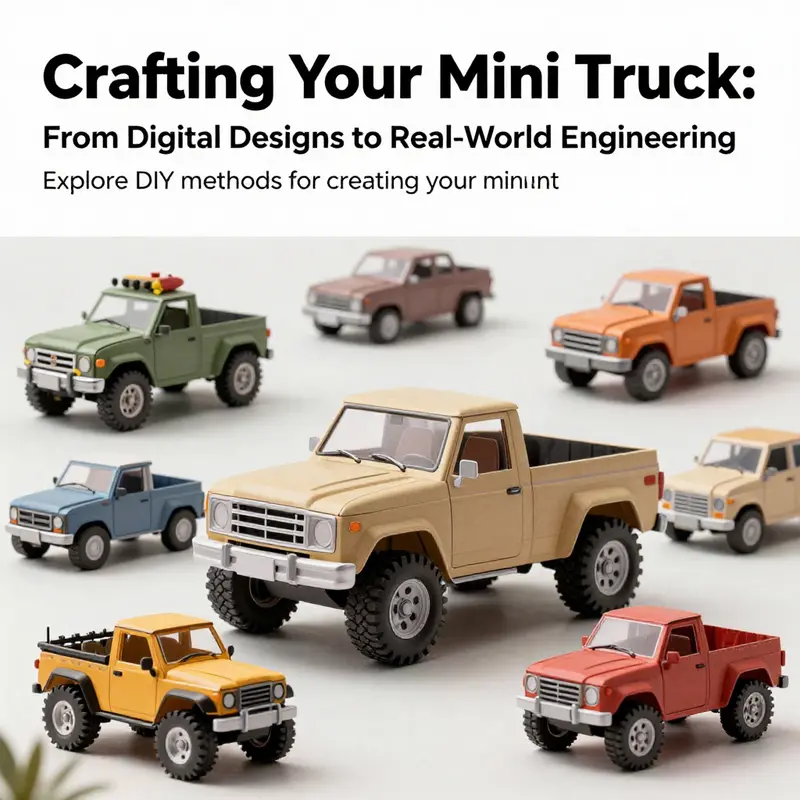
In the world of mini trucks, creativity knows no bounds. Whether you are a local business owner looking for unique transport solutions, a residential property owner wanting a reliable vehicle for tasks, or a mini truck enthusiast eager to dive into the DIY culture, this article offers something special for everyone. In the chapters ahead, we will guide you through building mini trucks using a variety of approaches. Starting with a fun, step-by-step guide on creating a mini truck in the game “Mini World,” you will discover how to draw from your imagination to produce digital designs. Next, we’ll shift gears to embrace the physical realm with a paper crafting model that encourages creativity and hands-on fun. Lastly, we’ll explore an innovative approach by engineering a mini truck from recycled materials, presenting a sustainable way to bring your creations to life. By the end of this article, you’ll have a well-rounded set of skills and ideas to start your mini truck journey—all while enhancing your creativity and problem-solving skills.
Micro Haulers, Big Imagination: A Cohesive Journey to Building Mini Trucks in a Sandbox World
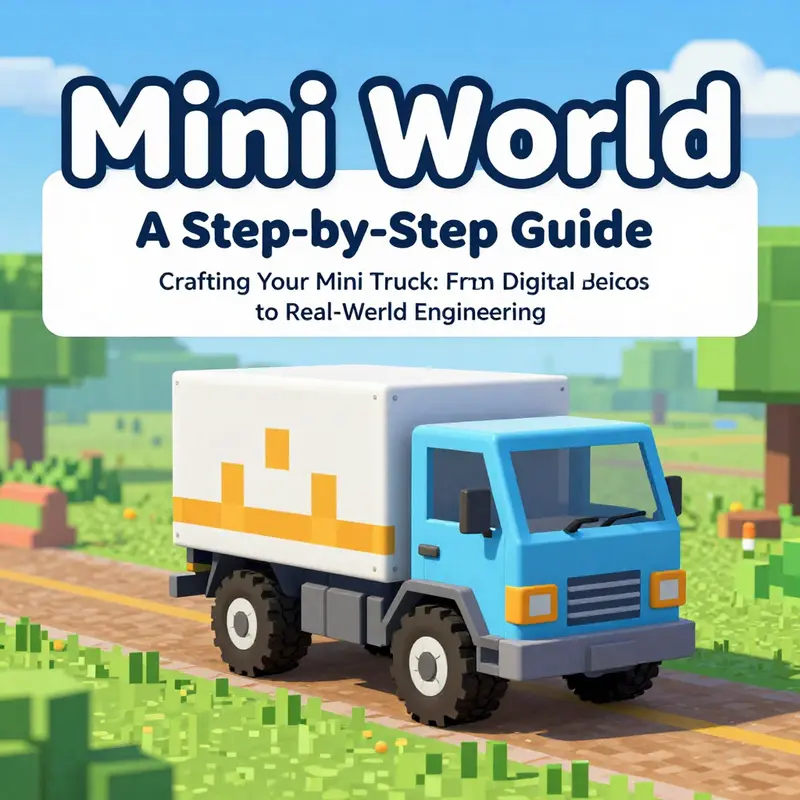
In a world built from blocks and possibilities, a tiny truck can carry more than just its wheels; it can carry a builder’s curiosity, a set of practical constraints, and a steady rhythm of experimentation. The journey from an idea to a rolling micro-hauler is less a race to assemble components and more a narrative of balancing mechanics with creativity. When you start this venture, you step into a space where a workshop in a game becomes a studio for problem solving, where geometry, weight, and balance all whisper their rules, and where a 20-by-20-by-20 construction cube becomes the stage for your first design statement. The beauty of such a project lies in its accessibility: you can begin with a handful of basic parts, a few blocks, and a clear sense of direction, and you can evolve the model as your skill grows. It is, in essence, a slow, deliberate exercise in translating imagination into a tangible, moving object that you can drive, customize, and share with others.
The core lure of this kind of mini vehicle is its teachable simplicity. The essential components—a steering mechanism, propulsion, a seat for the operator, and a power source—are the vocabulary you will use to tell a story about transport on a miniature scale. In the guiding framework of the sandbox, the Mechanical Workshop serves as both the forge and the blueprint drawer. It is the place where your plans begin to breathe: you set down the front and back anchors, align with an invisible compass that points the truck’s forward direction, and name the vessel that will soon move across digital terrain. The arrow that appears when the workshop is placed is not just a graphic cue; it is a directional covenant. It tells you where the head of the vehicle will point, how the chassis will negotiate space, and how your own body’s sense of orientation will translate into the model’s real-world counterpart—an intuitive reminder that design must always begin with orientation before substance.
Step into the construction area with an eye for balance and a mind tuned to the relationship between form and function. The chassis is the skeleton, and in this compact world, the first real decision is the placement of the wheelset. Position the Steering Wheel at the front end, where the arrow points, so that turning feels natural, responsive, and predictable. The Power Wheel belongs at the tail, where propulsion can be anchored without upsetting the vehicle’s center of gravity. You may opt for additional wheels to achieve steadiness, but the number should be chosen with care. A chassis that looks solid but walks on its toes will handle poorly on a shelf, in a world, or on a playful circuit. The rule of thumb here is to start small—two or three wheels for a lean, nimble ride—and increase only if your design demands it for stability or load distribution. The number of wheels is not a vanity metric; it is a structural question about how weight will be carried and how the vehicle will negotiate curves and uneven terrain.
With the framework in place, the body of the vehicle begins to take shape around the wheel base. The blocks you choose—hard sand, rock bricks, wood, or any other robust blocks—are the medium through which your concept becomes visible. The body should not merely enclose the wheels; it should frame them, provide protection, and convey the character of your truck. A boxy cab communicates efficiency and utility, a rounded cabin suggests speed, and a hybrid form can imply versatility. The cabin’s interior is where the driver logic begins to speak. Place the Driver’s Seat in the front position, a small throne for the operator who will guide the journey. For larger ventures within the same design language, you may imagine a second seating row for passengers, but within the constraints of the project you are following, there is space for up to 39 passengers, while the design keeps a single driver seat. This rule—one operator and a potential for a limited passenger capacity—reflects a basic principle of mini-vehicle design: the user interface should be clear, and control access should be straightforward.
The heart of the ride lies in the engine, the source of energy that makes travel possible. The Infinite Engine offers a compelling promise: power without the need for constant refueling, a conceptual ideal that resonates with the micro world’s appetite for efficiency and continuity. In environments where fuel logistics can complicate the build, the choice of engine matters not only for performance but for the rhythm of play. If you opt for a Fuel Engine instead, you acknowledge a more experiential constraint—gas stations and fuel management re-enter the narrative as a scheduling device rather than a perpetual motion. Either choice should sit snugly within the chassis, just behind the driver’s seat, so that your line of sight and reach remain unobstructed. When the engine is placed, the visual balance of the truck often shifts, reminding you that propulsion and steering are a shared responsibility—the vehicle must be easy to steer and steady to push forward, not a top-heavy sculpture that looks dramatic but behaves poorly when the world invites touch and motion.
The integration phase of the build is where many builders discover the subtle art of balance. Everything must fit within the 20-by-20-by-20 footprint that the workshop defines, with the front direction maintained by the arrow. The vehicle should look like it could plausibly move, even if the world is a playful grid with no real gravity. A successful mini truck reads as a story in miniature: the outward form mirrors a real truck’s silhouette, while the inside remains clean enough to host a driver’s seat, a potential passenger compartment, and a logical arrangement of mechanical components. If you choose to add more wheels for stability, place them with symmetry and even spacing. If you add passengers, balance the interior to avoid asymmetrical weight that could tilt the model or complicate its imagined travel dynamics. The design need not be over-engineered; often, restraint is the engine of elegance. A compact, well-proportioned model is more satisfying to operate and more forgiving to drive around the map than a bulky, ungainly shape that commandeers too much space without delivering proportionate motion.
As you approach the culmination of the build, you return to the workshop to give your creation a name and a description. The act of naming is not merely cosmetic; it is a final assertion of intent. By entering a name and a few descriptive lines, you codify what your micro-hauler stands for—this is the vehicle you intend to drive in your world, the kind of jobs it will perform, and the character it carries into the terrain. When you press the Generate button, your crafted mini truck materializes, emerging in front of you as a ready-to-operate model. The moment of generation is a small ceremony: a validation that your decisions about wheel placement, engine placement, cabin configuration, and body shape have coalesced into a cohesive whole. It is also a doorway to play: you step up to the vehicle, press the action key to enter the driver’s seat, and discover how your choices translate into the feel of steering, acceleration, and momentum.
Driving a self-made micro-truck is an exercise in listening as much as in control. The controls you used while constructing—the turning wheel, the propulsion wheel, the interface that governs engine power—suddenly take on real meaning. You will notice how leverage, weight distribution, and wheel base influence your turning radius, your cruising comfort, and your ability to navigate corners without tilting or stalling. The experience is not just about getting from point A to point B; it is about understanding how small changes to the chassis alter the vehicle’s behavior. For younger builders or those testing ideas with a limited toolkit, this is an invitation to iterate. If your truck travels a bit unsteadily, you can adjust the wheel-to-body ratio, tighten the chassis, or trim excess blocks that seem to overbalance the vehicle. If it feels sluggish, you can revisit the engine’s position or re-check the weight distribution around the driver seat. The iterative loop—design, test, adjust, test again—becomes a miniature laboratory for systems thinking. In a sandbox world, this is one of the most valuable gifts of a micro-vehicle project: it teaches you to value feedback, to accept that a design is never perfect on the first try, and to pursue incremental improvement with patience.
What emerges from this process is more than a ride; it is a compact instructional module disguised as play. The act of building teaches spatial reasoning, planning, and project sequencing. It teaches you to forecast how a broad design decision—like adding a second row of seats or increasing the number of wheels—will ripple through balance, aesthetics, and functional reliability. It teaches a sense of scale: what seems feasible on the screen, what looks elegant in three dimensions, and what feels intuitive to operate with a simple set of inputs. The educational potential of such a project extends beyond mechanical fluency. It invites dialogue about constraints and possibilities, about how a small machine can be engineered to perform big tasks, and about how play becomes a testing ground for problem-solving habits that transfer to more complex projects in real life.
In this sense, the journey from concept to vehicle becomes a continuous loop that you can return to again and again. Once you have a basic experience with a single truck, you can envision variations—short-bed pickups, compact cabs with trailers, or even multi-wheel platforms designed for specific tasks within your virtual environment. Each variation demands a re-engagement with the core principles: define the forward direction, establish a stable wheel arrangement, design a body that matches the mission, select an engine that fits the anticipated use, and verify that the final assembly communicates a coherent purpose to anyone who might drive it. The practice reinforces mindful design, turning a pastime into a disciplined, creative pursuit rather than a mere assembly exercise.
For readers who crave a thread to explore beyond the workshop, there is a natural impulse to look for references and communities where these ideas are discussed, celebrated, or repurposed. A visit to the Minitrucks blog offers a broader canvas of stories, builds, and shared insights that can illuminate your own path. There you can find a tapestry of builds, configurations, and experiences that resonate with the curiosity that fuels this kind of work. Exploring such a space can inspire new shapes, color schemes, or ergonomic tweaks that enrich future projects. It is not a guarantee of better performance, but it is a means to connect with a community that tests, documents, and reflects on their miniature vehicles just as you do. In a world where every block can be rearranged, the richest gains come from dialogue and collaboration, as much as from solitary experimentation. For those who wish to dip into a centralized hub of ideas and examples, the following link offers a starting point: Minitrucks blog.
The narrative of building a mini truck in a sandbox world is also a story about time, patience, and the delicate tension between imagination and reproducible technique. It is a reminder that the simplest projects can yield the deepest satisfaction when they unfold with clarity and purpose. Your micro-hauler is not just a model; it is a compact vessel of your design choices, a physical manifestation of your understanding of basic mechanics, and a playful invitation to imagine how transportation could look on a much smaller stage. In the broader arc of making things by hand or by game, this kind of project forms a connective tissue between craft and play, between the tactile habit of building and the responsive energy of driving. It demonstrates that a strong idea, paired with disciplined execution and a willingness to test and refine, can produce something that feels both real and enchanting, regardless of scale.
For those seeking a wider frame of reference about the structural foundations that underpin any wheeled machine, a general resource on chassis design and vehicle fundamentals can be enlightening. While the mini world operates under its own rules, the core concepts—how weight, balance, wheelbase, and engine placement interact—are universal. A quick look at the broader subject can help you translate your micro-builds into more ambitious projects later, should you wish to scale up your ambitions or adapt the principles to different kinds of vehicles. This broader reading offers a spatial intuition that complements the step-by-step practice you engage in when you craft your mini truck. To broaden your understanding beyond the sandbox, you can consult accessible overviews such as: https://en.wikipedia.org/wiki/Vehicle_chassis.
In the end, the journey of making a mini truck is about more than achieving a rolling model. It is about building confidence in your capacity to envision, plan, and execute. It is about learning to use a simple workshop tool, not just to assemble a vehicle, but to cultivate a mindset that values structure, testability, and iterative improvement. It is about recognizing that a small object, when conceived with care, can invite large ideas into the room—the idea that play can be a domain of serious inquiry, and that the quiet act of placing a steering wheel at the front of an arrow can become a doorway to understanding dynamics, design, and the craft of making. The micro-hauler you bring into the world is a companion in exploration, a reminder that the scale of our ambitions does not limit the scale of our creativity. The next time you set out to design, drive, or modify a tiny vehicle, remember the path you walked this time: plan with clarity, build with balance, test with curiosity, and share the results so others can learn from your journey as well.
From Cardboard to Cruising: Crafting a Realistic Mini Truck Paper Model for Hands-on Creativity
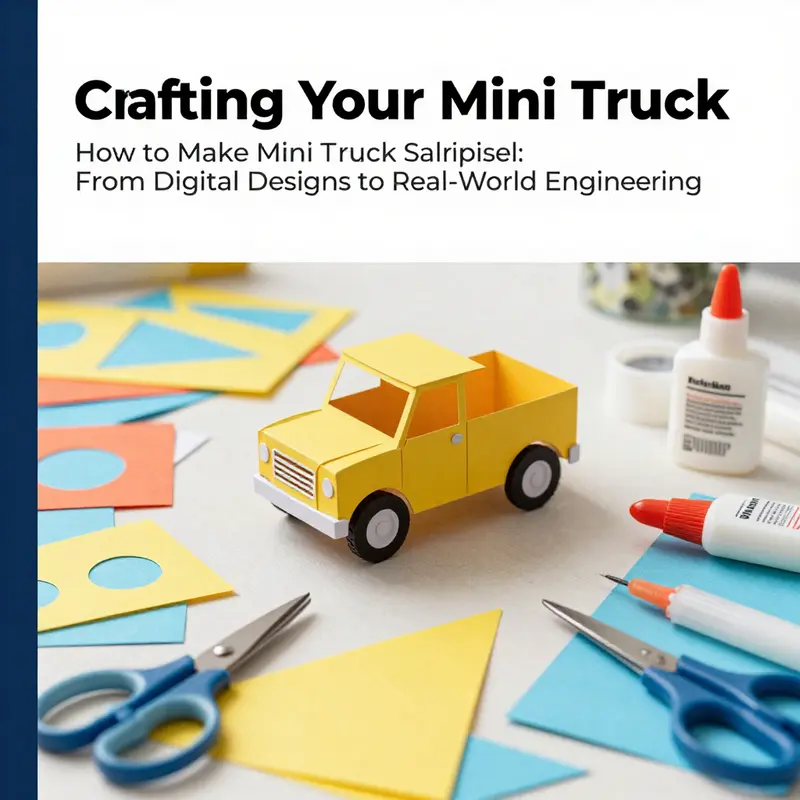
A small sheet of cardboard inverts the ordinary and becomes a doorway to a miniature world where engineering, art, and patience collide. This chapter isn’t about chasing a perfect finished toy but about the quiet economy of materials and the generous rewards of making something with your own hands. It invites you to treat a simple project as a conversation between design intention and tactile skill. When you set out to build a paper craft mini truck, you begin a process that blends planning with improvisation, accuracy with imagination, and the discipline of measurement with the delight of decoration. The craft rests on a few practical choices that keep the project accessible while preserving the satisfaction of a piece that feels engineered, even at a tiny scale. The core idea is simple: start with a sturdy base, shape a cab and trailer from flat panels, and then bring the form to life with wheels that actually turn and a chassis that holds together under light play. In this approach, the journey matters as much as the destination, because the steps teach you to think in three dimensions, to respect tolerances, and to adjust as you learn what works and what doesn’t. The result is a pocket-sized vehicle that can roll, show off its windows and doors, and carry a story about how it came to be built rather than merely purchased.\n\nMaterials at hand shape the project’s accessibility as much as your hands shape the model. For the base, a sheet of cardboard or corrugated cardboard from old boxes provides the sturdy skin that will bear the rest of the truck’s weight. It is inexpensive, forgiving, and familiar to the eye. The structural spine—two straws for axles and two wooden skewers or sticks for added support—gives the model a sense of real, functional engineering, even though the scale is tinier than a toy but larger than a decorative trinket. Glue is the quiet workhorse of this build; a hot glue gun is recommended because it creates strong bonds quickly, especially with cardboard that might flex or warp during assembly. Tools are simple: a craft knife for precise cuts, a ruler for straight edges, a pencil for marking, and a pair of scissors for trimming. Decoration is the playful finish: glue or tape, colored pens, markers, stickers, and any other craft supplies you enjoy. With these ingredients, the project becomes a small laboratory of craft and design, where each choice has a consequence that you can see or feel as your truck takes shape.\n\nDesign and planning set the tone for the entire build. Begin by imagining the truck you want to create. Will it be a compact delivery rig with a short cab and a compact trailer, or a compact pickup that hints at a larger fleet? Sketch the overall silhouette on paper, then break it into simple geometric shapes—rectangles for the cab, a trapezoid or rounded rectangle for the trailer, circles for the wheels. Templates can be drawn by hand or found online; the key is to keep lines clean and identifiable. The value of planning becomes apparent when you translate a two-dimensional drawing into a three-dimensional object. The dimensions don’t have to be exact and flawless, but they should be consistent enough to allow the pieces to fit together. Consistency—every edge aligned, every joint square—produces a more convincing form and reduces frustration during assembly. The joy is in watching the flat pieces become a solid, cohesive vehicle that looks like it could roll away, even if only on a tabletop or a shelf.\n\nCutting, like sculpting, demands care and precision, yet the process rewards patience. Mark the dimensions on the cardboard with a pencil, then cut with a craft knife along the ruler’s edge. The instruction that the shapes are pre-cut to size in some templates is especially welcoming for beginners; it reduces the time spent measuring and increases the time available to focus on placement and bonding. You’ll cut out the cab panels, the trailer body, and the smaller details such as windows and doors. The wheels are crafted from smaller circles of cardboard and will function as the model’s rotating elements once you anchor them to the axles. The aspect of the build that hinges on accuracy is the alignment of the axles with the wheels so that the truck can roll smoothly. Take your time here. If the wheels don’t sit evenly or if the axles are misaligned, you’ll notice wobble and resistance when you try to roll the truck. A little extra effort in validating alignment—checking wheel spin, ensuring a straight roll—makes a big difference in the final feel of the model.\n\nAssembling the cab is where the project begins to take on character. Glue the sides and roof panels together to form the core of the driver’s compartment. The cab should feel sturdy, with neat corners and clean joints. If you have extra cardboard strips, you can reinforce the interior corners with a small stream of glue that creates a subtle internal backbone. This reinforcement is not only practical but also satisfying, because it reveals how a small amount of structural thinking translates into a stronger model. The cab becomes the heart of the truck, a place where the scale matters less than the impression of solidity and intent. You can add details like printed or drawn windows, a grille line, or tiny door handles using a marker. You can even cut a small windshield from a transparent piece of plastic or a thin sheet of clear tape to give the cab a sense of airiness, but this is optional and depends on how much fragility you want in the final product.\n\nThe axles are the daily bread of the build’s functionality. Insert one end of a straw into the front of the cab, where the front wheels will be, and feed the other end into the back of the cab, where the rear wheels will be. Apply hot glue generously at both ends to secure the straws so that they become a stable, straight axis. If you’re constructing a trailer, repeat the same process for its axle and attach it to the trailer body with attention to alignment so that the trailer’s wheels sit true to their center line. The next step—the wheels themselves—binds the mechanical sense to the visual. Slide wooden skewers or sticks through the straw holes so they serve as the axle shafts. Then attach small cardboard circles to the ends of the skewers to act as wheels. A dab of hot glue keeps each wheel from slipping while the truck is moved. It’s a small but crucial moment: the moment when the mechanism you planned becomes a moving entity rather than a static model. If a wheel binds, remove and re-glue in a slightly adjusted position, re-check alignment, and test again. This trial-and-error rhythm is not a flaw but a feature, teaching patience and the ability to adapt when materials behave differently from the plan.\n\nWith the chassis and wheels in place, the truck begins to resemble something that could belong on a desk or a shelf rather than a simple construction project. Final assembly brings together the cab, the trailer, and the axle system into a coherent whole. At this stage, the structure should feel balanced, with the weight distributed in a way that allows the wheels to rotate freely without binding. A careful check of the wheel spin, an eye for level alignment, and a gentle press to ensure joints are tight are necessary to avoid wobble during play or display. Now the fun shifts to decoration. You can decorate with color to simulate paint patterns—think bold stripes along the cab, or a two-tone scheme that makes the truck more visually interesting. Markers can add details like headlights, taillights, windows, and a license plate. If you want, you can add a small flag or a miniature emblem to reflect your personal touch. The decoration doesn’t merely prettify the model; it expresses your interpretation of what kind of truck this is, where it comes from, and how you want to present it to others who will admire your work.\n\nThis paper-based mini truck is more than a toy or a decorative piece. It is a learning instrument that foregrounds how materials respond to design decisions. Cardboard’s stiffness can be tuned with careful folding and deliberate reinforcement, while straws and wooden skewers introduce the physics of rotation and torque in a scale where such forces are imperceptible in most other crafts. The process cultivates fine motor skills as you measure, cut, and glue with precision. It cultivates spatial reasoning as you translate a two-dimensional plan into a three-dimensional object and verify that parts align in space as well as on the drawing. It invites you to think about silhouette, proportion, and proportioning—how the length of the cab relates to the trailer, how the wheelbase lines up with the vehicle’s overall silhouette. The satisfaction of completing a cohesive model fosters a sense of accomplishment that can propel you toward more ambitious builds, whether you move up to more complex paper modeling, scale models, or hands-on engineering projects that use light materials to simulate real-world mechanics.\n\nIn reference to the broader exploration of mini truck making, this paper craft method sits among several pathways that can accommodate diverse interests and skill levels. Some builders prefer in-game creation, where the focus is on digital design, parameter tuning, and virtual prototyping. Others lean toward hands-on engineering, experimenting with more robust materials, motors, and real-world mechanisms to simulate movement and function. Detailed modeling invites meticulous attention to scale, surface texture, and multi-part assemblies that challenge longer timelines. Each approach shares a core objective: to turn a conceptual idea into a tangible form that fosters curiosity, learning, and creative confidence. Whether you are guiding a classroom project, a family afternoon, or your own personal exploration, the paper truck approach provides a low-barrier entry point that demonstrates the power of design thinking in practice. It is a starting point that invites you to imagine how a similar process could be extended to larger, more complex projects or adapted to different vehicle configurations, all while keeping your hands engaged in the physical act of building.\n\nIf you want more examples and inspiration, the Mini Trucks blog offers a broader landscape of ideas, projects, and customization notes that can fuel your next creative run. minitrucksocala blog This chapter has shown how a few materials, thoughtful planning, and careful assembly can yield a convincing paper truck that is as rewarding to build as it is to admire. It also hints at the broader potential of miniature vehicle making—a field where simple objects become instruments of discovery, not just objects of display. By embracing the iterative nature of assembly, you learn to tolerate small missteps, to adjust quickly, and to celebrate the moment when the wheels finally turn with a smooth, satisfying spin. The project’s value extends beyond the finished model: it is a practice in patience, ingenuity, and the joy of making something with intention from humble, everyday materials.\n\nAs you move forward, consider this: a single piece of cardboard can spark a cascade of ideas. If this mini truck whets your appetite for more, you can explore variations by altering the wheelbase, changing the shape of the cab, or substituting colored accents to match a family vehicle or a favorite color scheme. You could experiment with different axle configurations to see how stability and balance affect performance, or test alternate materials—thin foam, lighter cardboard, or even fabric for soft detailing. Each experiment invites reflection: which choices improved the model’s sturdiness? Which details made it more believable or more charming? This reflective practice mirrors how engineers and designers learn in real life, where every prototype teaches what to keep, what to revise, and what to reimagine entirely. The point is not to chase perfection but to cultivate an ongoing curiosity about how form, material, and purpose come together in a tangible object that you can hold, display, and discuss with others.\n\nIn closing, the paper craft mini truck is a meaningful starting point for a spectrum of maker activities. It demonstrates that a few well-chosen materials, a calm plan, and a little glue can yield something more than a decorative object: a small, functional story about creativity in action. It invites you to move from template to tangible thing with confidence, to enjoy the pace of careful work, and to savor the sense of capability that accompanies turning an idea into something you can touch and even share. The chapter’s practical steps—design, cutting, cab assembly, axle attachment, wheel mounting, and decorative finishing—are easy to recall and repeat, giving you a reliable framework for future projects. The real reward, beyond the looks of the finished model, lies in the skills you gain and the confidence you build for future, perhaps grander, making endeavors. A mini truck made of cardboard can be the first in a lineage of creations: a reminder that creative work begins with simple choices and grows through hands-on exploration, patient iteration, and the joy of seeing a small idea roll into life.
From Scraps to Mini Truck: An Engaging Engineering Voyage with Everyday Recyclables
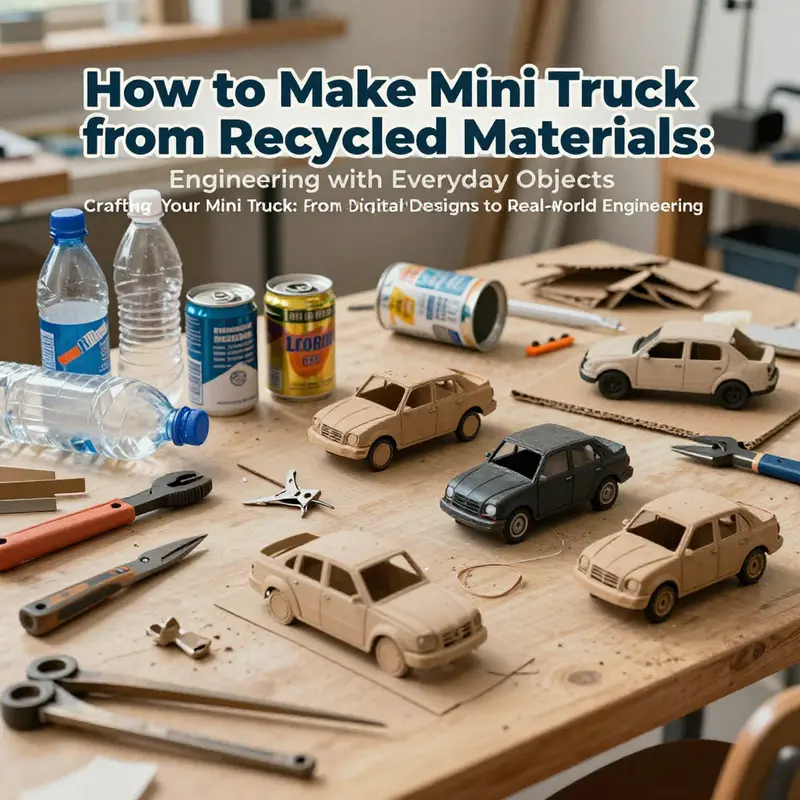
Every time a box lands in the recycling pile, a creative spark can follow. A simple cardboard sheet, a bottle cap, a curved straw, and a stray motor from a forgotten gadget can be more than waste; they can be the core components of a functioning mini truck. This project isn’t merely about assembly; it’s a compact workshop in practical physics, materials science, and iterative design. The idea is straightforward: take what would otherwise be discarded, layer it with careful thinking, and reimagine it as a small vehicle that can roll, steer, and even carry a light payload. What makes this approach especially compelling is its accessibility. You don’t need premium tools or expensive parts. You just need a plan, a handful of common materials, and the willingness to test, adjust, and improve. The result is not only a toy but a tangible example of how energy, balance, friction, and leverage interact in a real machine. In a world where sustainability matters, turning waste into a working model teaches a dual lesson: innovation thrives on constraint, and resourcefulness can yield real mechanical understanding without a workshop full of machinery.
The materials list reads like a scavenger hunt for a curious maker. Gather cardboard or corrugated paper from old packages, plastic bottles or caps that might otherwise end up in the trash, wooden skewers or sturdy plastic straws for axles, and small motors or even a repurposed battery from an electronic device. Rubber bands or elastic bands are your springs and torsion units, while used bottle caps or old CDs provide wheels. Glue, tape, or staples finish the toolkit, with a dash of imagination to tie everything together. The beauty of this approach is that every item has a story—someone’s discarded item that, with a little design thinking, becomes part of a functioning vehicle. It’s an invitation to see engineering not as an exclusive craft but as a problem-solving mindset that can operate on the scale of a desk, a kitchen table, or a classroom corner.
Begin with design and sketching, letting form follow function while keeping the plan simple enough to be reliably built with the materials at hand. In a compact project like this, symmetry and balance are almost as important as the aesthetic look. Draw a rectangular chassis as the central spine of the truck, map out front and back sections, and decide where the cab, bed, or any extra features will sit. The wheelbase—the distance between the front and rear axles—should be planned to keep the truck stable and capable of rolling freely on a flat surface. A common misstep is building a chassis that looks proportional but topples easily or binds when the wheels turn. A quick pre-build check helps: imagine how weight will distribute along the chassis as you add a motor or a payload. If the rear end feels too light, a small counterweight can be added to the front, or the wheel placement can be nudged slightly to improve stability. This planning phase might feel modest, but it seeds success for the rest of the build.
The chassis itself is a study in layering and reinforcement. Start by cutting two large cardboard panels to serve as the front and back sections. Connect them with sturdy cardboard strips to form a box-like frame. Layering multiple sheets of cardboard in key areas increases stiffness, much like how engineers reinforce a real vehicle frame. The result should feel rigid enough to withstand the occasional bump during testing, yet light enough to be moved and manipulated by hand. When you glue or tape the joints, consider dry-fit testing first. Assemble without glue at first to confirm that all pieces align properly; then secure with a combination of white glue for structural bonds and hot glue for quick, robust holds. The goal is a frame that stays square as the axles pass through, so frequent checks with a square or straightedge during assembly pay off later during operation.
Wheels matter as much as the chassis. Bottle caps work well as miniature tires, though their fit can vary. If needed, trim a tiny notch or drill a small hole to accept an axle. The axle itself can be a wooden skewer or a plastic straw, sized to slide through the wheel hubs with a little clearance to spin freely. Drill or puncture holes at the correct positions on the chassis to receive the axles, making sure the wheel pair sits square and parallel. The alignment process is delicate: if one wheel rubs against the chassis or sits at a slight angle, it will drag the truck and waste energy. A simple test roll on a flat surface after placing the axles will reveal any misalignment, and you can adjust by widening holes slightly or sanding rough spots on the wheel hubs. For sturdier builds, you can substitute slightly larger wheels from old toys or use CDs as a robust, low-friction wheel option, bearing the added weight of a small motor without disintegrating under use.
Power is where two paths divaricate and converge. The simplest propulsion uses a rubber band wound around the rear axle. This option embodies the spirit of accessible making: no electricity, no wires, just elastic energy released by a twist of the axle. To implement rubber-band power, anchor one end of the band to the chassis, wind the other end around the axle, and secure it so that when the band unwinds, it drives the wheel forward. The trick is to balance tension and control. If the band is too tight, it may slip or snap; if it’s too slack, the truck won’t move much. A measured, incremental approach—tensioning the band just enough to grip while allowing smooth unwinding—yields the best results. Additionally, consider the wheel on which the band exerts pull. Placing the wind around the rear axle with an accessible winding point makes it easier to test and adjust. This method—humble yet effective—teaches a direct lesson about energy storage and release. Its appeal lies not only in function but in the tactile understanding of mechanical advantage: as the wheel turns, you see in real-time how energy translates into motion and how friction with the surface either helps grip or resists motion.
For those ready to step into a powered, more realistic version, a small DC motor opens a door to greater performance. A tiny motor from an old toy or gadget can be mounted to the chassis with simple supports made from cardboard or lightweight plastic. Attach a gear or pulley system to the motor shaft to transfer power efficiently to the axle. The art here is to design a compact drive train that fits within the chassis, minimizes weight, and reduces complexity. A basic rule of thumb is to keep the motor as close to the axle as possible to minimize backlash and maintain timely response to changes in speed. Power is supplied by a small battery pack, ideally around 3–5 volts, suited to the scale of a mini truck. Wiring should be neat and insulated, with the conductors run along the chassis and secured away from moving parts to prevent snagging. The motor mounting points should be robust enough to absorb the torque without the motor shifting or vibrating loose. If you’re new to this, start with a straightforward configuration: motor mounted near the rear axle, a direct drive or a single-gear reduction to the wheel, and a simple on/off switch or a removable battery connection. The payoff is a tiny vehicle that not only rolls but can accelerate with a satisfying clatter of miniature gears—a tangible demonstration of how engineers translate energy into controlled motion.
A reference note in this part of the journey is the value of repurposed components. A motor from a broken toy or a discarded gadget can keep the project affordable and environmentally friendly. The same applies to small gears or pulleys that you might find in an old clock, model car kit, or electronics scrap. The incentive to reuse components is twofold: it keeps costs low and deepens understanding by showing how different parts interact under load. If you manage to source an aluminum can, a motor, and a simple gearing arrangement, you can assemble a surprisingly capable electric miniature truck—proof that everyday castoffs, when seen through a builder’s lens, can function as serious engineering material. In discussions with makers around the globe, you’ll hear this refrain: the best projects often emerge from constraints rather than abundance, and the most powerful ideas are born from rethinking what a scrap can become.
Decoration and personalization are the final layer that makes the project feel complete. With the frame assembled and wheels turning smoothly, you can transform a basic chassis into a character-filled vehicle. Colored paper, markers, stickers, or paint can give the body personality. Add headlights made from small reflective lids or cut a simple window pattern with a utility knife, then shade with a marker to simulate glass. A license plate or a tiny painted emblem adds a touch of character that elevates the build beyond a functional model. For those who enjoy storytelling through their builds, consider a theme—turn the truck into a fire engine, a delivery van, or a rugged off-road scout vehicle—and adjust the chassis lines and color scheme accordingly. A small dump mechanism can be fun too: a tiny cardboard flap triggered by a simple hinge creates the impression of a bed that can raise or tilt. The joy is in the details, but they should never compromise the core functionality. Thoughtful decoration should enhance the viewer’s perception of the vehicle’s purpose without adding excessive weight that would hinder movement or strain the power system.
Testing and iteration complete the cycle. Once the truck can roll under its own power, the next step is a careful assessment of performance. Roll the vehicle on a flat surface and observe how freely the wheels turn, how stable the frame feels, and whether the weight distribution supports smooth motion. If the truck veers to one side, check axle placement and wheel alignment. If the wheels drag, examine the joints and clearances around the axles. Small tweaks—like slightly widening a hole for a looser fit, adding a touch more glue at a joint, or reinforcing a weak corner with an extra strip of cardboard—can yield noticeable improvements. The iterative nature of this process mirrors real-world engineering: small refinements accumulate into a more reliable, robust system. And the delightful outcome is a vehicle that not only exists in three dimensions but behaves predictably in the same way a well-designed toy or model should.
This project is about more than making a toy. It stands as a practical lesson in sustainability and engineering pedagogy. Recycling and upcycling reduce waste, and in the same breath, they illuminate core mechanical concepts such as balance, friction, energy transfer, and control. The educational value extends beyond the mechanics of a single truck. As you work through design decisions—how long the chassis should be, where to place the axles for optimal stability, how to route power to the wheels—you practice the kind of problem-solving that serves as a foundation for more complex builds. The hands-on experience fosters a mindset that looks at problems from multiple angles: how to minimize material use, how to maximize performance with limited components, and how to adapt existing items to new purposes rather than discarding them. In a broader cultural sense, the Swat Valley example reminds us that resourceful engineering can emerge from local materials and traditional knowledge. Local artisans have demonstrated that recycled anchor chains can contribute to functional truck components, including semi-axles, underscoring a remarkable principle: industrial-grade capability can grow from discarded materials when creativity and technical intuition line up.
The journey from a pile of scraps to a working mini truck is also a reminder of a simple truth: good design often begins with a plan that is both practical and flexible. You don’t need the fanciest tools to begin. A sharp blade, a steady hand, a hot-glue gun, and a patient mindset will carry you through. As you gain confidence, you can experiment with more sophisticated ideas—perhaps integrating a more advanced electric drive, or refining the control system so that the truck responds smoothly to a power switch. The beauty of this approach is that it scales with your curiosity. If you want a more visually striking model, you can upgrade wheel size, alter the chassis profile, or introduce a more elaborate bed feature. If you want to keep things lean, you can keep the design compact, with a minimal set of recycled parts that still demonstrates core engineering principles. The end product—whether simple or complex—speaks to a broader philosophy: make do with what you have, learn by doing, and celebrate the ingenuity that emerges when you turn everyday objects into working machines.
For readers seeking more inspiration and a wider community of builders, there is value in exploring related projects and tutorials that align with the spirit of this chapter. A broad online community can offer variations on the same theme, different materials to test, and new ideas for combining scraps into credible mechanisms. If you’re curious to see more examples and to engage with others who enjoy transforming waste into learning tools, you can visit the community blog at minitrucksocala.com/blog/. This hub provides a variety of builds and tips that complement the approach described here, reinforcing the idea that the path from scrap to working model is as much about experimentation as it is about construction. While you may not replicate every detail of a given project, the underlying principles—design, reinforcement, testing, and iteration—remain universal and portable across many different configurations and scales. This is how a simple, recycled mini truck becomes a gateway to broader engineering literacy, encouraging makers of all ages to imagine, build, and refine.
The final lesson extends beyond the mechanics. It’s a call to curiosity: to look at a cardboard box not as waste but as a potential component, to view a bottle cap not as a cheap toy part but as a wheel, and to treat every test roll as a valuable datapoint. When you adopt this mindset, your mini truck becomes more than a model—it becomes a micro-laboratory for understanding motion, energy, and material behavior. The process teaches patience, precision, and pride in craftsmanship. It also demonstrates that learning is accessible: with just a few household items, you can craft something real, testable, and shareable with friends, family, or classmates. The chapter closes with a reminder that every ambitious project begins with small steps, a willingness to fail, and the resilience to adjust. Start with a design you can complete in a day, then expand as your confidence grows. The joy lies in the journey as much as in the finished model, and the learning echoes long after the last piece is glued in place.
External resource: https://www.youtube.com/watch?v=example-minitruck-diy
Final thoughts
Creating a mini truck can be a fun and rewarding experience, whether done digitally, through crafting, or with recycled materials. As we’ve explored in the chapters above, each means of creation offers diverse benefits, from honing your engineering skills to fostering artistic expression. Remember, the journey of building your mini truck isn’t just about the end product—it’s about the joy of creativity, the satisfaction of DIY projects, and the sustainable use of materials. So grab your tools, unleash your imagination, and dive into the art of making mini trucks. Happy building!