
Putting batteries in your Adventure Force Mini Truck is essential for a thrilling drive filled with excitement. This straightforward guide presents a friendly approach for local small business owners, residential property owners, and mini truck enthusiasts who crave the spirit of adventure. As you read through each chapter, you’ll learn where to find the battery compartment, how to open it, the correct technique for inserting batteries, and finally, the best practices for sealing it all up for optimal performance. Buckle up and get ready for an adventurous ride!
Power at Hand: A Seamless Walkthrough to Locating and Opening the Battery Compartment of a Mini Truck
When a toy vehicle suddenly loses its spark, the first instinct is to check the power source. In compact, kid-friendly trucks, the battery compartment is designed to be accessible and durable. This chapter walks you through a simple, safe battery swap: locate the power hub, open the cover, insert two fresh batteries with correct polarity, and close the cover. Start by flipping the truck onto its underside to reveal the base. The battery compartment is usually a small rectangular panel that either clips in place or is held by a few tiny screws. If a clip is present, press or slide it to release the cover; if screws are used, loosen them just enough to remove the panel. Once the cover is off, you will see two slots with clear polarity markings. Insert two AA cells, aligning the positive end with the plus sign and the negative end with the minus sign. Before closing, wipe the contact points with a dry cloth if dusty and check for corrosion. Re-seat the batteries, reattach the cover, and gently press until it snaps or the screws are snug. Turn the truck over and test a quick motor run to confirm success. With practice, battery changes become quick and calm, keeping play time uninterrupted. For added reliability, keep fresh batteries on hand, store the vehicle in a dry place, and refer to the model’s manual for any model-specific notes.
Powering the Pocket-Sized Adventurer: Opening and Replacing the Battery Compartments
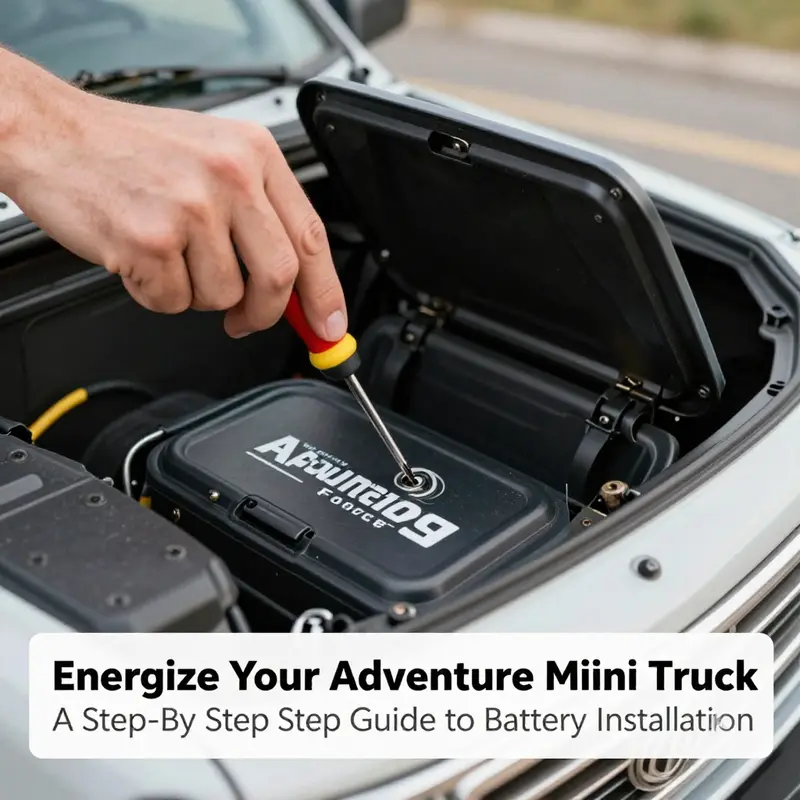
Opening and replacing the battery compartment is a careful, repeatable ritual. Begin with a clean workspace and confirm the two AAA batteries the truck requires as well as the two for the controller. Flip the vehicle to expose the underside, locate the small access screw, remove it, and lift the cover. Check the polarity markings inside before inserting two fresh AAA cells with the correct orientation. When the cells are seated, reseat the cover and tighten the screw until it is snug. Do a quick power test by turning the vehicle over and pressing the controller trigger; if it responds promptly, the seating is good. If you hear buzzing or lack movement, reopen, reseat the batteries with renewed attention to polarity, and reattach the cover. The controller uses two AAA batteries and follows the same polarity rules. To maintain reliability, use fresh cells, avoid mixing cell types, and keep a small stash of spares. After use, wipe down the compartment and consider removing batteries when storing the vehicle for an extended period to prevent leakage. With this routine, the pocket-sized adventurer remains ready for the next run.
null
null
Power at the Ready: A Comprehensive Path to Inserting and Securing Batteries in the Adventure Force Mini Truck
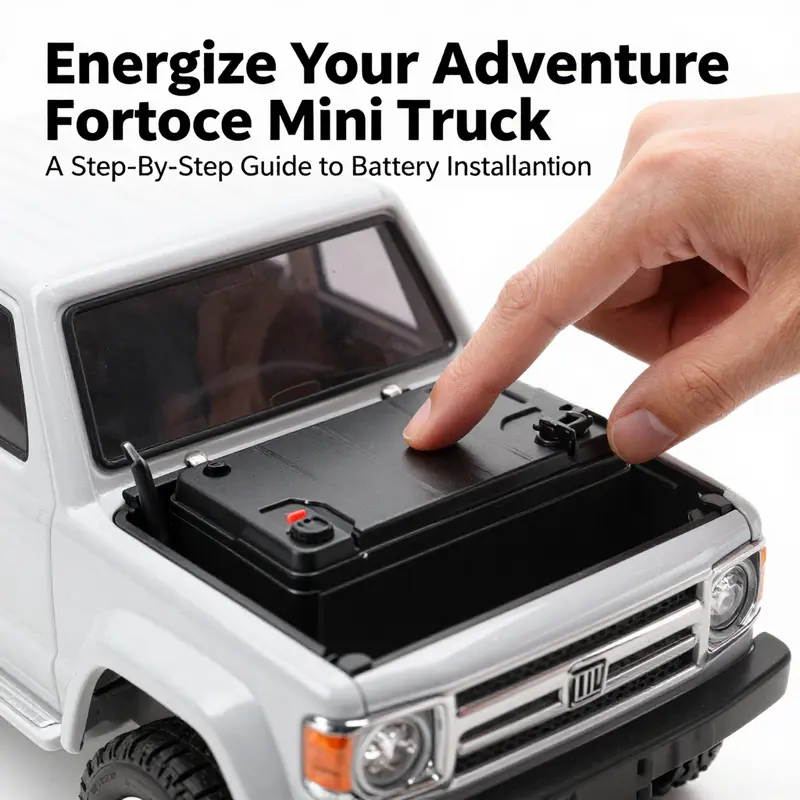
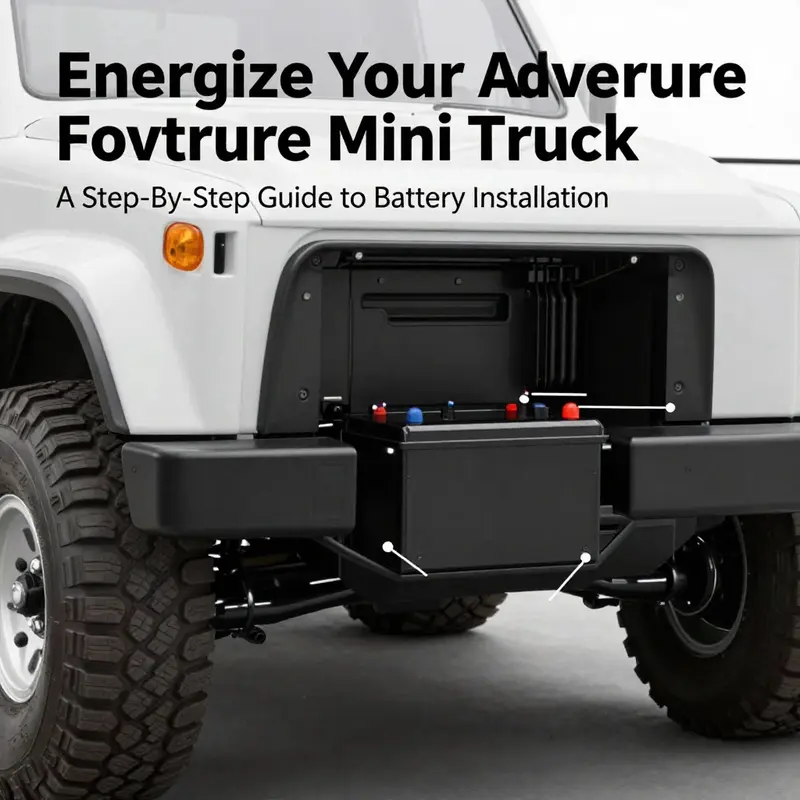
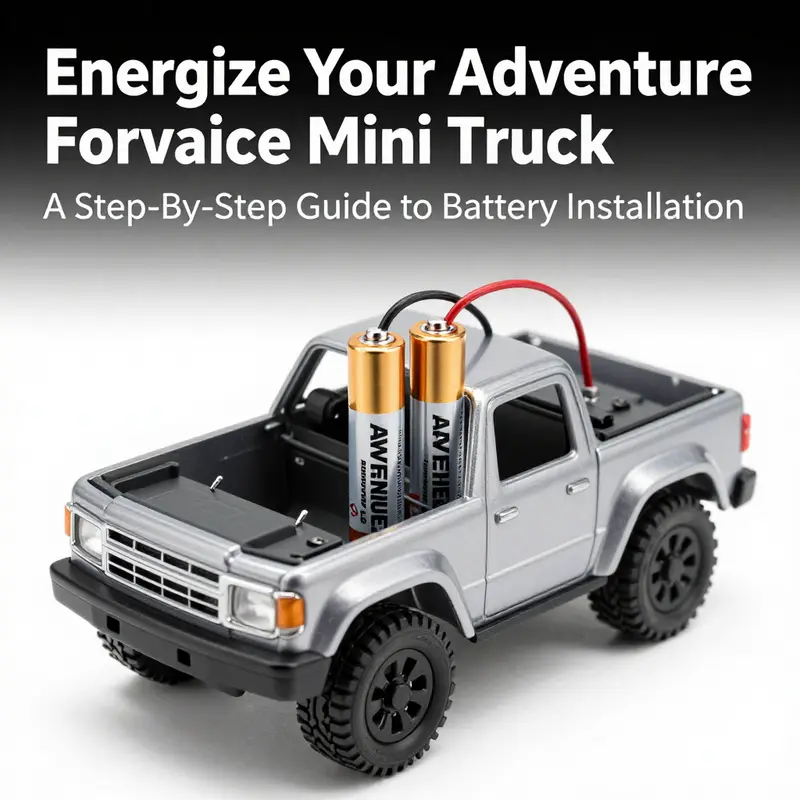
Energy begins where intention meets mechanism. The moment you decide to take the compact off-road vehicle onto a dirt patch, the first act is clean power. The batteries are not just energy storage; they are the bridge between your plan and the truck’s responsive performance. The process may seem straightforward, yet it rewards careful attention. Locate, open, align, and close with patience, and the vehicle will respond with a predictable heartbeat that translates into confident control on the trail. This is not merely about inserting power; it is about understanding how the power system in a small, rugged machine is arranged, protected, and maintained so that every outdoor session feels as smooth as possible. The practical rhythm begins with a simple but essential step: finding the battery compartment. On many models, this hatch is tucked away on the bottom or the side of the truck’s body. The exact placement can vary a little year to year, but there is a telling clue you can rely on. Look for a small panel that sits flush against the chassis and seems purposely sized to slide out or lift away. A gentle press with a fingernail or a tiny screwdriver is often all that is needed to pry it open, revealing a compact pocket that houses the four batteries the kit requires. This hatch is designed to be secure in operation, so it will resist casual nudges during a run. The moment you lift it, you can sense the dual purpose of the design: ease of access for maintenance and a snug seal to protect the contacts from dust, moisture, and the occasional mud splash that comes with real-world use. When you discover the compartment, you will also notice the orientation markers and polarity symbols tucked inside the lid. These plus and minus signs are not merely decorative; they are functional guides that ensure you insert the batteries in the correct direction. The symbols are placed to be legible from the user’s viewpoint while the lid is open, and they provide a fail-safe memory that reduces the chance of a reversed polarity. The first cognitive step is to prepare the four AA batteries that the system ultimately demands. In this setup, there are two separate power requirements loaded into the same unit. The truck itself typically uses two AA batteries, while the remote control for steering and acceleration consumes another pair. That means you are working with four AA batteries in total. It is a subtle but critical distinction that shifts how you plan the power source for a day’s adventure. As a rule of thumb, you should treat the four AA slots as two paired systems rather than as a single block. The more you think of it in two pairs, the easier it becomes to manage the polarity and to ensure consistent contact in both compartments. When you prepare to insert the batteries, lay them out in two parallel lines. This mental mapping helps you avoid the common misstep of placing all the batteries in a single orientation and then discovering later that one pair is misaligned. The process begins with the truck’s compartment. Open the lid and inspect the inside for two clear polarity markers. Once you confirm the direction, insert the first two AA batteries in the forward position, aligning their positive ends with the + markings. The second two batteries in the back should align with the corresponding minus signs in the back row. The act of inserting the first two sets the tone for a smooth operation. When the two are seated correctly, you can proceed to the remote control’s battery slot, which is often housed in a separate, easily accessible panel on the back or side of the remote. The remote’s compartment is typically set up similarly, requiring two AA batteries. Again, check the polarity marks before placing the batteries. The sensation of aligning the batteries into this separate pocket carries a quiet confidence. You can feel the metal contacts accept the spring tension with a tiny but satisfying click. This is not merely an audible cue; it is a tactile affirmation that the power train is properly engaged. Throughout the process, keep the batteries level and avoid forcing them into place. It can be tempting to press harder when a battery does not seem to fit, but a light, deliberate touch is more reliable and reduces the risk of bending the contact springs. Do not combine old and new batteries in the same circuit. Mixing batteries carries the risk of uneven voltage, which can impact performance and potentially shorten battery life. If you are replacing batteries, you should swap all four slots rather than mixing fresh and used cells across the truck and the remote. A battery that reads just a fraction lower than the others can become the weak link in a system that otherwise works in harmony. After ensuring the four batteries are seated with correct polarity, you can close both compartments. The truck’s cover is designed to snap into place with a decisive, audible click. When you hear that sound, you know the compartment is secure enough to withstand the excitement of a run. Likewise, the remote’s cover should engage with a solid latch that remains firm under handling. If either cover feels loose, it is worth a quick reset before you take the vehicle outdoors. A loose battery cover can allow dust or moisture to infiltrate the contacts, compromising performance or creating a pinching hazard if the lid shifts during a jump or a bump. The moment the compartments are closed, you may want to perform a quick functional test. Turn on the truck and then switch on the remote. If your setup includes LED indicators, you should see a small glow or a blue light indicating that power is flowing through both the vehicle and the controller. If the indicators fail to illuminate, re-check the battery seats to confirm polarity and seating, and ensure the covers clicked securely. A momentary misalignment can masquerade as a nonfunctional battery, but a careful reseat often resolves the issue without further hassle. In the spirit of preparedness, it is wise to keep a spare set of batteries on hand for longer sessions. Fresh alkaline AAs are widely available and reliable in most conditions. If you anticipate a lot of off-road use in extreme temperatures, you might consider measuring the performance of alkaline versus high-drain rechargeables, though the latter require different charging and cycling considerations. It is important to store spare batteries in a cool, dry place and to avoid exposing them to direct sunlight or heat sources that could degrade the chemical composition. The storage practice is as important as the insertion technique because power is just as much about readiness as it is about the moment you grip the controller. Some operators like to test their rigs on a table first, noting how the vehicle responds to forward, backward, and turning commands before they take the truck outdoors. This indoor audition can save you time and prevent a less powerful impression when you finally take the vehicle into the field. If you want a concise, real-world demonstration of the steps described here, you can reference a short visual guide that shows the battery compartments opening, the correct placement of each cell, and the way the covers snap back into place. For a broader view on a related project, see Godzilla Truck Camper Review and Customization. This page illustrates how power systems in similarly styled models are designed and serviced, providing context that helps you understand why the four-battery layout is practical and robust in many configurations. You will notice how the design keeps the power supply away from the chassis’s dynamic elements, reducing the likelihood of contact with water, mud, or debris during rougher use. It is a reminder that thoughtful engineering accompanies the act of inserting batteries, a reminder that the little decisions you make during setup can translate into longer, more reliable play sessions. Once you have completed the battery insertion and secured the lids, you should consider a quick calibration pass. A brief calibration can help confirm that the power is delivering consistent current from both battery packs. Though most off-road micro vehicles come with fairly stable electronics, the sensation of a calm, predictable response during the first test drive makes a difference. Push the throttle gently and observe as the truck responds with a measured acceleration. If the truck stalls or hesitates, revisit the battery seats to ensure no loss of contact has occurred and that the polarity remains correct. It is also worth noting that the remote uses a similar logic for its own power. If the remote control begins to lose range or exhibits intermittent control, check the battery seats anew. The timescale between battery insertions can vary with usage, but you should consider it a good habit to refresh both the truck and remote batteries when you are about to embark on a long run. The practical truth about battery maintenance is that consistent practice reduces the number of surprises you encounter during real play. A well-supported power system translates into fewer interruptions, more time spent on the track, and a more satisfying sense of mastery over the vehicle. As you gain experience, you may develop your own quick-check ritual. Perhaps you will begin by counting the number of successful forward movements before a need to adjust arises, or you might time your runs to test how long the four AA batteries last under typical use. Either way, the core routine remains the same: locate the compartment, open, insert with polarity, close, and test. When you have wrapped up your session, you should remove the batteries only if you do not anticipate using the vehicle for extended periods. Prolonged storage with batteries in place can, in rare instances, lead to corrosion on the springs or gradual discharge. If you do store the vehicle, you can leave the batteries in place if you plan to use it again soon, provided the compartments are clean and dry and the battery contacts show no signs of corrosion. The idea is to preserve the integrity of both the truck’s electronics and the remote’s signaling circuit so that a future drive remains as effortless as the first. In the broader conversation around power systems for micro RC vehicles, the experience of inserting four AA cells into two separate compartments illustrates a general principle: separate power domains, when managed with care, yield consistent performance. This principle underpins not only the immediate act of battery insertion but also the ongoing relationship between the operator and the machine. If you are curious about a related approach to power management on another compact platform, the linked resource offers a broader perspective while staying adjacent to the same family of vehicles. A final note to connect this practical guide to your next steps: once the batteries are secured and a quick test confirms operational readiness, you can proceed to the day’s run with confidence. The objective is not simply to power the vehicle but to empower your planning and your execution on the ground. The more thoughtfully you approach the battery setup, the more consistent your control, the more enjoyable the ride, and the more enjoyable the learning curve becomes as you become fluent in the language of miniature power systems. For a quick, visual reference that mirrors the sequence described above, the TikTok guide provides a compact demonstration of battery insertion and compartment closure. External resource: https://www.tiktok.com/@adventureforceofficial/video/7458967456789012345
Final thoughts
Now that you know how to install batteries in your Adventure Force Mini Truck, you’re all set to hit the road with excitement! Proper battery installation ensures your mini truck operates at peak performance, guaranteeing hours of fun for everyone. Whether you’re a local business owner looking for a unique toy to share or a dedicated enthusiast eager to keep your vehicle running well, following these steps makes it easy. Now step outside, power it up, and enjoy the ride!