Building a mini monster truck go-kart offers a delightful blend of creativity, engineering, and fun. Whether you’re a small business owner looking for an engaging community project, a residential property owner wanting to build something unique for your family, or a mini truck enthusiast eager to indulge in your passion, this guide has you covered. It will walk you through the journey of bringing your mini monster truck to life, from the initial conceptual design and planning phase to gathering materials and tools, executing assembly steps, and ensuring safety during testing. By the end of this guide, you will be well-equipped to create an exciting, functional miniature vehicle that can be enjoyed by people of all ages.
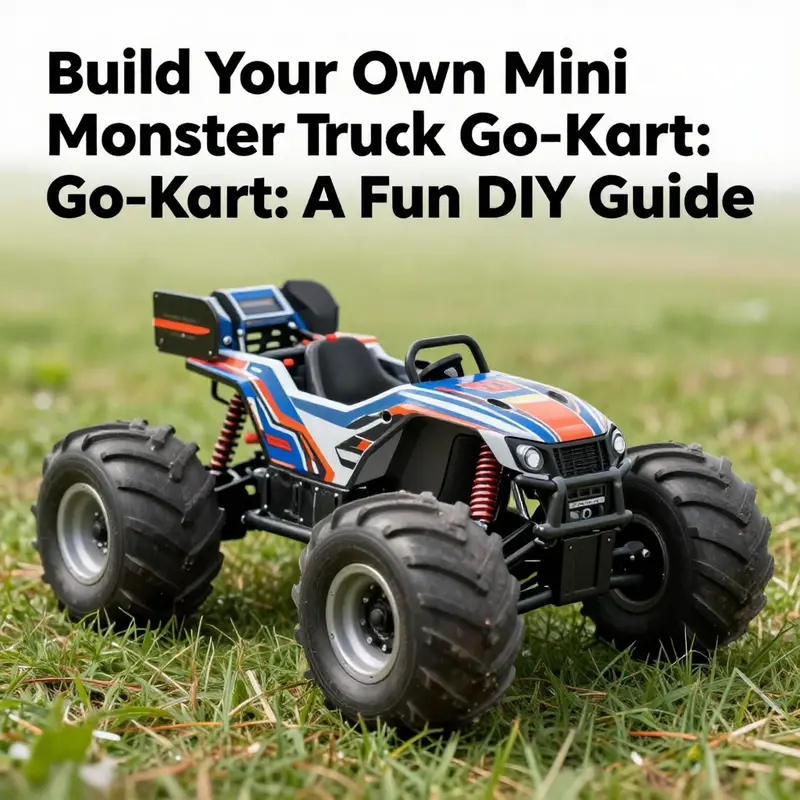
Designing the Dream: Conceptual Design and Planning for a Mini Monster Truck Go Kart

Design, Dream, and Deliberation: Conceptual Design and Planning for a Mini Monster Truck Go Kart
Every ambitious build begins with a question as old as cartography: how do you translate a bold idea into something that stands, moves, and endures? When the idea is a mini monster truck go kart, the challenge is twofold: capture the iconic monster truck silhouette and personality, while ensuring the machine remains balanced, safe, and teachable. The planning stage becomes a kind of blueprint for behavior as well as form. It is where the playful impulse of a kid or maker meets the stubborn math of physics, where aesthetics and practicality shake hands over a table littered with scraps of wood, metal, and cardboard. In this chapter we traverse that early terrain of design thinking, not as a dry exercise in specifications, but as a guided conversation between imagination and engineering. The goal is to cultivate a chassis that can tolerate rough playground terrain, a powertrain that delivers controlled performance, and a safety profile that makes the project worth sharing with others. The result is not a finished product but a durable design language that informs every subsequent choice, from material selection to steering geometry, from wheel grip to the shape of the body shell.
At the heart of conceptual design is the frame. For a mini monster truck, the frame should feel robust without becoming prohibitively heavy. The core idea is to imagine a structure that resists off-road jolts and holds its geometry under load. A sturdy metal frame, crafted from steel or an aluminum alloy, offers the durability needed for occasional collisions with rocks or grass clumps. Yet the choice of material is not merely about strength. It is about weight distribution and manufacturability. A frame that is too heavy will demand more powerful power delivery and may restrict nimbleness; one that is too light risks flexing and misalignment in corners. Therefore, the design usually leans toward a low center of gravity, a principle borrowed from real go-kart engineering. Keeping mass close to the ground reduces the chance of tipping on uneven terrain, especially when the vehicle navigates slopes or makes sharp turns. A spine-like chassis with reinforced cross members can distribute impact loads evenly, while gussets at critical joints help resist torsional twisting.
Beyond the frame, the steering system carries a lot of the personality and responsiveness of the vehicle. A rack-and-pinion arrangement, scaled for a mini vehicle, can provide a surprisingly precise steering response. The appeal of rack-and-pinion is that it translates the user’s input at the steering wheel directly into wheel angle with minimal play. In a mini monster truck go kart, this matters because the toy-like scale often amplifies any looseness or slack in the steering linkage. The practical takeaway is to design a steering column that mounts securely to the front axle, with bearings or bushings that reduce play, and with tie rods sized to handle the lateral forces encountered when the tires bite into a loose surface. Even at a small scale, good steering geometry comes from planning a trail ofthoughtful alignments: toe-in to maintain straight tracking, careful camber for consistent tire contact, and a steering ratio that makes turning both controllable for a child and forgiving for a caregiver during demonstrations.
The choice of powertrain—whether to push forward with an engine or opt for an electric approach—naturally orchestrates the rest of the concept. In the most fully realized designs, a small engine offers tactile feedback and a familiar vibration that echoes the world of full-size monster trucks. The idea of a compact engine around the 80cc class, delivering a controlled top speed in the range of twenty-five kilometers per hour, blends excitement with safety. It is a pace that invites confident use without crossing into dangerously speedy territory. However, that choice carries implications for fuel handling, exhaust routing, and maintenance. An electric alternative, meanwhile, promises a simpler, cleaner layout with rapid initial torque and quieter operation. The trade-offs are not merely about power. They involve weight distribution, battery placement, and run-time. In planning, the designer imagines both paths not as rival options but as routes to the same destination: a vehicle that feels dynamic, behaves predictably, and teaches the user about propulsion fundamentals through hands-on experimentation.
Safety threads itself through every design decision. When the idea is to build something that a child can enjoy under supervision, safety can’t be an afterthought. The plan should specify padded seating and a seat belt for the driver, to reduce the risk of injury during rough play or accidental jolts over uneven ground. Braking, too, must be considered early. Hydraulic disc brakes are a popular conceptual choice for mini go karts because they offer reliable stopping power and intuitive feedback. The plan should then lay out a clear protocol for testing the braking system on varied surfaces—grass, dirt, and small gravel—before enabling any sort of motorized run. Certification-neutral safety considerations are also meaningful at this stage. While full production standards like international certifications may be overkill for a home workshop project, aligning with basic safety guidelines and clear design rules makes the project safer and more educational. In practice, this means ensuring there are no exposed wires, no sharp edges, and no loose components that could detach under normal use. A good plan also includes a strategy for supervision, specifying age considerations, supervision ratios, and maintenance intervals.
Another layer of planning concerns aesthetics. The monster truck premise calls for a look that communicates power and resilience without sacrificing kid-friendly charm. Bold fenders, a lifted stance, and oversized tires are not just decorative; they inform the geometry and clearance of the chassis. The designer may sketch a few variants—one leaning toward a cartoonish silhouette with rounded edges and flame decals, another aiming for a more rugged, verification-friendly silhouette with pronounced wheel arches and reinforced bumpers. The body panels can be lightweight yet rugged, constructed from cardboard, thin plastics, or composite sheet that’s easy to cut and shape. The design process uses iterative drawings, cardboard mockups, or 3D-printed elements to test fit and visual balance before any permanent material is cut. Even at a sketch stage, the design should anticipate access points for batteries or the fuel system, keeping weight bias in mind so the vehicle sits evenly whether it is unpowered or motorized.
The path from concept to construction is not linear. It is a series of decisions that inform each other—frame rigidity informs steering alignment; mass distribution informs tire selection; the visual identity informs body mounting and protection. For this reason, the plan is better understood as a living document: a set of core principles augmented by notes on what changes in response to testing. As the designer moves from drawing to prototype, the most valuable asset becomes the ability to compare performance against expectations. A well-worded plan will describe not only what is being built but how it will be tested and refined. It offers a mental checklist that helps a builder reject features that don’t contribute to safety or reliability, even if they look exciting on paper. The design language established in this phase—dimensionally aware, safety-conscious, and aesthetically coherent—will carry through all subsequent steps and keep the project cohesive.
Finally, it is wise to acknowledge the broader ecosystem of ideas around small, off-road karts. Builders learn by studying the examples they encounter online and in maker communities. Even if this chapter emphasizes core principles rather than a strict blueprint, the habit of collecting ideas from multiple sources fosters creativity while preserving safety and practicality. For those who want to hear a broader conversation about scaled-down builds, a quick tour of community content can be instructive. For more community insights, visit the minitrucksocala blog. This space is useful for observing how others interpret the same design challenges, test different materials, and iterate on aesthetics in ways that respect the scale and safety of a child-focused vehicle.
In sum, conceptual design and planning form the heart of a successful mini monster truck go kart build. They translate a cherished fantasy into a feasible system with measurable rules. The best plans balance a reverence for monster-truck character with the discipline of engineering practice—low center of gravity, solid frame, thoughtful steering, safe power delivery, and a design that invites learning through trial and adjustment. The next stage then takes these guiding ideas into concrete form, leading to a chassis that not only looks the part but behaves with the predictability a family can trust. As the builder moves forward, the design vocabulary established in this phase serves as the common language that keeps everything aligned—from the choice of joinery and fasteners to the eventual placement of the driver’s seat and the battery pack. The result is a project that rewards careful planning with a durable, exciting, and educational toy that can be enjoyed in many landscapes, from flat driveways to light, sandy playgrounds.
External reference for further context and certified options can broaden the horizon for those who wish to explore more formal or commercial pathways. See a supplier listing that showcases engine kits and safety-focused components to ground the conceptual work in real-world specifications: https://www.alibaba.com/product-detail/Mini-Monster-Truck-Go-Kart-with-engine_1600794132188.html
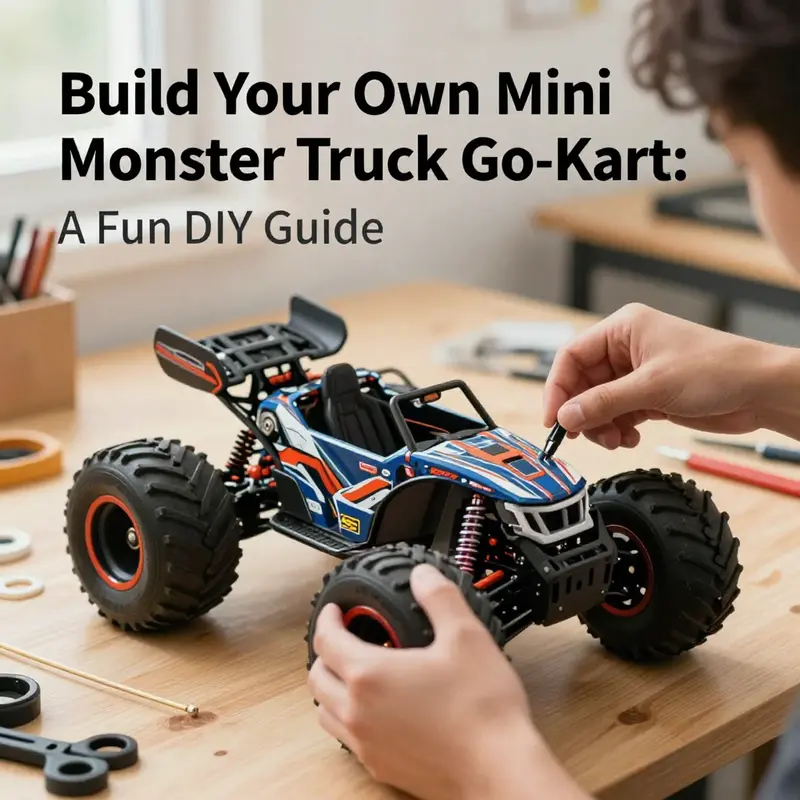
From Frame to Fury: Essential Materials and Tools for Crafting a Mini Monster Truck Go-Kart

Every great build begins with the right skeleton, and in a mini monster truck go-kart that skeleton is the frame. It must be strong enough to withstand bold off-road play, yet light enough to be manageable for curious hands and small engines. The materials you choose set the tone for everything that follows—how the kart behaves on grass and gravel, how quickly it accelerates, how safe it feels when a child clatters over a curb, and how long the project will hold together before fatigue or a rough landing reveals a weakness. In this chapter, we weave together the practical realities of materials and the tempering discipline of tools, showing how to balance durability, weight, and safety without sacrificing the thrill that makes a monster truck model so compelling. The journey from frame to finishing touches is a sequence of carefully chosen decisions, each echoing the overarching aim: a bold, scale-appropriate machine that can be admired, experimented with, and, in the right settings, used with care.
The frame and structure anchor the entire undertaking. A robust metal frame speaks to durability and safety, particularly if you intend a motorized or semi-motorized experience. Steel tubing or sturdy square sections provide a rigidity that resists flex and twist during heavy landings or uneven terrain. Even when the project stays purely decorative or pedal-powered, a solid chassis creates confidence in the builder and safety in the user. If your goal is a lighter, beginner-friendly version, you can start with a fixed wooden frame or a reinforced platform built from plywood and metal brackets. The key is to reinforce corners and central load points, ensuring there’s ample support where the body will mount and where axles will pass through. A well-planned frame will also facilitate accurate wheel alignment and straightforward integration of the suspension, steering, and drive components later on.
Tires and wheels are more than just round shapes to fill the arches; they define how the kart interacts with its environment. Larger, thick rubber tires provide traction and a visual punch that screams monster-at-play. For a scale model, you can source off-the-shelf toy-car wheels, or repurpose bicycle or scooter tires for a cartoonish aesthetic. The choice between solid wheels and pneumatic tires affects weight, ride quality, and maintenance. A heavier, rugged tire improves grip on loose surfaces but adds rotational inertia; a lighter tire reduces overall weight and makes steering feel more responsive, but can wear quicker and offer less shock absorption. In a project that aims to evoke the real thing without becoming a full-size machine, combining a sturdy wheel hub with a forgiving tire affords a satisfying balance of performance and safety.
The body and exterior elements are where imagination takes shape, but they must be anchored to the frame without compromising safety or accessibility. Composite panels provide a sleek, high-performance look with the potential for weight savings, yet they demand careful handling and appropriate resins. Plastic body panels are popular for their durability and ease of fabrication; they can be cut, heat-formed, and fastened with simple hardware. If you’re building a purely artistic model, cardboard, thin plywood, or foam can be sculpted into bold monster-truck silhouettes and then sealed with a protective coating. The visual impact matters as much as the mechanics, so bold color schemes, flame decals, and monster-face motifs become a bridge between engineering and storytelling. Whatever you choose, ensure the panels are securely mounted to withstand the occasional bump and that edges are smoothed to prevent snags or injuries during assembly and play.
Powertrains give the project its heartbeat. For many makers, the simplest route is a non-motorized model that relies on manual propulsion or a pedaled drive. This keeps electrical risk low while teaching core mechanics like drive ratios and gear engagement. If you decide to motorize, a compact DC motor paired with a small battery pack and a switch is a practical and approachable configuration for a kid-friendly go-kart scale. The objective is not raw speed but controlled, predictable performance that aligns with a safe play environment. For more ambitious builds that push toward a real driving experience, a purpose-designed engine and transmission system would be integrated using a chain drive to the rear axle. In any case, the drive system should be mountable with symmetry and alignment in mind, so the wheels stay in line and tracking remains straight on smooth surfaces. Chain drives are common for their reliability and ease of maintenance, but you’ll need proper guards to keep fingers and loose clothing away from moving parts. A thoughtful layout also minimizes heat sources near passengers and battery packs, reducing the risk of discomfort or damage during extended play sessions.
Safety is woven throughout the entire construction, and it deserves attention at every stage. Padded seating reduces jolt impact and adds a touch of comfort that encourages longer, safer play. A low center of gravity is a deliberate design feature that enhances stability; positioning the heavier components toward the ground and the lighter body above helps resist tipping on uneven ground. Beyond seating and stance, consider protective features such as simple bumper elements and rounded edges on exposed hardware. If a mountable roll bar is in the plan, ensure it’s designed to deflect minor impacts without introducing entanglement hazards. Electrical components, when used, must be housed and insulated to deter short circuits, and the wiring should be neatly routed with strain reliefs to prevent fatigue and pinching under load. Even in a scaled-down build, the discipline of safety—guarding moving parts, ensuring secure fastenings, and conducting cautious, incremental testing—serves as the backbone of a project that’s meant to be explored and enjoyed, not rushed or rushed apart by a careless mistake.
In addition to the core materials, several auxiliary components round out a ready-to-build package. The steering mechanism must be simple, intuitive, and reliable. A straightforward rack-and-pinion or a robust linkage setup can deliver predictable response without introducing complexity that complicates maintenance or increases play risk. Pedal-powered controls are a thoughtful option when the build targets younger users; a pedal assembly with a basic braking mechanism teaches cause and effect while keeping the system within a size that’s manageable and safe. Decorative elements—headlights, a steering wheel crafted from a bottle cap or plastic disc, and a driver figure—give the kart personality and a sense of narrative. They are not just cosmetic touches; they’re cues that help children imagine themselves in the driver’s seat, which is part of the educational and imaginative value of DIY builds like this.
The toolkit you assemble for the project will shape the pace and ease of progress. Basic hand tools—wrenches, screwdrivers, pliers, hammers, and a measuring tape—are the workhorse set for most of the assembly, adjustment, and fine-tuning tasks. Cutting and shaping tools like an angle grinder or a hacksaw are indispensable if you’re fabricating a metal frame or trimming composite panels. If you’re welding, a safe, well-ventilated space with proper protective gear becomes essential for any metalwork. Drills and bits, along with a range of bolts, nuts, and washers, enable sturdy, repeatable connections that can be disassembled for later maintenance or upgrades. For composite components, you’ll encounter a different subset of tools, including resin systems, protective gloves, and materials handling supplies. The hands-on nature of the build benefits from organization: labeling parts, pre-assembling test sections, and keeping a clean workspace reduces the risk of lost components and misaligned assemblies.
The process of building—especially when you’re aiming for a design that sits between hobbyist model and functional toy—thrives on a careful balance of imagination and constraint. You’ll find the most satisfying builds are those where the frame is a quiet, unglamorous hero: a frame that carries weight gracefully, resists flex, and aligns the drivetrain with a geometry that ensures stable, controllable motion. The body panels, while striking in appearance, must not compromise the structural integrity or accessibility of the mechanical components. Even the smallest details, like how the wheels are mounted or how the steering linkage travels, reverberate through the ride quality and the child’s confidence in operating the kart. The more you invest in the early stages—evaluating center of gravity, testing wheel alignment, and checking clearances—the easier the later steps become. The goal is not a perfect replica of a full-size monster truck but a thoughtful, durable mini that captures the essence of power, grit, and play.
If you’re seeking ideas and variations from other builders, the broader maker community offers countless examples of how people translate large-machine aesthetics into scaled-down projects. For project updates, inspiration, and a community voice that can help you troubleshoot, the Minitrucks Cala blog provides a reservoir of builds and experiments that can spark new approaches or confirm tried-and-true methods. You can explore more ideas here: Minitrucks Cala blog.
External resources can also illuminate safety practices and design principles that apply across toy-like vehicles and small go-karts. A comprehensive overview of go-kart design and safety basics is available at general reference sources that discuss scale, center of gravity, and drive-train considerations. External resource: https://en.wikipedia.org/wiki/Go-kart
Rugged Beginnings: A Seamless Path Through Building a Mini Monster Truck Go-Kart
The journey from concept to a tangible, playful machine begins with a single idea and a willingness to translate imagination into metal, wood, or plastic. When you set out to build a mini monster truck go-kart, you are not just assembling parts; you are orchestrating a miniature performance that fuses design intent with practical constraints. The target is a vehicle with the bold silhouette of a monster truck—oversized tires, a high stance, and a chassis that communicates both strength and playfulness—without sacrificing safety or usability. Start with a clear mental image of the finished piece, then translate that image into a plan that respects scale, weight, and the limits of your chosen materials. A 1:10 or similar scale can work well for a sturdy, display-worthy model that remains approachable for a first full build. Sketching becomes more than art; it’s the blueprint that guides every cut, joint, and mount. You will frequently return to these sketches to confirm proportions, wheelbase, ground clearance, and the relative size of the driver’s seat compared with the tires. The planning phase is not a one-time step but a continuous loop: design, critique, revise, and test in miniature, then scale up or down as needed.
Material selection anchors the entire process. For the chassis, you can choose between traditional materials like plywood, aluminum, or steel tubing, and lighter, more forgiving options such as thick plastic sheets or repurposed frames from old furniture. Each choice carries a trade-off between weight, rigidity, and ease of fabrication. If you’re new to this kind of project, embrace a modular approach that lets you retrofit or replace sections without dismantling the entire frame. A modular design also helps when you want the vehicle to be non-motorized for safety or purely for display. The wheels and tires are another cornerstone. Large, thick rubber tires give the most convincing monster-truck aesthetic while providing the largest bite on uneven surfaces encountered in a workshop or a backyard play zone. You can source toy-car wheels, convert bicycle tires for a cartoonish effect, or repurpose foam-rimmed wheels for a lighter, springy bounce. If you opt for a motorized version, the power source becomes a design constraint. A small DC motor in the 3–6V range can drive a simple axle or a geared reduction system. A battery pack and a switch complete the core, while a motorized toothbrush kit or other off-the-shelf micro kits can inspire creative wiring and control ideas for tiny builds. Even if you decide to keep the model non-functional, you can implement a simple mechanism that mimics drive input—an optional, visually convincing drivetrain that doesn’t actually rotate the wheels—so your chassis remains safe, quiet, and visually striking.
The chassis and frame are the heartbeat of the project. Beginning with a solid base—often a rectangular or oval plate cut from plywood or lightly milled aluminum—helps you control weight distribution and stability. Reinforcement along the edges with strips of wood or metal creates a forgiving reserve against flexing under load, while a well-braced center reduces wobble when you push the kart across a yard or driveway. The frame should elevate the body enough to showcase the oversized tires and give a sense of ground clearance without making the vehicle top-heavy. When you mount vertical supports, consider the geometry of the suspension and the wheel alignment. Even a basic, toy-like suspension works wonders for a display piece and can be designed with simple springs or elastics that visually evoke real vehicle systems without introducing complexity or risk. Once the frame is assembled, you’ll want to check three core aspects: symmetry, straightness, and the ability of the wheels to rotate freely without rubbing. A small adjustment here—shimmying a frame corner or loosening a binding joint—can turn a stubborn wobble into a smooth roll and a much more satisfying tactile experience when you push the kart across a workshop floor.
Connecting the frame to the steering and wheel assemblies is where the vehicle starts to feel alive. In a scaled model, using a bicycle fork as a steering column offers an intuitive, reliable approach. The steering wheel can be fashioned from a plastic disc, a bottle cap, or a small metal ring, with a simple linkage that translates steering input into angular wheel movement. The alignment angle matters; a gentle bias around 15 degrees improves handling feel and reduces the tendency to crab or drift when you turn. The front wheels should be mounted with a clear path to turning, and the tie rod must be securely joined to each front wheel hub. Precision here pays dividends in how the kart behaves when you move it—both for display and for gentle playground use. The rear axle, meanwhile, anchors the propulsion concept. If you’re building a non-motorized model, the axle serves as a solid anchor point for the frame and a place to attach decorative, non-functional drive elements like a faux chain or a prop-driven propeller to simulate motion in display. For motorized builds, the rear axle is the home of the drive system. A simple chain-and-sprocket arrangement can be used, with careful attention to gear ratio. You’ll need to select sprockets that match the motor’s torque profile and the wheel diameter so the bike-like cadence of motion remains smooth and predictable at low speed. This is not engineering at automotive scale, but the principles—matching torque to load, ensuring smooth engagement, and keeping the drive path clear of the frame—still apply and pay off in reliability.
The heart of the go-kart—the body and shell—offers a canvas for bold character while serving practical purposes. The body can be carved or cut from cardboard, thin plywood, or durable plastic sheets. It’s in this layer that the monster identity comes alive: bold color choices, flame motifs, monster eyes on the grille, and a silhouette that reads as powerful even when stationary. The body should be easy to detach for painting and adjustments, while still providing enough attachment points to be secured to the chassis with screws, clips, or strong glue. Lighting accents—tiny LEDs for headlights or taillights—are a delightful finish that also reinforces the sense that this model is more than a toy. The driver figure, whether a simple silhouette or a small sculpted form, adds scale to the overall composition and humanizes the project. A simple steering wheel, crafted from a plastic disc or repurposed cap, can be mounted at the driver’s seat for visual authenticity and to help set the driver’s eye line and seating position in relation to the steering input. The color palette should celebrate the monster theme: bold reds, electric blues, and dark blacks with contrasting detailing such as flame patterns or monster-themed decals. Polished edges, rounded corners, and attention to joints contribute to a sense of quality that elevates the build from a toy to a crafted model.
Power systems can be as simple or as elaborate as your intent dictates. For a straightforward, safe, non-motorized version, the spectacle comes from the chassis, wheel size, and body styling alone. If you want movement, a modest electric drive is feasible. Mount a small DC motor toward the rear with a direct or geared drive to the rear wheels. Secure the battery pack in a location that doesn’t disrupt balance or interfere with pedal or steering clearance, and route the wiring with strain relief to avoid jostling. Keep the electrical system compact and accessible, with a clearly labeled switch and fusing for safety. If you’re drawn to a gasoline or more robust powertrain, be mindful of dimensions, weight, and the safety implications of fuel and exhaust. Even in a simplified miniature, a muffler and firewall can be practical additions to simulate real-world design while maintaining a safe, compact package. A careful safety plan extends to how you manage hot surfaces, sharp edges, and exposed wires, especially if the kart will be handled by children. The general rule is obvious but essential: design for gentle interaction, test thoroughly on a flat, open surface, and never operate near crowds or indoors. The first test drive should be at a very slow pace, in a large area free of obstacles, to observe how the balance shifts with wheel engagement and steering input. If the kart veers or drifts, you can fine-tune the tie-rod length, adjust the seat position to better align the driver’s weight with the vehicle’s center of gravity, and ensure that all fasteners have some degree of redundancy or locking mechanism to prevent loosening during use.
As with any hands-on project, the finishing touches matter as much as the core structure. Polish the assembly with careful sanding to remove sharp corners, then seal or paint the body to protect surfaces and enhance durability. Decals, stickers, and a few personal touches help transform a generic frame into a characterful mini monster truck. The final aesthetic decisions—where to place a pair of headlights, whether to add a roof spoiler, how to dramatize the monster theme—are the hinge moments of the build, where craft skill blends with storytelling. Even the smallest elements can carry personality: a curved roll bar, a painted grille, a set of faux exhaust pipes projecting from the side, or a lighted cockpit can all contribute to the overall impression of power and attitude. The result is a machine that not only conveys the look of a full-size monster truck but also invites hands-on play and experimentation. In that spirit, it’s worth exploring modular add-ons or alternative configurations so that the same basic chassis can be retooled into a different monster truck expression. A modular approach invites experimentation without requiring a total rebuild, giving you a platform for ongoing creative exploration, improved stability, and safer, repeatable assembly.
The design ethos behind a mini monster truck go-kart is not just about the mechanical assembly. It’s a narrative of how simple components can come together to create something that feels alive, expressive, and fun to operate. Your process becomes a conversation between the cardboard sketches that started it all and the tangible weight of the finished model. In that exchange, you learn how weight distribution, wheel alignment, and simple drive concepts influence the feel of the ride, even at miniature scales. If you want to explore additional perspectives on vehicle customization and modular builds, you can look to broader DIY build guides and project-oriented accounts that emphasize adaptability and safety. For a broader view on chassis customization and practical design considerations, see the Godzilla Truck Camper customization guide, which offers insights into how enthusiasts think about scale, weight balance, and modular attachment points in bold, imaginative builds. Godzilla Truck Camper customization. This reference can help you frame a consistent approach to framing, mounting, and aesthetic detailing while you keep the project focused on a safe, enjoyable toy that still delivers the thrill of a monster-truck presence.
In practice, the assembly process becomes a fluent, iterative practice rather than a rigid sequence. You begin with the planning, move through chassis construction and wheel mounting, add the body and controls, and finish with a careful safety check and test drive. Each stage informs the next, and every adjustment you make strengthens not only the vehicle’s structural integrity but also your confidence in handling tools and materials. The approach emphasizes safety, simplicity, and enjoyment, recognizing that the most successful mini builds balance accessible techniques with a clear, bold design language. When you plate the final layer of paint and attach the last decal, you have created more than a prop—you have a working, demonstrable model that embodies the Monster Truck spirit in a compact, playful form. The chapter ends not with a conclusion but with a doorway: a doorway into refinement, customization, and further experimentation as you tune balance, aesthetics, and performance in pursuit of a build that remains uniquely yours and ready to roll in a safe, open space.
Safe Builds and Reliable Tests: Practical Safety Guidelines for Your Mini Monster Truck Go-Kart
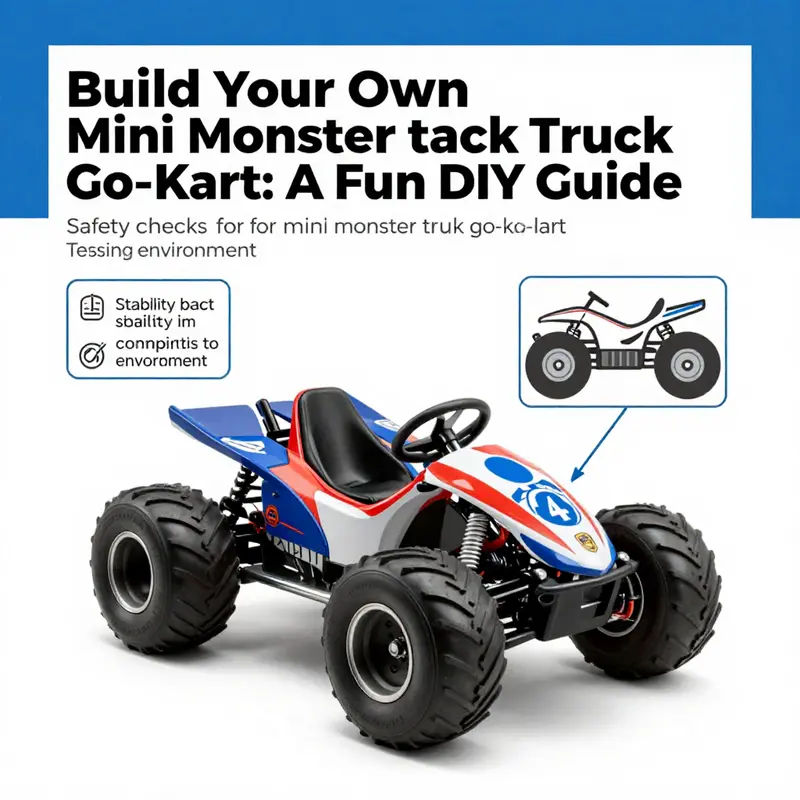
Safety & Testing: Practical Guidelines
Building a mini monster truck go-kart is part craft, part engineering, and all about responsibility. Safety must shape every decision, from frame material to final test run. Treat the build like a small vehicle project: design for stability, select components that tolerate real loads, and test methodically. This chapter walks through the safety principles, inspection routines, testing phases, and practical precautions that keep riders secure and projects dependable.
Start with the design and compliance mindset. Even for a homemade or scaled model, adopt the discipline of standards-based thinking. Look to commonly accepted toy and small-vehicle safety concepts: structural integrity, predictable handling, secure restraints, and easily operated braking. While you might not pursue formal certification, designing to those expectations reduces failure risk. A low center of gravity, robust anchoring points, and clear weight limits are non-negotiable elements.
Choose materials that match intended use. For a display piece, lightweight foam and cardboard can suffice. For a rideable kart, favor durable metals for the chassis, dense hardwood or plywood for mounting plates, and impact-resistant plastics for panels. Fasteners should be grade-appropriate: use bolts with locknuts or threadlocker on critical joints. Avoid relying solely on glue where loads are transmitted. When you repurpose parts, inspect them for fatigue, rust, and cracks before installation.
Design the geometry for stability. Oversized tires look authentic, but wheel placement and track width determine roll resistance. A wide track and longer wheelbase reduce tipping during turns. Keep heavy components such as batteries or engines low and centered in the chassis. If you add a raised cabin or tall decorations, offset that height by lowering mass elsewhere. Small shifts in the center of gravity can dramatically affect handling.
Seating and restraints should match rider size and expected forces. Even for young users, a padded seat with side support reduces abrasion and helps maintain rider position. For powered karts, incorporate a simple lap belt or quick-release harness rated for the load. Padding at contact areas prevents bruising during abrupt stops. Ensure seat mounts are bolted to the main frame, not just cosmetic panels.
Prioritize dependable braking. Brakes must be intuitive and effective at the kart’s top speed. Mechanical drum, disc, or band brakes are all viable on small builds, provided they are sized correctly. Test brake fade by running repeated stop cycles during testing and letting components cool between runs. Pedal placement should be ergonomic for the rider. For very small electric builds, consider using a speed-limited motor controller paired with a mechanical parking brake.
Clear labeling and weight limits reduce misuse. Mark the maximum rider weight and appropriate ages on the chassis or a durable tag. That simple step prevents overloading and misapplication. Include basic operating instructions near the controls: how to start, how to stop, and what to avoid. These reminders are essential when others use the kart.
Electric and combustion power both need careful handling. For electric drives, use battery enclosures that ventilate heat but protect terminals. Secure batteries with straps and use proper fuse protection sized to the motor and wiring. Keep wiring neat and supported to prevent chafing. For small combustion engines, design a guarded exhaust path and keep fuel tanks away from heat and pinch points. In either case, include an accessible master cutoff switch that instantly disables power in an emergency.
Wiring and electrical safety deserve specific attention. Use insulated, appropriately gauged wire and professional-grade connectors. Solder joints should be mechanically secured and insulated. Avoid routing wires across moving parts or near sharp edges. If you add LEDs or accessory electronics, place their wiring away from steering linkages and tires. Test circuits at low power first and progressively add load while monitoring for heat.
Testing should be phased and methodical. A staged approach reduces risk and exposes issues in manageable increments. Begin with a static inspection: check fasteners, welds, mount points, and alignment. Confirm wheel bearings spin freely and axles are straight. Verify that steering travel does not allow terminal binding. Check for any sharp edges and remove them with files or sandpaper.
Next, perform low-speed functional tests without a rider. Roll the kart by hand to feel for binding and to hear unusual noises. Engage the drive system under no-load conditions. For electric drives, run the motor at short intervals while watching for heat and vibration. For combustion engines, observe idling stability and listen for exhaust or intake leaks. During these early runs, wear safety glasses and gloves and keep a fire extinguisher nearby if fuel is present.
Introduce a controlled ride test. Have a volunteer of the intended size and weight enter the kart while a helper stands by. Choose a flat, obstacle-free surface for this stage. Start with slow speeds and simple maneuvers. Test braking distances and steering responsiveness. Observe chassis flex and listen for creaks or loose hardware. After each run, re-check critical fasteners and mounting points. Tighten any fasteners that loosened.
Conduct a load and endurance test next. Simulate extended use by repeating runs and gradually increasing duration. Monitor temperatures on motors, brakes, and bearings. Check for fatigue cracks in high-stress areas. Watch for signs of rubbing on tires or body panels. If you added suspension elements such as springs or rubber bands, evaluate their rebound and long-term deformation. Replace or reinforce elements showing wear or creep.
Speed tuning requires careful limits. For children, keep top speeds modest. Use gearing, motor controller limiting, or governor techniques on engines to cap maximum velocity. Test how the kart behaves near that limit. Verify that steering remains controllable and that brakes stop reliably from that speed. If you spot twitchy handling or sway, tune tire pressure, redistribute weight, or widen the track.
Plan for emergency situations. Teach riders how to use the cutoff switch, how to execute a controlled stop, and where to place their hands. Include simple failure modes in tests: what happens if a tire loses pressure or a chain slips. Make sure the kart remains predictable under single-point failures. Design redundant safety features where possible, such as a secondary tether kill switch for powered builds.
Maintenance and inspection cycles should be routine. Before each use, perform a quick checklist: fasteners, tire pressure, steering play, brake operation, and battery charge. Weekly or monthly, depending on use, perform deeper inspections. Look for weld cracks, corrosion, bearing wear, and electrical insulation degradation. Keep a maintenance log to track replacements and repairs. That record helps spot recurring failures and supports safer future builds.
Personal protective equipment matters. Helmets are mandatory for any moving kart. For powered runs, add gloves, closed shoes, and eye protection. For younger riders, consider knee and elbow pads. Protective gear reduces injury risk and encourages confidence while learning control. Always supervise children and never allow unsupervised use outside recommended age limits.
Safety labeling and documentation complete the package. Include a simple user manual with operating instructions and emergency procedures. Add a durable tag on the chassis with the build date, recommended rider weight, and the builder’s contact information. This documentation is useful for handoffs, lending, or selling the kart later.
If you decide to buy parts or prebuilt kits, favor suppliers who provide safety documentation. Look for evidence of third-party testing and clear technical specifications. When sourcing inspiration or community advice, consult reputable build guides and checklists. For broader context on small truck and mini-vehicle builds, see the project blog that covers related mini truck customization and safety insights: Mini Truck SoCal blog.
Finally, always treat testing as an iterative process. No single test guarantees safety. Each ride reveals new data to refine the design. Expect to make adjustments and upgrades. Approach every modification with the same safety-first mindset. That approach turns a fun DIY project into a durable, enjoyable mini monster truck go-kart the whole family can trust.
External reference: https://www.alibaba.com/product-detail/Mini-Monster-Truck-Go-Kart-with-engine-hot-sale_1600755912166.html
Final thoughts
By embarking on this project, you’re not only creating a fun and engaging mini monster truck go-kart but also honing valuable skills in design, engineering, and problem-solving. Whether for personal enjoyment or as a venture to share with others, this build can spark creativity and bring joy to both you and any lucky drivers. Remember to keep safety at the forefront as you test your creation, and enjoy the rewarding experience of seeing your mini monster truck come to life. Have fun, and happy building!