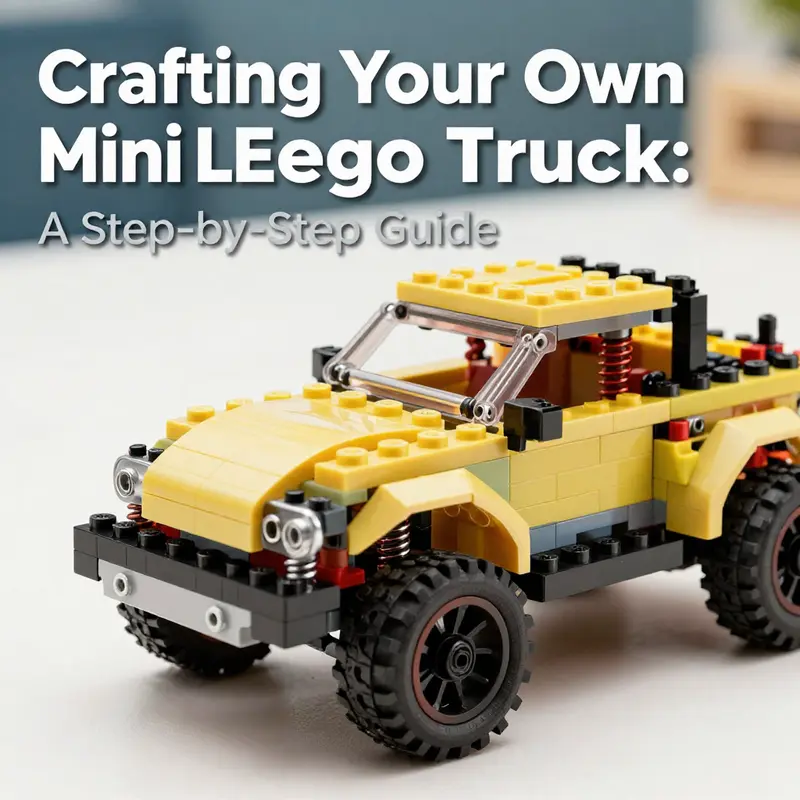
Have you ever wanted to dive into the world of LEGO building with a focus on vehicles? This guide is perfect for you, whether you’re a passionate mini truck enthusiast, a local business owner looking to spark creativity, or a resident who enjoys unique hobbies. Here, we’ll weave together the intricate steps involved in creating a mini LEGO truck, enabling you to explore your creativity. Each chapter will take you through vital components of the build, from constructing the chassis to attaching the wheels. Along the way, you’ll gather tips that make the process enjoyable and straightforward, ensuring a successful outcome.
From Ground Up: Designing a Stable Chassis for a Mini LEGO Truck
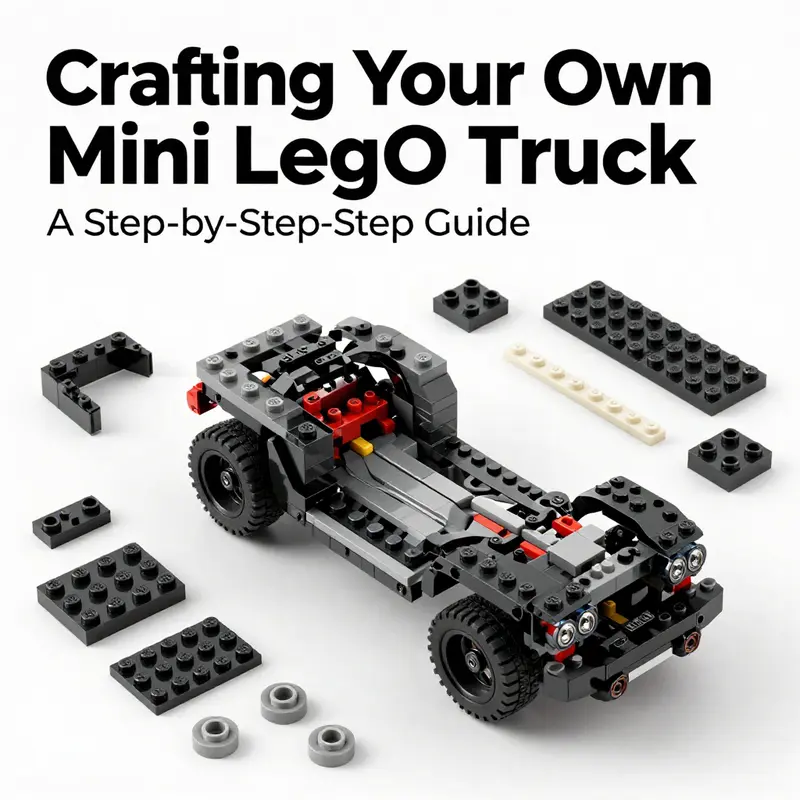
Designing a mini LEGO truck begins with a single, sturdy truth: the chassis is the vehicle’s backbone. It determines how the rest of the model will behave, from wheel alignment to the way the body sits atop the frame. A good chassis should feel solid in your hands, respond predictably when you press the tires, and serve as a reliable platform for the detailing that follows. The first decision centers on a baseplate size. An 8×8 plate offers a broad, forgiving canvas that accommodates a symmetrical, evenly distributed frame, while a 6×6 plate keeps the footprint compact and nimble. Either choice can work, but the guiding principle remains the same: symmetry and balance. When you lay out the main frame, you want to imagine a lightweight but rigid skeleton that can withstand lateral stress as the truck moves and as you add detail above it. The frame usually uses long rectangular bricks—1x4s or 2x4s—placed in parallel lines to form the long sides of the chassis. The goal is a clean rectangle that resists twists, with the rails parallel to each other and aligned to the wheel axes. This alignment isn’t cosmetic; it’s essential for wheels to track correctly and for the body to sit evenly without tilting on one side. The initial frame should feel forgiving to assemble, but precise enough to keep the wheels parallel to the base. As the frame takes shape, the placement of axles becomes the hinge point of performance. In real vehicles, axles are the link between power, wheels, and suspension. In a mini LEGO truck, you translate that idea with axle pieces anchored at each end of the frame. The axles must be positioned so that the wheels lie directly under the wheel wells, creating clean, natural lines along the sides of the chassis. If the axles are too far inward, the wheels will tuck under the body, narrowing the stance and making the truck look unsettled. If they’re too far outward, you risk interference with the body panels and precious little clearance for the tires to rotate freely. To avoid this, you measure twice and click once, adjusting the axle position until there is equal overhang on both sides and the wheels have full freedom to spin without rubbing the chassis. The next layer of mindfulness is wheel mounting. The wheels need to rotate freely and True to the chassis, and you can capture this by using axles that are long enough to protrude beyond the wheel hubs without binding. At this stage, some builders add small cross-braces beneath the chassis; these serve as invisible supports that add stiffness without adding much weight. Think of them as the undertow of the boat: hidden, but essential to keep everything together when the model faces real-world handling on a table or a shelf. If you want to introduce a touch of realism, consider optional flexible elements like rubber bands or spring-loaded components. These little parts are not for suspension in the same sense as a full-size truck, but they can help absorb tiny impacts when the model is bumped or nudged, reducing the chance of part separation. They also simulate a suspension feel, which gives the truck a more dynamic presence. When you begin the task of attaching wheels, there are two practical reminders that make a big difference. First, ensure the wheels are oriented so the tires point straight ahead. Misalignment here is immediately noticeable and can lead to wobble or uneven wear across the tread, even in a tiny model. Second, test spin. If a wheel hesitates or rubs against a neighboring part, pause and adjust the axle spacing or the new cross-brace you added. It’s better to rework a small section now than to discover the issue after you’ve built the rest of the truck around it. The wheel wells deserve careful shaping because they determine how cleanly the body sits over the tires. The initial guide suggests using four 2×2 round tiles to define the wheel-well areas with precision. This approach keeps the wheel arches visually tidy and helps you gauge the relative height between the tires and the bed of the truck. The wheel wells also influence the side panel layout, especially in the front where the body begins to take its character. As you plan the rest of the chassis, it’s helpful to consider support beams that can add rigidity without bulking up the model. Small bricks or plates can form cross braces that distribute stress from the center of the frame toward the ends where the axles anchor. Even in a small model, those subtle reinforcement lines improve durability, making the chassis less prone to flex, particularly when you handle the truck during play or demonstrate the movement of its wheels. The practical payoff of these design choices becomes evident when you start testing the overall feel of the model. A chassis that is straight, level, and rigid pays dividends later when you attach the body, the cargo area, and any decorative cab features. A true base reduces the risk that the truck will tilt or rock on uneven surfaces. It also simplifies aligning the cab with the bed so that the line of the roof remains visually continuous along the length of the truck. The cycle of refinement often repeats itself as you add parts above the chassis. You’ll discover small misalignments you hadn’t anticipated, and that’s normal. The best builders approach these moments with a measured, iterative mindset: adjust one component, test the fit, and reassess. In practice, this means moving a plate here, nudging an axle there, or exchanging a hinge for a slightly longer brick to gain the needed clearance. The more deliberate you are, the more natural the flow becomes, and the less you will find yourself undoing work later on. A well-designed chassis does more than support the body; it sets the stage for the aesthetic that follows. The idea of symmetry should echo in every subsequent step, from the placement of side mirrors to the alignment of the cargo area. If the base plate allows, you might even tuck a shallow inner rail along the length of the chassis to mimic the frame rails of a real vehicle. These tiny additions are not always visible once the truck is complete, yet they contribute to a sense of authenticity that elevates a mini build from a simple toy to a convincing scale model. When you contemplate the role of this chassis in the broader build, you may want to explore related chassis-building ideas and examples in a familiar resource hub that hosts a wide range of builds and tips. Minitrucksocala blog. This internal reference is a reminder that you are not alone in the process; other builders share the same instinct to start with a solid foundation and layer on complexity piece by piece. If you are curious about how different chassis configurations affect the final silhouette or about how to adapt the same principles to a longer bed or a heavier truck, the broader collection of guides can provide a wealth of comparative perspectives. As you move beyond the chassis and into the body and cab, you will notice how the stability of the frame informs the lines and corners you craft above it. The chassis is the rulebook for the rest of the build: if your base is square, level, and well-supported, the body tends to flow more gracefully, with fewer compromises in density and symmetry. And when you finally cover the top with the planned plates—the sheet that unifies the entire chassis with its exterior—the result is not merely a hollow shell but a cohesive mechanism with tactile heft and a satisfying, dependable movement. For builders seeking a deeper technical frame of reference, the international LEGO community often references official building diagrams and guidelines. While you might not replicate every aspect of a professional set, the underlying principles—careful axle alignment, symmetrical framing, and intentional reinforcement—translate across all scales and styles. The most meaningful part of this process is the moment when the chassis finally feels right: you can flex the model gently, roll the wheels with confidence, and sense that the truck will carry its intended load and purpose without wobble. That sense of readiness is what transforms a routine assembly into a thoughtful, enjoyable build experience. When you look back at how the chassis supports the entire project, you’ll appreciate that choosing the base, aligning the axles, and shaping the wheel wells aren’t mere preparatory steps; they are the practical discipline that makes a mini LEGO truck come alive with assurance. This approach keeps the door open for experimentation later, should you decide to introduce a more rugged style or a lighter, sportier profile, while still preserving core stability. As you transition to building the body and cab, remember that each added layer can be hinged on the chassis, kept in place by the careful use of plates, brackets, and carefully positioned studs. Will you favor a compact, square silhouette or a longer, more expansive bed? Either choice begins with the chassis you’ve laid down with such care, because every subsequent piece rests on this foundation. For those wanting a broader sense of how chassis choices ripple through the entire build, the broader ecosystem of building tutorials and instruction resources is a convenient companion. And when you pause to test your progress, take a moment to appreciate the sense of craft that comes from having a solid base beneath every careful line and every chosen detail. The chassis is not merely a frame; it is the character of the truck you are going to bring into the world, stabilized, believable, and ready to carry the story you intend to tell with bricks and imagination. External reference: https://www.lego.com/en-us/service/buildinginstructions
Shaping the Body and Cab: Forming a Sturdy, Detailed Mini LEGO Truck
Shaping the Body and Cab: Forming a Sturdy, Detailed Mini LEGO Truck
Begin by placing a 6×6 plate as your working foundation. This single piece gives the build a compact footprint and a firm starting point. On this base you will layer strength and shape, so double-check its orientation before adding parts. Work deliberately: every plate, bracket, and tile you add will either lock the structure or introduce a weak point. Keep pieces snug and aligned.
Start the lower frame by attaching 1×4 plates along the longer edges of the 6×6 base. These act as the truck’s sills and distribute weight to the center. Use 2x2x2 dish pieces to create a slightly recessed lower frame profile. These curved dish elements soften the truck’s silhouette while providing anchor points. For added rigidity, place 2×4 dish pieces on each side where the cab will rise. The dishes help the sidewalls resist twisting when the truck is handled.
Raise the cab area using 1×2 corner bricks. Stagger them to form the basic front silhouette. Corner bricks are great for compact builds because they give the appearance of a larger, continuous curve. Layer one or two levels, depending on how tall you want the cab to be. Keep the front slightly lower than the windshield line to mimic real truck proportions. Inside the cab, install a 1×3 seat piece. This seat serves two roles: it provides an interior detail and it acts as an internal brace that holds the front walls together.
Define the windshield and roofline using 1×4 and 2×2 flat tiles. These tiles create a clean, compact glass area without needing large transparent elements. Place the tiles at a slight backward slope by offsetting the tiles one stud back on the plate below. A small backward angle gives the truck a dynamic stance and helps the roof tiles lock into place with the bricks behind them. If your color palette includes a different shade for the roof, use it to create visual contrast.
Construct the chassis framework under the floor with 1×6 beams and 1×2 brackets. These beams bridge the front and rear, aligning the cab and cargo area. Attach the brackets to the underside of the base plate and clip them under the 1×6 beams. This method creates a reinforced spine that resists bending when the truck is rolled or carried. Place a 1×3 plate or a thin tile between beams for extra cross-bracing. The goal is a chassis that feels rigid in hand, not floppy.
For the hood and grille, incorporate a curved 1×6 brick at the front. This element creates a streamlined nose and a recognizable truck front in miniature scale. Surround the curved brick with 1×4 plates and 1×2 wall elements to form the grille and bumper detail. Use small tiles to represent vents and trim. A 1×1 light element placed on the side provides a headlamp detail. On the opposite side of the cab, add a tiny flat 1×1 or 1×2 tile offset as a rearview mirror. These tiny details read surprisingly well at mini scale.
Focus on wheel alignment next. Secure wheel axles through 2×2 round tiles fitted as wheel wells. These round tiles serve as tidy housings that keep axles centered. Insert short axle pins through the tiles into the chassis beams. Test the wheels early. They should roll freely but not wobble. Misaligned axles will make the truck veer or drag when pushed.
As you build, think like an engineer and a modeler. Alternate structural layers with decorative layers. Plates lock the frame; tiles tidy the surfaces. Bricks and brackets create vertical strength while tiles smooth the horizontal planes. Where possible, overlap seams. Offsetting plate seams across two or three layers prevents a single seam from running the full length of a wall. This simple technique multiplies the model’s durability.
Detail the cab interior minimally but purposefully. The 1×3 seat can be flanked by a thin tile to represent a dashboard. A printed 1×1 tile or a small sticker can stand in for gauges. Keep the interior simple; at this scale, less is more. Visible clutter often reads as noise, not realism. Instead, aim for one or two readable cues that tell the viewer what they see.
When you connect the cab to the cargo area, use a 1×6 base or a combination of 1×4 and 1×8 plates to bridge the gap. This bridge must be stiff. Reinforce it with internal plates or a centered beam. The cargo’s side panels can be built from 1x3x3 door panels or similar panel elements. These panels give an instant sense of scale and let you build a boxy bed quickly. Cap the top with 1×4 and 1×8 plates for a neat lip. Adding a transparent orange 1×2 plate and a small 1×1 plate in the center of the cargo’s rear adds visual depth and a taillight illusion.
Balance is important. Make sure the front hood and rear cargo area share the load across the chassis. If the rear is too heavy, add a thin reinforcing plate under the front to even the weight. If the front dips, consider shifting decorative elements rearward or adding a small ballast plate inside the cab under the seat. Test the truck on a flat surface to ensure the wheel contact points are on the same plane.
Refine the roof and windshield trim. Use 1×4 flat tiles along the roof edge to simulate trim. If you built a slightly sloped windshield, cap the slope with a 4x6x2/3 plate across the top. This larger plate ties the front and rear together elegantly. It also provides a clean surface where you can attach accessories or decals later. Ensure the top plate does not interfere with wheel clearance.
Final detailing gives your mini truck character. Attach a tiny light to the cab side, tweak the mirror angle, and add grille studs if available. If you want a tougher look, use darker colors on the bumper and sills. Lighter colors on the roof and cabin will catch the eye. Avoid applying too many small elements that can fall off during play.
Part substitutions are often necessary. If you lack a curved 1×6 brick, stack smaller curved slopes to approximate the shape. If dish pieces are unavailable, use round tiles paired with micro studs to create recessed wells. Be creative but prioritize connection strength. A substitute that looks right but falls apart is worse than a simpler, sturdier solution.
Throughout assembly, keep symmetry and clean alignment as your guiding rules. Misplaced studs or rotated tiles will stand out at this scale. Pause frequently to rotate the model and inspect it from different angles. Small misalignments are easier to correct early.
A well-built mini truck should feel cohesive. The cab, chassis, and cargo area should look like parts of a single vehicle rather than separate attachments. Use matching sills, repeating tile patterns, and a consistent color palette to unify the model.
For inspiration on compact truck styling and assembly rhythm, consult a visual step-through that demonstrates similar principles in action. A clear video guide can show the exact piece placement and timing that text descriptions sometimes miss: https://www.youtube.com/watch?v=5Rl7Q9WqFmE
If you want additional ideas for customizing proportions and finishes, the Mini Truck SoCalA blog has a range of small truck and camper conversions to study. Explore the Mini Truck SoCalA blog at https://minitrucksocala.com/blog/ for related builds and customization tips.
With the body and cab complete, you will have a sturdy, attractive mini LEGO truck. It will roll smoothly, hold up to handling, and offer a pleasing level of detail. The next step will be to finalize wheel suspension and cosmetic touches to finish the model for display or play.
Designing and Building the Cargo Area for Your Mini LEGO Truck
Designing and Building the Cargo Area for Your Mini LEGO Truck
The cargo area is where a mini LEGO truck gains purpose and character. It defines how your truck interacts with other builds. It also sets the stage for play scenarios and display detail. Begin with a clear plan. Picture the items your truck will carry. Small crates, a tiny car, or an assortment of city parcels change how the bed must be sized. Decide whether the cargo will sit flush with the chassis floor or require raised rails or pallets. This choice determines the base plate and the height of the side walls.
Start the physical build with a solid rectangular base. A 1×6 base plate provides a compact but stable foundation for most mini trucks. When space is tight, use overlapping 1×4 and 1×2 plates to create a reinforced floor. Stagger these plates like brickwork to prevent weak seams. For a bit more rigidity, sandwich a thin plate under a slightly larger one to create a hidden lip that locks into the chassis. If you want the cargo area to be removable, leave a one-stud gap around the base so it snaps on and off without stress.
Once the floor is set, focus on containment. Low walls made from 1×2 or 1×4 bricks keep items from rolling out during play. Build walls at least two bricks high for secure storage. For a cleaner look, cap these walls with 1×4 tiles. If you prefer a rugged style, use textured grille tiles or studs-up elements to mimic metal slats. Consider integrating vertical studs or clip pieces into the inner wall. These work as anchor points for cargo, straps, and accessory panels so you can secure loose pieces.
A rear door or ramp adds function. Hinges are the most straightforward solution. Attach a pair of hinge plates to the back wall and connect a flat plate for the ramp. Keep the ramp width within one stud of the truck bed to avoid catching on the chassis. If hinges feel fragile, build a removable ramp from thin plates and store it inside the bed when not in use. Slopes can simulate a fold-down tailgate. Use 1×2 slopes or a 1×4 slope to create a believable tailgate line without adding weight.
Think about the cargo floor. A textured bed makes a build feel deliberate. Use thin tiles in alternating directions to suggest a wooden deck or a bed liner. Grille tiles convey a non-slip surface. If you want to mimic palletized cargo, use 2×2 tiles placed in a grid and leave small gaps between them. This gives the impression of separate pallets without higher complexity.
Functional detail enriches storytelling. Build a small loading zone near the cab using a flat 1×2 plate to act as a workbench. Add a tiny winch by mounting a clip on the inner wall and threading a short bar through it. For a conveyor-like effect, install a few hinged tiles that tilt slightly. These small features make loading and unloading feel dynamic.
Use miniature accessories to give scale and purpose. Tiny crates, 1×1 round plates to represent barrels, or a single small vehicle fit neatly in a mini bed. DUPLO number blocks or colorful small bricks simulate sorted cargo or parcels. If you plan to swap cargo frequently, add a simple peg system. Insert a 1×1 round plate with open stud as a securing peg and use small rings or clips on the cargo pieces to hook onto it. This system allows for quick changes without disassembly.
Balance is crucial. Keep heavy elements centered over the chassis to avoid tipping. Place dense cargo items close to the truck’s centerline and near the axles. Lightweight decorative pieces can sit toward the rear. If your mini truck includes springs or suspension, consider how shifting weight affects movement. A low-mounted cargo floor lowers the center of gravity and improves handling.
Reinforcement is often overlooked in small builds. Connect the top plates of the cargo walls with 1×4 and 1×8 plates across the bed. These ties prevent the sides from flexing when the truck is moved. For added strength, use a 4x6x2/3 plate across the truck’s top to unify the structure. That plate will double as a protective cover and as a spine that absorbs torque.
A thoughtful cargo area blends decoration with realism. Add stickers or printed tiles to represent labels, hazard markers, or company logos. Avoid covering studs needed for functionality. Instead, place decorative tiles on side panels or on the removable ramp. If you want weathering or a used look, alternate tile colors subtly to suggest patched panels.
Integration with other playsets expands possibilities. Create removable pallets sized to match larger sets. Design the bed so that modular pieces slide in and out. Consider how a ramp mates with a loading dock, or how a pallet fits under a forklift from another build. This interoperability increases the value of a small truck in a larger scene.
For those who like technical detail, certain parts yield consistent results. A 1x3x3 door panel can form a neat side, while 1×6 base plates create a stable floor. Transparent 1×2 plates and 1×1 plates make great tail lights or reflective markers when placed in the middle of the side walls. A 1×4 plate across the top works well with a 1×8 plate for reinforcement. These combinations form a toolkit of reliable connections for a compact cargo bed.
When finishing the cargo area, test functionality under realistic conditions. Place the intended cargo, close the tailgate, and shake the truck gently. Watch for pieces that shift or walls that bow. If anything moves, add a reinforcement plate or an extra stud connection. Try loading and unloading the ramp repeatedly. Hinges that loosen too quickly should be replaced with a removable ramp until stronger parts can be used.
Finally, look beyond the build itself. Small touches create narrative potential. Add a tiny clipboard on a stud for a driver’s manifest. Install a 1×1 brick with a printed pattern to represent a GPS or meter. Color-code cargo with subtle palettes to hint at different goods. These touches transform the bed from a storage platform into a story engine.
For inspiration and practical examples, explore community builds and blogs that focus on mini trucks and customization. A concise resource hub with ideas and customization stories can offer new angles for your design. You can find broader mini truck content, including customization and flatbed ideas, at the Mini Truck Socala blog.
For a visual reference showing how cargo trailers and modular storage are executed at a larger scale, consult the official reference linked below.
https://www.lego.com/en-us/city/sets/60440-yellow-transport-truck
Fitting the Wheels: Secure, Smooth, and Right-Sized for Your Mini Brick Truck
Fitting the Wheels: Secure, Smooth, and Right-Sized for Your Mini Brick Truck
Attaching wheels to a mini brick truck is more than a final step. It defines how the model rolls, how stable it feels, and how it behaves when bumped or pushed. A good wheel fit transforms a tidy chassis into a convincing, functional miniature. This chapter explains how to choose the right parts, prepare the chassis, fit axles and wheels cleanly, and troubleshoot common problems so your truck is both sturdy and playable.
Begin by identifying the axle and wheel pieces that match the scale of your truck. Mini trucks need compact axles that sit flush with the chassis. Look for short axles or thin rod elements that will pass cleanly through the chassis holes. If your parts inventory includes bushings, clips, or short pins, set them aside; they will help keep the axle centered and prevent lateral play. Take time now to lay out the tires and rims. Rubber tires give better traction and a realistic look. If you only have smooth disks, they will roll, but they may slip and look toy-like. Choose wheels that do not protrude too far past the fenders; a slight overhang can read as scale, but too much will snag on edges.
Next, check the chassis where axles will pass. If you built the frame using small plates and corner pieces, confirm that the wheel wells are defined and unobstructed. Four round tiles or similar circular elements can mark wheel well locations and provide a tidy surface around the axle entry. Ensure interior plates that act as seats and supports do not crowd the axle path. An axle should enter cleanly, pass through any central supports, and exit with symmetry on the other side. If the axle rubs a plate edge or a stud, adjust the internal layout. Swap a 1×3 plate for a 1×2 or move a seat plate by one stud to clear the path.
When the path is clear, install the axle carefully. Push it through the chassis holes in a straight line. Avoid forcing the axle at an angle; this can bend small rods or wear connection points. The axle should sit snugly but not jammed. If the chassis uses bushings or clips, slide them onto the axle before seating it into the final hole. These parts lock the axle in place and limit lateral movement. If your build includes spring elements for suspension, test-fit the spring assemblies before final wheel placement. Springs add realism and absorb small bumps, but they also change the axle height. Fit springs early so the wheels align with fenders when compressed.
Mount the wheels one end at a time. Place the wheel onto the axle, pushing until it meets resistance. If a wheel slides too far to the center, add a small spacer or bushing to hold it at the proper distance from the chassis. Spacers prevent rubbing on wheel wells and keep the wheel centered in its arch. On the opposite end, repeat the process and check wheel alignment. Wheels must be parallel and sit level under the chassis. Rest the truck on a flat surface and look for tilt or wobble. If a wheel tilts inward or outward, remove it and check for crooked axles, uneven spacers, or mismatched wheel types.
Spin each wheel by hand to check free rotation. A well-mounted wheel should turn smoothly with a gentle, even motion and not wobble. If rotation is rough, inspect where the axle contacts the chassis. Friction points often occur at plate edges or where studs protrude into the axle path. Small adjustments, such as moving a plate or adding a thin plate as a shim, will remove contact and restore smooth spin. For models with rubber tires, check that the tire bead seats evenly on the rim. Mis-seated tires look off and can cause wobble even when the axle is straight.
Secure connections are vital for durability. If a wheel feels loose, determine whether the axle is seated correctly or the wheel itself lacks a locking element. Many small builds need a tiny bushing or clip on the outer axle end to stop the wheel from sliding outward. If your parts inventory lacks a dedicated bushing, a 1×1 round plate or a thin connector can act as a spacer and keep the wheel in place. Avoid adhesives or permanent fixes; modularity is a strength of brick builds. Use parts that hold under play but remain removable for repairs.
When your truck uses suspension parts, test the travel range. Compress and release the springs to ensure they do not bind against other bricks. The axle should move smoothly up and down without contacting the cargo floor or the underside of the bed. If compression causes the wheel to rub the cargo wall, raise the mount point by one plate or add a short spacer between the spring and the chassis. Suspension improves realism, but only when it moves freely.
Steering is rare on micro trucks, but if your design includes it, check the pivot points and linkages. Steering linkages must clear the frame and not interfere with the body or cargo area. Tight pivot joints give precise steering but can bind. Loosen a connecting clip or add a tiny spacer for smoother motion. If the truck carries a load on its flatbed, test drive it with and without cargo to confirm the axles carry the weight evenly. Uneven loading can tip the truck and strain one axle more than the others.
Attention to wheel clearance is crucial for a clean build. The top plate that covers the chassis—often a 4×6 plate—can interfere with wheel arcs if placed too low. Before finalizing the top cover, check wheel rotation under the mounted plate. Raise the cover by one thin plate if you see any contact. Similarly, the cargo area sides and doors must not brush the tires. If the wheels rub the cargo walls, slightly reposition the side panels or use narrower wheels.
Fine-tuning brings a professional look. Align wheel hubs so the tread pattern and rim face the same way on both sides. Symmetry matters; a mirrored pair of wheels reads as intentional. If you use different wheel styles on front and rear, balance them visually. Add small touches such as side mirrors or a tiny light near the wheel well to frame the wheel visually. These details draw attention away from minor imperfections and make the truck feel complete.
Troubleshooting common issues is a key skill. If a wheel wobbles, first remove it and check for a bent axle. Replace the axle if needed. If the wheel is loose but the axle is fine, add a bushing or spacer. If wheels scrape the body, check vertical clearance and adjust plate heights. If the axle binds, inspect for studs or plates inside the path and adjust them. Keep a few spare bushings and thin plates handy; they solve many small problems quickly.
During play, periodically re-check wheel security. Repeated bumps can loosen bushings and shift spacers. A quick rotation test and wheel wiggle will catch emerging problems before they become damage. If you plan to transport the model often, consider reinforcing the axle mounts with an extra plate layer beneath the top cover. This reduces flex and keeps the axle aligned.
For visual reference and set-specific guidance, consult the official build instructions. They show exact axle placements and recommended bushings for each model. If you want inspiration for more rugged or oversized wheel setups, a short visual tutorial online demonstrates similar principles with larger wheels and suspension. For general build ideas and community examples, visit the minitrucksocala blog for projects and tips.
Official instructions and step diagrams help when wheel fit is unclear: https://www.lego.com/en-us/service/buildinginstructions/60491-1
Follow these steps and checks and your mini brick truck will roll true. Carefully chosen axles, correct clearances, secure spacers, and smooth rotation turn a simple chassis into a miniature vehicle that looks right and performs well. With a few small adjustments, you can make the wheels a highlight of the build rather than an afterthought.
Build-Along Visual Roadmap: Using a Video Reference to Assemble a Mini LEGO Truck
Using a Video Reference to Guide Your Mini LEGO Truck Build
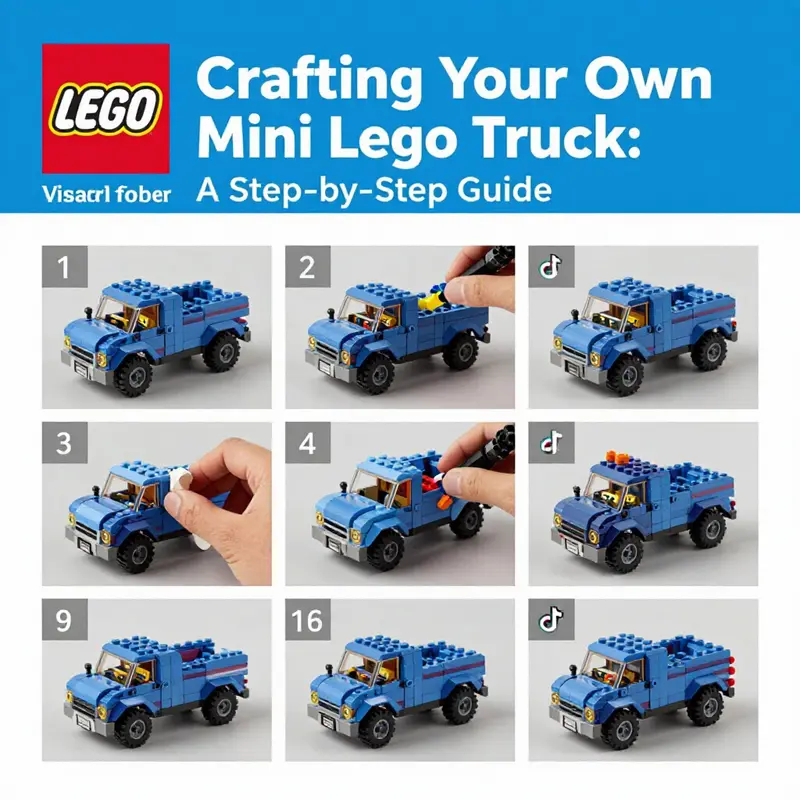
A clear video can shorten the gap between inspiration and a finished mini LEGO truck. When you watch a skilled builder assemble a model, you absorb sequence, technique, and tiny tricks that photos and parts lists often hide. The video referenced for this chapter shows a compact, high-tech off-road design. Treat it like a live blueprint you can pause, rewind, and study frame by frame as you recreate or adapt the model to your own parts and style.
Start by watching the video all the way through once. Do not attempt to build as you watch the first time. Instead, take mental notes on the overall form. Note where the chassis, cab, cargo area, and wheels fall into place. Look for repeating modules. Many mini truck builds are assembled from small, repeated sub-assemblies. Spotting those early saves time and reduces trial and error.
After the overview pass, prepare your workspace. Lay out plates, bricks, corner pieces, and tiles in groups by size and function. A tidy parts spread speeds the build and mirrors what you see in the video. If the creator uses a unique element, pause to identify it. Substitute a similarly sized brick when necessary. For example, a 1×6 arch can be replaced by stacked 1×4 and 1×2 bricks if you lack the exact piece. The video will show where the part’s shape matters most so you can choose the best replacement.
Next, focus on the chassis sequence. In the referenced build, the chassis is the structural backbone. The builder begins with a compact frame of 1×4 plates, 2×2 plates, and 1×2 corner pieces. Those elements lock together to form a rigid bed. Watch how the video defines wheel wells with round tiles. The tile placement gives precise spacing for axles and tires. When you replicate this step, align round tiles carefully. Misaligned tiles make the wheelbase uneven and can lead to wobbly rolling.
Pay special attention to internal support. The creator adds a 1×3 plate as an internal seat, which acts as a bracing point beneath the cab. It’s a small piece that makes a big difference in stability. If your version will carry additional weight on the cargo bed or feature working elements, add a second internal support. The video illustrates how the chassis tolerates pressure once those plates are locked in.
The video also demonstrates how to build the body and cab using small corner pieces and wall elements. Observe the sequence for attaching the front styling—especially the 1×6 arch and 1×4 plates used to shape the nose. These parts provide the truck’s character. The creator places a 1×1 brick light and a small plate as a mirror for visual detail. These are optional but powerful. When you add them, the model reads more like a truck and less like a generic box.
For the cargo area, the video shows a clever technique that uses door panels as side walls. The builder combines 1x3x3 door panels with a 1×6 base for a sturdy container shape. Note how a transparent orange 1×2 plate and a 1×1 plate are used for visual depth. These small inserts create contrast and break large flat surfaces. If you lack door panels, build the sides from stacked plates and thin bricks. The key is to maintain the right internal width so the top assembly sits flush.
Top reinforcement is another highlight. The creator connects the cargo sides with a combination of 1×4 and 1×8 plates. Watch how these plates bridge across the width and lock into the chassis. That technique prevents the bed from flexing. When you replicate this, press firmly to ensure plates snap fully. A loose connection here will create a weak point when the truck is handled.
Wheels and suspension are often the most visible and functional part of a mini truck. The video makes a point of showing correct tire orientation and spring placement. Springs provide that subtle bounce and keep tires aligned. If your bricks include spring elements, follow the exact orientation shown. Springs can compress differently depending on how they are seated. Test the wheels early and often. Roll the chassis on a flat surface to confirm smooth movement. Correct any binding before you close the body around the axles.
The final covering in the video is a 4x6x2/3 plate across the top. It unifies the truck and hides much of the internal structure without sacrificing stability. When you add the top plate, align studs and plates to prevent the top from catching on the cab or cargo edges. The video demonstrates small adjustments to make the finish seamless. Pause and rewatch these moments; subtle nudges and micro-adjustments are where professional builders earn a polished look.
Beyond following exact steps, use the video as a platform for customization. The reference build is a compact off-road model. You can repurpose its techniques for a classic pickup, a delivery van, or a flatbed. Swap colors for theme variations. Increase or decrease height by repeating modular layers. The video gives you the structural recipe; you control the flavor.
While following along, take notes on timings. The creator’s pace reveals which sections are quick and which need slow, deliberate work. If a section looks fiddly in the video, allocate more time to it. Build sessions that respect these rhythms feel less frustrating. Use small trays or bowls to keep partial sub-assemblies together. The video shows how easily modules can be lost or mixed up when left loose on a table.
Lighting and camera angles in the video make a difference too. Notice how the builder rotates the model to reveal connection points. When you follow along, position a lamp or your phone camera to mimic those angles. Overhead lighting reduces shadows and makes color matching easier. If you take photos of your progress, you’ll find it helpful to capture steps the video shows. Your photographs will help you reconstruct or iterate on the model later.
If you hit a snag, rewind and replay short segments. Frame-by-frame inspection reveals which stud snaps first and which plate slides under another. Modern video players allow fine-grain control. Use it to learn the subtle push-and-rotate moves that the creator uses to lock plates into place without disassembling existing sections.
Finally, expand your learning beyond a single video. A blog devoted to mini trucks can provide complementary inspiration and parts-sourcing tips. For further ideas and community builds, see the Mini Truck SoCal blog. Community resources often list compatible substitutes for hard-to-find parts and offer alternate color schemes. Combine those ideas with the visual techniques learned from the video and you’ll gain both confidence and creativity.
The referenced creator offers a focused demonstration of a mini off-road truck. You can replicate it step-by-step, or use it as a structural guide for your own variations. Pause, observe, and mirror the model’s bracing, wheel alignment, and top plating. Substitute parts thoughtfully, and test rolling and handling before finalizing the top cover. Use the video as a flexible tool, not a strict rulebook. That mindset will turn a single tutorial into many unique mini truck builds.
External resource: For direct visual reference to the build discussed in this chapter, see the creator’s site and video materials at https://dongpan.cn.
Final thoughts
Embarking on the journey of building a mini LEGO truck opens up a world of creativity and fun. By collaborating various techniques across each stage—chassis, body, cargo, and wheels—you not only construct a toy but create a personal masterpiece. Your newfound skills are just the beginning; the experience encourages exploration in design and construction, promoting engagement within a community of like-minded enthusiasts. So gather your LEGO bricks, put on your building hat, and enjoy the rewarding adventure of crafting your mini truck!