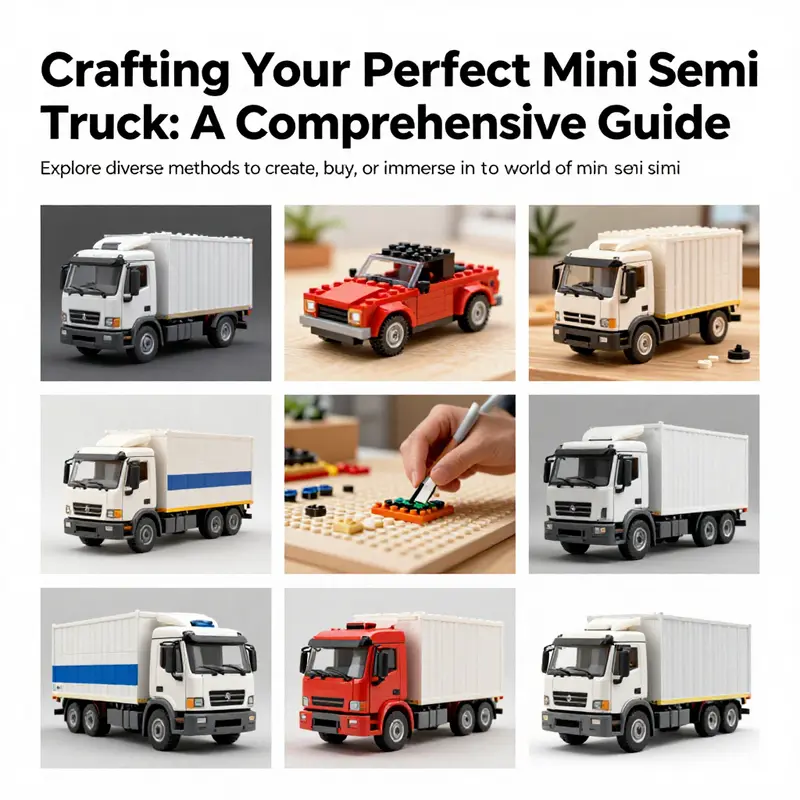
Are you a small business owner looking for ideal transport solutions, a residential property owner wanting a unique model, or a mini truck enthusiast eager to build your own? This guide is tailored for you! Here, you’ll discover four dynamic ways to engage with the mini semi truck theme. Whether it’s creating a digital version in Mini World, building a robust LEGO model, crafting a custom DIY mini truck, or purchasing a sleek commercial model, each chapter dives deep into these methods with detail and enthusiasm. Get ready to rev up your mini trucking adventure!
A Mini World Truck: From Blocks to Behavior
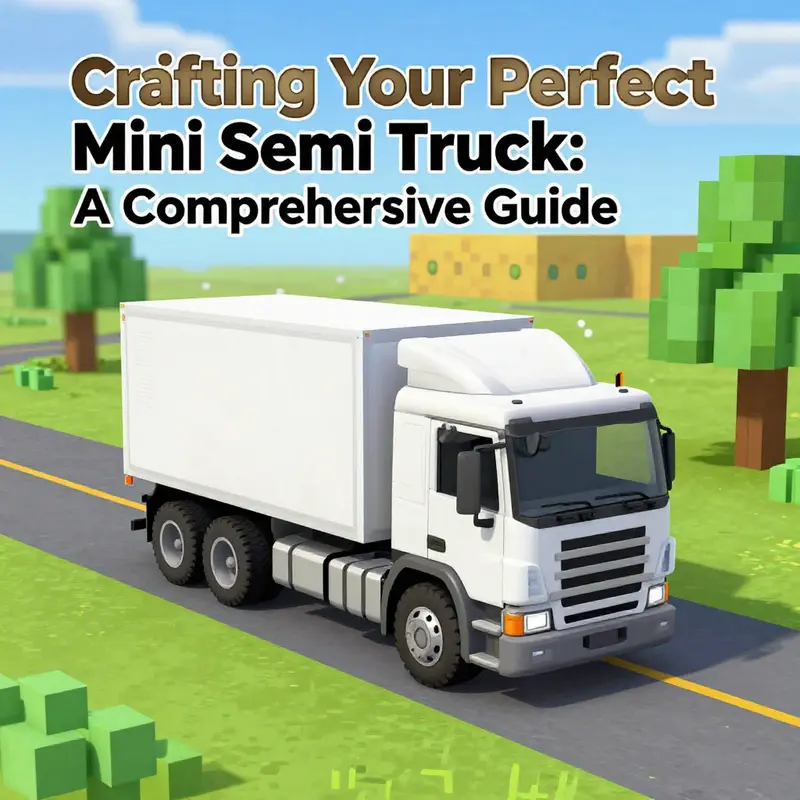
In Mini World, a tiny semi truck becomes more than a toy. It’s a compact exercise in balance, steering, and the way parts interact. This guide invites you to plan before you place, map the chassis, drive and steer trains, and test the result in a safe workshop space. Start with the chassis, anchor it in the workshop, then add front steering wheels and rear drive wheels aligned with the chassis. The cab sits on the frame, the trailer attaches with a hitch, and weight distribution guides adjustments to balance. Then add detail: headlights, mirrors, paint, decals, and subtle vents. Testing reveals whether wheels turn smoothly, the hitch keeps the trailer aligned, and suspension handles terrain. If something feels off, re-check alignment and weight. The process is iterative: plan, place, test, refine. Through repetition you learn how geometry and dynamics shape behavior. For those who want more, YouTube tutorials offer visual walkthroughs. The journey shows how even a small digital vehicle demands attention to the fundamentals: cohesion between chassis, drive, steering, and trailer, and how a deliberate sequence of choices yields a working machine.
Bricks on the Road: Crafting a Realistic Mini Semi Truck with a Brick-Based Build
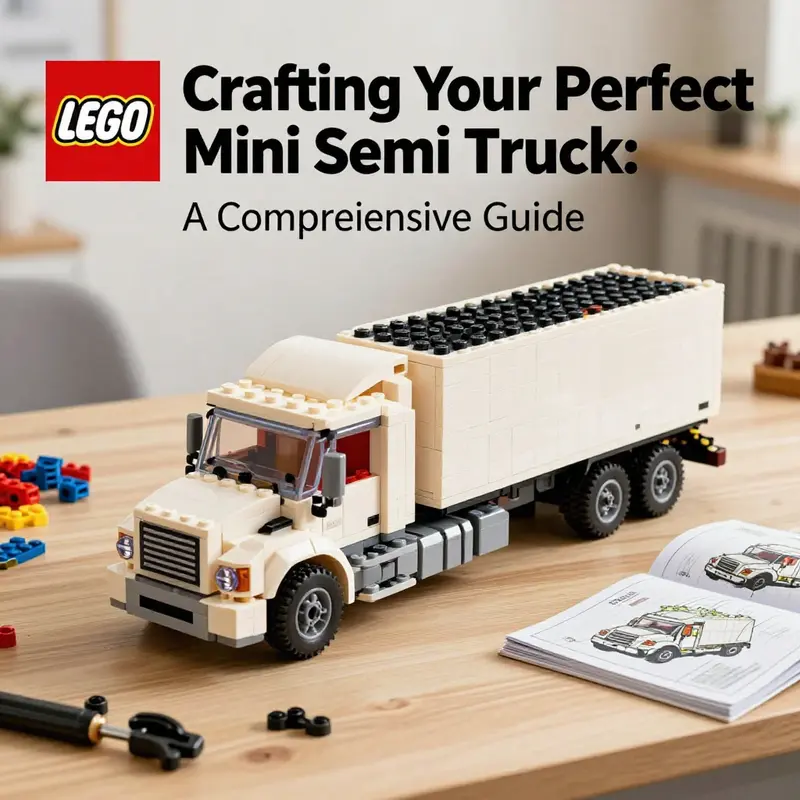
A mini semi truck built from a brick-based construction system is more than a simple display piece. It is a dialog between proportion, engineering logic, and personal style. When you set out to translate the vast geometry of a real truck into a scale model that fits on a desk or a shelf, you begin a dialogue with space, weight, and balance. The process rewards patience, curiosity, and iteration, turning a flat idea into a three-dimensional thing you can push, roll, and admire. The core of this undertaking rests on three pillars: choosing the right starting framework, designing with modular thought, and layering details that breathe life into the model while preserving its structural integrity. What follows is a cohesive path through those pillars, weaving together practical steps with the intuition that guides any good maker’s hand. The aim is not merely to assemble parts, but to cultivate a fluent sense of how a truck sits, moves, and carries its visual weight on a small stage made of bricks and plates. Along the way, you’ll encounter design choices that reflect both a DIY spirit and a respect for the real machine’s proportions, steering geometry, and load-bearing realities. And if you want a broader context for related projects, you can explore further ideas in the community blog linked here minitrucksocala.com/blog/. This reference acts as a beacon for enthusiasts who want to see how others balance scale, playability, and fidelity in their own builds.
The first step in any brick-based mini semi truck is selecting a solid, detail-rich starting framework. Think of it as choosing the skeleton that will carry everything else. A good starting point is a set that emphasizes both structural rigidity and functional components. Look for kits that include elements for a sturdy chassis, reliable wheel hubs, and space to integrate moving parts without compromising the model’s silhouette. Even when you plan to design your own version, starting with a proven, well-balanced chassis is a wise shortcut. As you study the framework, pay attention to how the wheels are mounted and how the chassis distributes weight from a heavy cab to a potentially lighter trailer. Those insights become the bedrock for a model that not only looks correct but feels correct when you push it along a table top. You’ll find that a robust baseline reduces the number of revisions needed later, because the core geometry already respects a real truck’s center of gravity and axle placement.
With the chassis chosen, the next phase invites you into modular thinking. A good modular approach means the cab, the trailer, and the coupling mechanism each exist as separate, testable units that can be adjusted without breaking the whole. The cab module should be designed with a stable mount to the chassis, and enough vertical clearance to accommodate interior details or lighting elements if you choose to add them. The trailer module, meanwhile, benefits from a similar approach: a frame that can be swapped or elongated without renegotiating the entire build. The coupling between cab and trailer is a critical point, because it governs articulation, weight transfer, and the potential for a realistic hitch action. When you design this connector, aim for a snug fit with a gentle range of motion. A loose hitch produces wobble; a too-tight hitch restricts movement. The sweet spot is a balance that lets the trailer tilt slightly on turns while remaining firmly attached during straight runs. This modular mindset also simplifies customization. If you someday want to switch from a flatbed to a box trailer or experiment with a different cab style, you’ll be able to do so without reconstructing the entire model. It is this adaptability that keeps brick-building projects fresh and satisfying over time.
A central layer of realism comes from incorporating functional aspects. Even in a miniature, believable trucks benefit from features that mimic their full-size counterparts. Working steering is a hallmark of a convincing model. Rather than a static front axle, you can implement a simple steering linkage that translates a turn of a knob or a rotating axle into a lateral movement of the front wheels. The most faithful applications use a series of linked beams and gears to preserve synchronized wheel movement. If you prefer a cleaner visual, you can achieve satisfying steering feel with a well-chosen cross-axle arrangement and careful axle spacing. Suspension is another key element, especially for anyone who wants the model to respond to uneven surfaces or to mimic the ride of a real truck over road imperfections. Even a simplified suspension system—using small flexible elements or spring-like components—adds depth and reduces a rigid, toy-like impression. It also teaches a practical lesson about how weight shifts across the vehicle as it travels. These mechanisms do not just look right; they teach you about the physics of motion in a hands-on, tactile way.
As soon as the framework and mechanics are established, the design language of the build begins to reveal itself. Proportions matter as much as the mechanics do. A well-proportioned mini semi truck respects the visual rhythm of a full-sized tractor-trailer: the cab should feel compact yet robust, the hood and grille understated but legible, and the trailer long enough to suggest cargo capacity without overwhelming the cab. Achieving that balance requires careful measurement and frequent visual checks. It helps to sketch a quick blueprint or to generate a simple CAD-style template to compare different scale ratios before laying bricks. Even small decisions—such as the height of the cab relative to the wheel arches or the length ratio between cab and trailer—affect how the model presents itself to the eye. The aim is a silhouette that remains consistent from multiple angles, so a viewer unfamiliar with brick-building can still recognize the vehicle type at a glance. The details you add afterward—logos, decals, window shapes—will reinforce that recognition without straining the proportions.
Details are where a brick-built truck truly comes alive. Headlamps, door lines, and windshields are not just decorative; they guide the eye along the model’s length and help convey its personality. Small, precise pieces can capture the gleam of headlight glass or the crisp edge of a window frame. For the cab, you can introduce transparent panels or clear resin elements to imitate glass, choosing shapes that mimic the curvature of real glass while remaining faithful to a brick-friendly construction. The cargo area is a canvas for storytelling: you can simulate a closed container with printed plates or create a modular cargo box that can be swapped for an open flatbed. Logos and branding can be simulated with decals or custom stickers, giving the model a unique identity while honoring the real-world practice of vehicle livery. If you enjoy color, use a restrained palette that echoes the restrained hues of actual highway trucks—dark chassis tones with bright accents for the lights and reflectors—so the model reads clearly from a distance and up close alike.
Practical testing and iteration conclude the core cycle. After assembling the initial version, you should roll the truck on a flat surface and observe how the wheels align and how the weight is distributed. Do the front wheels turn smoothly without binding? Does the trailer maintain stability when pulled or pushed gently? Do the cab and trailer align so there is no obvious tilt or skew when the vehicle sits in its natural resting position? Answering these questions with small refinements—perhaps adjusting axle spacing, tightening a loose connector, or recalibrating a steering linkage—helps the design mature into a more faithful miniature. If you have access to a larger plate or a broader table, you can test cornering with faux cargo to see how weight shifts or how much tilt you get during a tight turn. Each pass teaches you something new about the interplay of dimension, weight, and movement, and each tweak brings the model closer to the quiet truth of a real truck’s geometry.
For builders who crave more structured guidance, a formal build guide from the platform hosting these brick-based projects lays out the stages of construction with precise diagrams and step-by-step logic. While this chapter speaks to a self-guided, design-first approach, you can still draw strong parallels to the official methodological path that many hobbyists follow. The guide walks through the process of establishing core dimensions, laying down a solid chassis, then layering in details, and finally testing for mobility and durability. Engaging with an official tutorial—often accompanied by printable templates and reference diagrams—helps you calibrate your own process and compare solutions across different design choices. If you want to explore further, you’ll find the official tutorial resources in the broader build community library, which provides additional context and examples for nuanced engineering choices. In the broader ecosystem of brick-building projects, these resources serve as a compass, pointing toward consistent techniques that keep your creations robust and repeatable even as you push toward more ambitious designs.
The beauty of a well-made mini semi truck lies not just in how it looks, but in how it behaves when you interact with it. A model should reward movement: wheels that roll with minimal friction, a chassis that holds its shape under light pressure, and a cab that remains visually honest even after a few playful moves. When you reach this level of polish, you are not simply assembling parts; you are translating a sprawling, highly mechanical machine into a compact, expressive sculpture. You craft a tiny vehicle that can live on a desk, on a shelf, or in a dedicated display space, reminding you of the scale and complexity of real road transport while honoring the maker’s own rhythm of building. In that sense, the brick-based mini semi truck becomes more than a project; it becomes a small, shareable experience—one that invites you to explore variations, refine your technique, and perhaps inspire others to embark on their own brick-built road journeys.
To deepen your exploration and encourage ongoing practice, consider following related projects and tutorials within the maker community. An internal resource that often proves valuable is the community blog, where fellow builders share photos, measurements, and design notes from their own mini-tractor-trailer endeavors. Exploring this repository can help you understand how others balance aesthetics with mechanics, and it can spark ideas for your own upcoming builds. For a broader view of material sourcing and related conversion ideas, you can also peruse the linked article series that compares different approaches to miniature trucks and campers, which can inform choices about scale, materials, and finishing touches. If you want a direct reference to a comprehensive external guide that dives into the engineering specifics of a semi-trailer build, a well-regarded, detailed resource covers the full range of chassis, steering, and suspension concepts in a format designed for hobbyists and students alike.
In the end, building a mini semi truck with a brick-based system is a voyage from concept to craft. It is about translating a vast and complex vehicle into a compact, tangible form that can be touched and tested. It challenges you to think in terms of modules, tolerances, and motion while still honoring the aesthetic cues that make trucks instantly recognizable. The joy comes from small triumphs—the hood lines that align perfectly after the third attempt, the wheels that spin with just the right amount of drag, the moment when a suspension tweak finally feels right. And as with any hands-on project, the chapter ends where it began: with a question you are eager to answer through your next build. How will the next mini semi truck be different? What new technique will you learn, and what new detail will you dare to include? The road, after all, is open to brick enthusiasts who are willing to shape it themselves, one stud at a time.
External reference for further technical depth on this topic can be found in a detailed external build guide that covers semi-trailer mechanics and scale modeling techniques. It complements the practical, hands-on approach described here and provides broader context for those aiming to elevate their mini-truck projects to the next level.
Creating a Custom Mini Semi Truck Model from DIY Materials
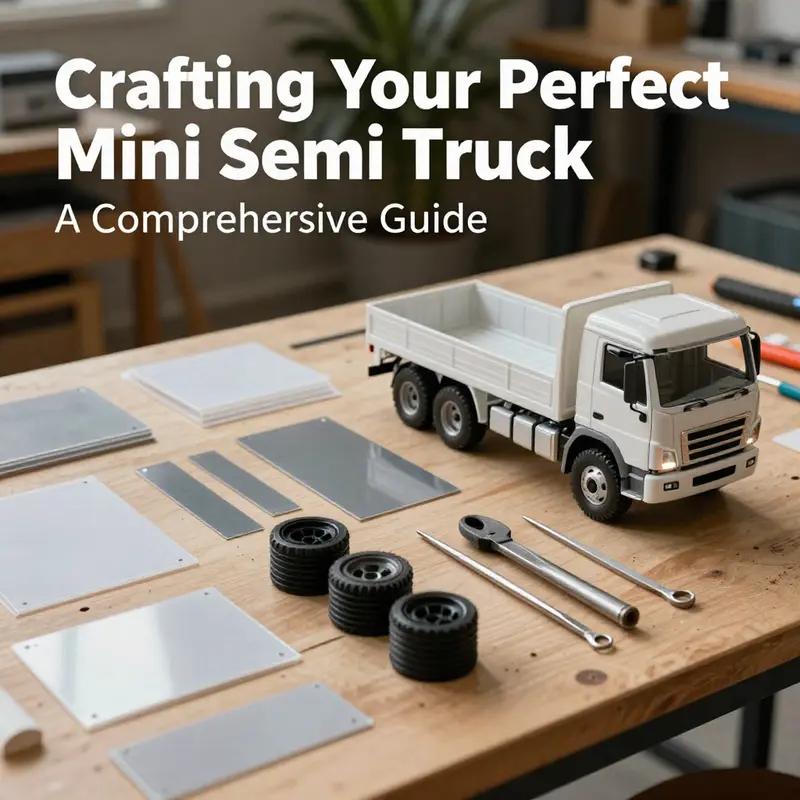
A tiny semi truck built from everyday materials can become a surprisingly faithful portrait of its full-size cousin—without needing a shop full of machinery. The act of selecting humble supplies, shaping them with patient hands, and then coaxing a little runtime out of a contraption you crafted yourself is a kind of hands-on engineering that rewards curiosity as much as accuracy. The appeal lies not only in the end result but in the process: the way a chassis made from cardboard and a couple of wooden dowels teaches balance, how a simple steering rod demonstrates geometry, and how every tiny decision about weight distribution or wheel alignment echoes the same concerns that keep a real truck steady on the highway. Approaching a mini semi with patience and a touch of play transforms it from a mere ornament into a learning tool, a vehicle for experimentation, and a personal sculpture that speaks to a maker’s taste and skill.
This project leans on accessible, inexpensive materials while inviting enough customization that it remains a doorway into broader maker practices. The goal is not to imitate every label or badge found on a commercial model but to capture the essential cues: a cab with a generous windshield, a distinct trailer connected by a hitch, and wheels that look right in proportion and roll with a satisfying ease. The process unfolds in stages that weave together design thinking, basic mechanics, and decorative craft. The result is a cohesive, compact vehicle that can live on a shelf, be used in stop-motion animation, or become a teaching prop for demonstrations about scale, forces, and balance. If you want a practical starting point for inspiration and see how others approach customization, a concise example can be found in a related customization discussion here: godzilla-truck-camper-review-customization.
Before committing any cuts, take a moment to picture the scale you want. A common choice for a DIY mini semi is roughly 1:18 to 1:24, where the cab might be about 6 to 8 centimeters long and the trailer a bit longer. This scale helps you manage proportion while keeping the build manageable on a kitchen table or a small workbench. With scale in mind, gather the core materials: a sturdy chassis and body plan cut from thick cardboard boxes provides a strong framework; wooden skewers or dowels serve as lightweight, rigid axles; bottle caps or cork pieces can revolutionize wheel hubs with a little sanding and paint. Recycled plastic bottles become the fenders or subtle body features. The aim is to keep the parts simple and robust enough to handle handling and a bit of rough play without collapsing under pressure. If you prefer a guided start, printable templates and printable parts found in various maker resources can offer dimensions to trace and adapt, which you can then refine with your own touches.
As you begin shaping, start with the chassis. Cut a solid base from cardboard that mirrors the profile of a real rig—the front end a touch longer and wider to accommodate a cab, a middle section for the engine bay, and a rear platform to anchor the trailer hitch. Reinforce corners with extra cardboard strips or thin wood scraps. The reinforcement is essential for durability; it prevents the chassis from flexing when you test wheel alignment or apply light force when mounting the wheels. A simple trick is to layer two or three cardboard sheets, offsetting the seams so no single joint bears the load. The chassis becomes the spine of the model, and its rigidity dictates how well the rest of the truck will perform.
Next, you’ll lay out the axles and wheels. Wooden skewers or small wooden dowels can be cut to length to serve as axles. They must extend evenly on both sides of the chassis to prevent wobble. After the axles are in place, attach the bottle caps or cork pieces as wheels. A bit of sandpaper around the inner surface of the cap improves grip and gives the wheel a cleaner roll. If you want the wheels to spin more smoothly, you can slightly hollow out the wheel hubs with a mini drill or a pin vise and insert a small metal or plastic axle spacer. This is a good moment to check alignment: lay the model flat and spin each wheel by hand, looking for parallelism and any side-to-side drift. Small adjustments—sand a little more here, trim a millimeter there—can dramatically improve how the truck sits and how it rolls.
The steering mechanism is where the system begins to feel alive. A simple approach uses a straight rod connected to the front wheels, allowing them to pivot together. Attach a short rod to the front axle, then connect a longer steering rod that runs toward the cab area. A small pivot point or a makeshift hinge created from a bent paperclip or a small nail head can act as the steering fulcrum. As you rotate the steering lever, the front wheels should track left and right. If you’re aiming for a more functional toy, you can create a rudimentary rack-and-pinion or linkages that convert rotational movement into wheel turning. Even a basic setup teaches the concept of steering geometry without needing precision machinery.
With the chassis and steering in place, shift focus to the cab and trailer. The cab is a sculptural form, a box with a generous front window and side windows cut from leftover plastic or clear acetate. A simple interior can be suggested with a flat panel and a couple of seat shapes drawn on the cardboard walls. The trailer, another rectangular volume, attaches to the cab via a hitch connection. A dependable hitch can be created with a small hook of wire or a loop of thread that anchors to the cab’s rear, while the trailer carries a matching loop that catches the hitch and allows a gentle tilt. The visual balance between cab and trailer matters aesthetically; it should feel like a single, connected vehicle rather than two mismatched parts joined awkwardly.
Finishing touches bring personality and realism. Paint lends the model its character—gloss black for a sleek chassis, white for a clean cab, or a bold color to evoke a transportation company’s livery. Weathering—subtle dry brushing to simulate dirt on the lower panels, light gray on the tires, and a hint of rust on any metal accents—adds depth and credibility. Decals or hand-painted stripes can mimic the distinctive lines of a real rig without requiring exact branding. The scale is forgiving; you’re not reproducing an exact truck, you’re capturing the silhouette and the vibe. If you want to emphasize a sense of realism, add small details like a windshield wiper carved from thin plastic or a tiny mirror folded from scrap metal foil.
For those who want optional propulsion, a tiny motor and battery can be slotted into the chassis and wired to a small control board for remote operation. This addition transforms the project from a static model into a working toy or demonstrator. The choice to add power should be deliberate: it changes weight distribution, increases vibration, and demands more careful balancing and secure wiring. Start with a modest motor that aligns with the scale and a compact battery that won’t overwhelm the chassis. Keep the wiring tidy and secure, and route it away from moving parts to minimize snagging. For learners who enjoy iterating, the motorized version can be an ongoing project, with upgrades and refinements as skills improve.
Design exploration is one of the strongest benefits of this DIY approach. You can customize the overall proportions—lengthen the trailer, widen the cab, or shorten the engine bay—to suit your aesthetic or practical constraints. Templates and printable templates found online can guide exact dimensions if you want an approach that looks professional from the outset. Beyond templates, look for printable paper templates or 3D printable files that you can adapt to your chosen scale. These resources offer precise outlines that you can trace and trim, then translate into cardboard or plastic components. The process of adapting a template to your chosen materials becomes a learning exercise in scale, tolerance, and material behavior. Templates and printable resources sometimes provide exact fold lines and interlocking joints, which can save time and improve accuracy while still inviting hands-on customization.
A useful direction for inspiration and practical examples of customization can be found in related discussions on our site. For a perspective on how others approach transformation and character in a small model, explore this page: godzilla-truck-camper-review-customization.
As you assemble, test, and adjust, you’ll notice the project morphs from a rough concept into a cohesive vehicle. The chassis becomes the spine; the wheels, the legs; the cab and trailer form the torso and tail; the hitch, the link that binds the whole creature together. The delight lies not only in the mechanical alignment but in the way light catches the painted surfaces, how the windows reflect the room, and how the model invites you to imagine longer journeys. Even small refinements—like smoothing a joint with light sandpaper, or replacing a brittle plastic piece with a sturdier scrap from a box—enhance durability and confidence. With each iteration, you gain fluency in material properties: cardboard’s crisp edges, plastic’s flexibility, metal’s rigidity, and paint’s adhesion. You also cultivate problem-solving habits: measuring twice, cutting once, and testing in stages rather than rushing to a finish line.
When the build is complete, consider how the mini rig will be showcased. A simple display base—flat wood or thick cardboard with a felt or vinyl top—frames the truck and protects delicate details. The presentation matters because it foregrounds the craft and invites viewers to read the model as a narrative: a tale of a life-scale vehicle condensed into a handful of inches. If you plan to photograph the model, shoot from multiple angles to reveal the design’s lines and geometry. Lighting that emphasizes the cab’s curvature and the trailer’s silhouette helps convey the model’s presence. And because the project emphasizes sustainability and resourcefulness, you might highlight the repurposed components in your write-up, sharing how everyday scraps can become a convincing, even charming, miniature truck.
For builders who enjoy broad creative latitude, the DIY route remains an invitation to experiment with form and function. The choices you make—how you cut the chassis, where you place the wheels, the balance between the cab and trailer—become part of the model’s story. If you want to extend the project, you can weave in more advanced mechanics, such as a more complex steering system or a functional suspension that responds to uneven surfaces on a test track you build indoors. The joy is not just in reaching a finished model but in the ongoing dialogue between idea and craft, between scale and reality. In that sense, the custom mini semi truck you create becomes a small laboratory where imagination and technique meet, a tangible artifact that proves even modest materials can transport big ideas.
External resource: for readers seeking printable templates and scalable paper designs that can jump-start the planning phase, explore resources like PrintablePaper.net at https://www.printablepaper.net/model/truck/semi_trailer. This reference offers templates that can be adapted to your chosen scale, helping you translate a concept into a precise cut list and a coherent build plan. As with any DIY project, the real value lies in what you learn as you go: how to select compatible materials, how to judge tolerances, and how to translate a two-dimensional plan into a three-dimensional object that feels sturdy and purposeful.
In the end, a DIY mini semi truck made from cardboard, wood, and salvaged plastic becomes more than a toy or a display piece. It is a miniature workshop where reasoning, creativity, and manual craft converge. It’s a reminder that practice compounds into skill, and that the smallest models can carry the largest ideas if you approach them with curiosity, patience, and a willingness to iterate. The satisfaction comes not only from the finished model but from the process—the careful measurement, the gentle sanding, the steady glueing, the deliberate painting. It is in these moments that a simple kit of scraps becomes a crafted object with personality and purpose, ready to roll across a desk, a shelf, or a classroom table and spark conversations about design, scale, and the physics of motion.
The Collector’s Compass: Sourcing a Premium Alloy Mini Semi-Truck Model for Craft, Display, and Historical Precision
A premium alloy 1:24 scale container flatbed trailer model stands out in the collector’s circle as a blend of craft, history, and tactile heft. It is more than a decorative piece; it is a carefully engineered artifact that invites touch, study, and contemplation about the vast world of long-haul transport. For enthusiasts who want a display piece that carries the weight of real-world engineering, the alloy model offers durability, balance, and a sense of permanence that plastic counterparts often struggle to deliver. The difference is not merely in weight or surface finish; it is in the confidence a solid metal build gives you when you pick up the model, when you admire the geometry of the gooseneck, the precise stow of the wheel wells, and the way light plays off a brushed alloy surface. This is the kind of piece that transfers from shelf to study desk with a sense of ceremony, becoming both reference and keepsake for someone who has spent hours studying layout, scale, and the nuanced language of trailers.
The core reason collectors gravitate toward a 1:24 alloy container trailer is fidelity. In scale modeling, fidelity translates to proportional accuracy, material behavior, and the subtle cues that tell a story about how the real vehicle functions. An alloy chassis resists warping and flex that often creeps into plastic components during handling or shipping. That rigidity matters most in the gooseneck area, a critical joint that bears load and experiences torque as the trailer pivots. In many plastic interpretations, the gooseneck can sag, twist, or develop stress marks after repeated handling. With an alloy construction, the gooseneck maintains alignment, preserving the visual language of a true coupling point and the clean, uninterrupted line where cab and trailer would connect under real-world stress. The same resilience extends to the suspension-like detailing, where small, delicate components that suggest leaf springs or coil interactions remain true without becoming mushy or loose after a few moves on a display shelf.
This particular category of model, the 1:24 alloy container flatbed trailer, is not a mass-market product designed for quick sale. It represents a design philosophy that values structural integrity, dimensional discipline, and the quiet artistry of a well-executed replication. The designers have studied real-world layouts and translated them into a scaled form that carries both the logic of the original and the aesthetic cadence of a collectible. What emerges is a model that feels governed by real engineering rules rather than purely decorative choices. When you inspect the deck, you notice the panel lines, the attention to the riveted or seam details, and the way the joints align with the proportions of a real trailer’s hull. It is not simply a question of size; it is a question of how faithfully the model communicates the experience of seeing a full-size rig through a glass case.
The maker behind this alloy piece is described in industry circles as a studio with deep, hands-on expertise in both alloy and resin production. The background of leadership includes a former product engineer from a well-known model brand, someone who carried forward a practical, problem-solving mindset into metal and resin crafting. That lineage matters because it explains why the model reads as reliable rather than flashy. The engineering lineage becomes visible not in loud branding, but in the quiet supremacy of fit, finish, and material behavior. There is a careful balance between mass and mint condition—enough heft to convey seriousness, yet refined tolerances that keep every panel flush and every edge crisp. The result is a model that looks as if it could be insulated against the rough handling of a shipping crate and survive a careful but not pampered life on a collector’s shelf.
An important consideration for buyers is licensing status. This particular alloy model mirrors the standard structure of contemporary container flatbeds, but it is not produced under an official license from a specific original equipment manufacturer. That distinction matters to some collectors who prefer strictly licensed reproductions for authenticity claims; others value the absence of licensing constraints because it allows for truer scale fidelity and a broader interpretation of the vehicle family. The absence of licensing does not diminish the model’s educational value, because the design mirrors widely recognizable, standardized features found on modern container trailers. You can trace the silhouette—how the gooseneck integrates with the frame, how the coupling mechanism would align with a typical tractor, and how the trailer’s deck is perforated with a rhythm of support beams and crossbars that echoes real-world practice. In short, you get a credible, non-derivative representation that respects both industry geometry and collector sensibilities.
Customization emerges as a pivotal point for serious collectors. Unlike mass productions that rely on single, factory-applied finishes, alloy models often invite personalization through paint, weathering, and decal schemes. The alloy substrate accepts finishes with minimal risk of chipping or cracking, and it can hold subtle weathering textures—streaks of road dust, faint oil shadows in the deck seams, and meticulous edge wear that tells a story about long journeys. For those who want a more bespoke piece, customization options might include a choice of color tones to match a preferred logistical livery, a set of decals that communicate a fictional fleet’s identity, or even a specialized finish that mimics the sheen of a well-kept metal trailer after years of service. The opportunity to tailor a collectible to a personal narrative is one of the most compelling reasons to consider this class of model, because it invites you to become a co-creator of the artifact rather than a passive observer.
Careful sourcing is essential, too. The market for premium alloy miniatures is smaller and more discerning than for mass plastics, which means that availability can be irregular and pricing reflective of rarity, craftsmanship, and the presence of any customization. Buyers weigh not only the price tag but also the provenance, the condition of the finish, and the integrity of the finish against potential transport risks. Even the best packaging cannot completely neutralize the stresses of overseas shipping, but a solid metal model tends to arrive with fewer cosmetic compromises than its plastic counterparts if the seller prioritizes rigid internal supports and moisture control during transit. The decision to purchase becomes a balance of passion, practical display needs, and an appetite for a piece that can endure a long lifecycle as a centerpiece in a showcase.
As you explore the broader conversation around mini-semi modeling, a wealth of perspectives becomes available beyond the purchase itself. The community-driven discussions, reviews, and gallery reads can enrich your understanding of how these pieces age, how color and patina might shift with exposure to light, and how to preserve the integrity of delicate joints. For readers seeking more context on community insights, the Mini Trucks Ocala blog offers a breadth of commentary, reviews, and visual documentation that can illuminate what collectors value in a premium alloy model and how owners approach care and presentation over time. This resource provides a practical frame of reference for evaluating a model’s long-term staying power, beyond initial impressions.
In considering where to buy, prospective buyers tend to favor sources that emphasize craftsmanship and traceable quality. Direct-from-maker purchases can offer customization pathways and a clearer sense of the maker’s process, while specialty retailers may provide curated selections, evaluation photos, and expert assurances about finish, weight, and scale accuracy. No matter the path chosen, it’s wise to request detailed specifications: the exact scale, material composition, finish options, and a clear description of any customizations or post-purchase care recommendations. Reading a well-documented product sheet before committing helps ensure that expectations align with reality, preventing surprises in color tone, weight, or fit after delivery. Price is, of course, a consideration, but it tends to reflect the depth of craftsmanship, the quality of the alloy, and the level of natural variations that come with hand-finished pieces. In the end, the value of a premium alloy mini semi-truck model rests not only in its visual appeal but in its ability to sustain the curiosity and admiration of a collector over many years.
For anyone who contemplates how such an alloy model might connect to a broader project, the model can serve as a study object for scale, proportion, and structural logic. It becomes a tangible reference point when designing a custom display case, planning a future DIY build, or even drafting a local display arrangement that arranges several related pieces in a narrative of freight movement across time and space. The model invites you to pause, measure, and reflect on the real-world constraints engineers face in the design of container trailers, from weight distribution to coupling forces and deck geometry. It is an artifact that bridges the gap between static display and the dynamic world it represents, a singular object that makes the physics of trucking feel more approachable and comprehensible to enthusiasts who want to understand the craft as well as the wishful fantasy of collecting.
As the conversation circles back to the practicalities of purchase, remember that a thoughtful approach to choosing a premium alloy model is a meditation on patience and discernment. You are not simply acquiring a mini version of a truck; you are selecting a small-scale ambassador to an industry that moves the world. A robust alloy construction, faithful proportioning, and a design ethos rooted in real-world practice create a piece that respects the vehicle’s heritage while inviting your unique interpretation. In that sense, acquiring a high-end alloy mini semi-truck model becomes a quiet rite of passage for a collector who seeks both accuracy and personal meaning in a lifelong display. The next step is to align your choice with your display goals, your storage and care plan, and your deeper curiosity about how a scale model can illuminate the logistics stories that unfold behind every long, straight highway and every port gate.
External resource: https://www.mingyimodels.com/
Final thoughts
Whether you choose to build your mini semi truck digitally, as a hands-on LEGO project, through DIY crafting, or by purchasing a stylish commercial model, each method provides unique satisfaction and opportunities. Embrace your passion for mini trucks and explore these options to find what suits you best. Your journey into the captivating world of mini semi trucks awaits, so gear up and dive in!