
Building a mini truck is an exciting and rewarding project that can cater to hobbyists, DIY enthusiasts, and small business owners alike. Whether you’re looking to unleash your creativity with LEGO bricks, repurpose everyday materials in an eco-friendly way, integrate technology with microcontrollers, or delve into detailed assembly through model kits, this guide has something for everyone. Each chapter will explore a unique method of crafting a mini truck, offering practical steps and insights that can enhance your building experience.
null

null
From Scraps to Steel: Building a Working Mini Truck from Recycled Materials
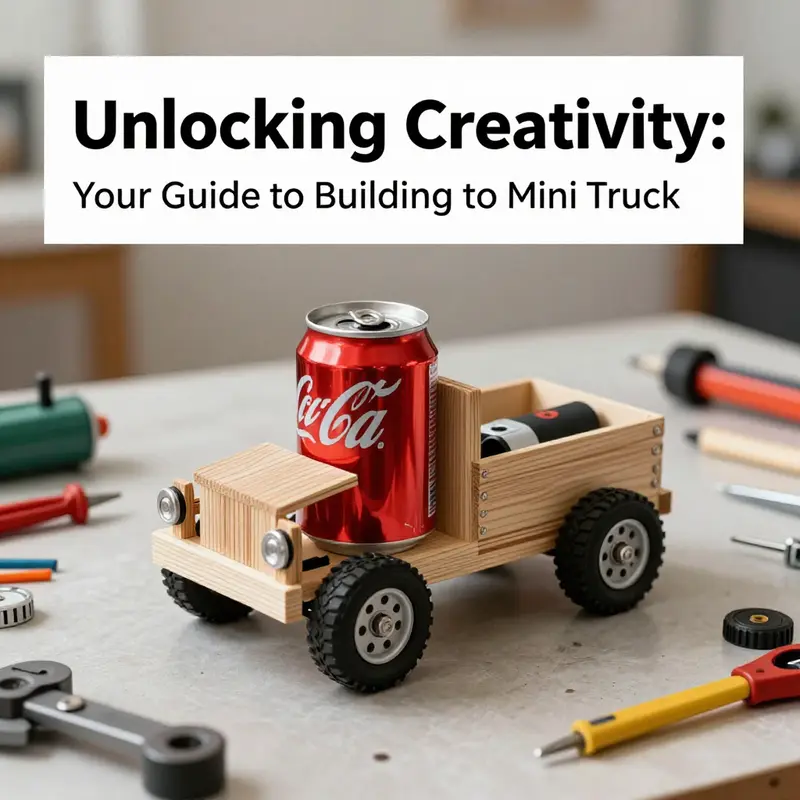
A pile of scrap, a box of bottle caps, and a handful of old gears can become a working mini truck with the right approach. The idea at the heart of this chapter is simple: reuse what would otherwise be waste, and transform it into something that teaches, moves, and endures. Building a mini truck from recycled materials is as much about mindset as it is about mechanics. It invites you to observe, improvise, test, and improve. It asks you to balance curiosity with caution, imagination with discipline, and resourcefulness with safety. The result is not just a small model; it is a small laboratory on wheels where ideas about design, force, motion, and energy come alive in a tangible form. As you begin, you may feel like an inventor rummaging through a junkyard; by the end, you gain a clear sense of how a vehicle is assembled piece by piece and how those pieces work together to translate intention into motion.
The simplest versions of this project prove that you do not need pristine materials to learn. A cardboard cab and cargo bed, reinforced with extra layers of cardboard or thin wood, can become a convincing chassis for a display model or a push-driven toy. The process starts with a design sketch, not a rigid blueprint. It is a plan that invites adjustments as you discover what scraps fit best, what surfaces accept glue without splitting, and what shapes yield the sturdiest frame. In the early stages, the aim is to understand geometry: how long the chassis should be relative to the wheelbase, where the center of gravity lies, and how the cargo box affects balance. These considerations are foundational; they keep the project grounded even as you fantasize about scale and realism.
When you move toward a functional model, the project becomes a study in energy, power transmission, and durability. A small electric motor—rescued from an old toy or a damaged appliance—can be strapped to a frame and connected to the wheels through a simple drive train. A belt drive is forgiving and beginner-friendly; it lets you see the motor’s torque turn into wheel rotation with minimal alignment fuss. Gearing offers efficiency and speed control but requires careful alignment and secure mounting to prevent slip. Either choice emphasizes a core lesson: the way you connect power to motion is as important as the power itself. You learn early that even modest torque can move a surprisingly heavy load if you minimize losses along the way.
The chassis, whether metal or wood, remains the spine of the vehicle. A robust frame resists bending when the model is pushed, pulled, or loaded with a pretend cargo. If you work with scrap metal, you may weld or bolt beams to form a rectangular or trapezoidal skeleton. If you work with wood, you can cut and notch pieces to interlock, then reinforce joints with glue and small screws. The joints deserve extra attention because they control how the truck handles stress. A loose corner can deform the frame under load, causing wheels to misalign and the vehicle to wander. Secure joints, precise alignment, and a straightforward, clean assembly path help you build confidence as you test and retest.
The axles and wheels deserve deliberate care. In the simplest builds, axles can be straight wooden dowels or metal rods that run through the sides of the chassis. The wheels, whether bottle caps or small fabricated discs, must rotate freely with minimal friction. Washers can reduce binding and help center the wheels. If you have access to older toy wheels or light automotive components, you can swap in sturdier pieces to improve rotation and reduce wobble. The wheel alignment is more than cosmetic; it directly affects how smoothly the truck travels and how well it tracks a straight line. A little effort here pays off in a big way when you later add power and test performance on a simple track.
A key theme across both simple and more advanced versions is safety. Working with metal means sharp edges, hot tools, and the risk of pinch points. When you cut or weld, wear eye protection and gloves, and work in a well-ventilated area. If you use a power tool, follow the manufacturer’s safety guidelines and keep a tidy workspace. If you are assembling with screws and bolts, apply proper torque to prevent loosening over time. Even in a scrap-based project, the thrill of invention should never override caution. The habit of cleaning scraps, deburring edges, and insulating exposed wires becomes part of the craft and helps keep future work safer and smoother.
The power source invites the most engaging decisions because it defines how the vehicle behaves under real use. A toy-grade motor will run on a few volts and keep you within a comfortable, safe speed range. If your ambition grows toward a more capable model, you might explore salvaged motors and batteries from old electronics, ensuring you employ safe, low-voltage configurations. The drive train can reveal the elegance of engineering: a belt that links the motor to the driving axle, a simple gear train, or even a direct-mount solution for a compact build. Each option offers a different texture of feedback—the tactile sense of torque, the audible hum of a running motor, and the visual rhythm of wheels turning in unison. You learn to tune the system to balance speed, torque, and stability so the truck behaves predictably on a bench and, if you choose, on a gentle ramp.
The aesthetics of a recycled build hold a special appeal. A truck that looks well-used carries a story with it. You can leave some edges exposed to remind viewers that the vehicle is born from salvage, or you can sand and finish the surface to emphasize a more polished, collectible look. Paint is a tool for storytelling as much as for protection. It can highlight a concept, such as a cargo bed in a contrasting color or a cab that evokes a particular era of design. Decals, stickers, or even simple hand-drawn stripes can add personality without demanding expensive materials. The narrative value of the finish matters; it signals to onlookers that the maker took time to plan, execute, and care for details—an invisible curriculum in itself.
The process is rarely linear. You will test, learn, and reconfigure multiple times. A wobble in the wheel might reveal a misaligned axle, a tiny misfit in the frame, or a belt tension issue. You learn to document each attempt, noting what worked and what did not. This documentation becomes a guide not only for this project but for future builds. It is a thread that connects makers across generations, turning a single model into a stepping stone for more ambitious endeavors. If you share your process with others, you invite feedback that can accelerate learning and spark new ideas. The social dimension of building with recycled materials often yields collaborations that push projects beyond what a single workshop could achieve.
A remarkable real-world demonstration of what is possible with recycled materials helps anchor these ideas in reality. A young maker, with the help of a family member, welded a sturdy frame from scrap steel and repurposed axles and motors from discarded vehicles to create a four-wheel-drive mini truck capable of carrying substantial loads. The project did not rely on new parts; it relied on careful design, solid fabrication, and a willingness to iterate. The outcome was not only a functioning vehicle but a powerful testament to what resourcefulness and craftsman’s patience can achieve. It is a story that speaks to farmers, students, hobbyists, and communities that see value in repairing and reusing materials rather than discarding them. You read such stories to remind yourself that constraints—when approached with skill and curiosity—become catalysts for invention rather than roadblocks.
In the quieter moments of the build, you discover the deeper educational payoff. Not every attempt yields a shining, flawless model; some outcomes are humble, even imperfect. Yet each piece, whether a misaligned axle or a rickety cargo bed, becomes a living lesson about constraints, tolerance, and resilience. The hands-on nature of the project teaches more than the mechanics of motion; it teaches problem solving, project planning, and the value of sharing a craft with others. You learn to set up a small workspace, to inventory scrap, and to categorize parts by their utility for current and future projects. The discipline of reusing materials—sorting, cleaning, testing, and refining—translates into a broader, real-world habit: make the most of what you have, and treat waste as a resource rather than a dead end.
The chapter does not pretend that recycled builds are always simple or quick. A robust, moving mini truck demands time, patience, and attention to detail. Yet the effort pays dividends in understanding the fundamentals of engineering. You see how weight distribution affects traction and how the geometry of the chassis influences stability. You feel the satisfaction that comes from watching a figure made of scraps glide across a surface under its own power. You recognize that the project has value beyond the final model: it reinforces a practical mindset, a respect for materials, and a confidence that you can transform discarded items into something useful and educational. That is the experiential core of building with recycled materials, and it aligns beautifully with the broader goal of learning through making.
If you want a quick anchor into practical steps while keeping this narrative cohesive, you can consult a reliable resource for a step-by-step demonstration that uses common household recyclables to form a working model. A succinct tutorial on making a paper box mini truck can offer a gentle entry point and a visual reference for the basic geometry of a truck, including a simple cab and cargo space. The full experience then branches into more rigorous, robust constructions that show what happens when you add a motor, gear train, and a more deliberate balance of weight. This bridging narrative—between a display piece and a working model—illustrates the continuum of learning that recycled-material projects offer.
In closing this reflection, consider how you might share your project with others. You can invite family, friends, or neighbors to contribute a piece of their own recycle bin to the next build. The collaborative aspect often yields surprising results as people offer help with painting, wiring, or testing. A humble trunk full of scrap becomes a classroom, a workshop, and a stage for storytelling about materials, methods, and the consequences of waste. In this sense, the mini truck from recycled materials is more than a toy or a showpiece; it is a microcosm of how design, care, and ingenuity converge to solve everyday problems. If you keep the spirit curious and the methods open, you can continue to refine your approach, try new salvaged parts, and push the project toward greater complexity or greater simplicity, according to what you want to learn.
A practical note about sourcing and safety ties this chapter to the broader themes of the article. When gathering scrap, you learn to sort for compatibility. Some pieces will require cleaning, some will need treatment for rust, and some will demand a plan for safe disposal once the project is complete, or a decision to reuse parts in another build. You can maintain a small workspace that stays organized and safe, with a clearly labeled bin for screws, a place for magnets and fasteners, and a separate area for sharp-edged components. By keeping a tidy space, you minimize accidents and make room for future experimentation. The act of reusing materials fosters creative discipline—an essential quality for anyone who wants to build more than one project and to explore variations on a single concept.
If you want deeper inspiration and more technical detail, consider turning to a comprehensive guide that emphasizes recycling and practical construction with common materials. A detailed external resource can offer additional ideas, diagrams, and troubleshooting tips that complement this narrative and help you scale up your skills over time: https://www.instructables.com/Make-a-Mini-Electric-Car-from-Recycled-Materials/.
For ongoing reading and project ideas, you can explore the community space linked through the broader site: the minitrucks blog, which hosts updates, tutorials, and stories from makers who work with salvaged parts and inventive engineering. This living collection of experiences helps you see how others turn scraps into functional models and how your own build can evolve over time.
In sum, a mini truck built from recycled materials embodies a philosophy as much as a machine. It demonstrates that careful planning, patient fabrication, and iterative testing can yield a moving model that teaches physics, honors sustainability, and sparks curiosity. It is a proof point that design does not demand pristine materials to be meaningful. It demands intention, skill, and respect for the possibilities hidden in everyday leftovers. The road from scrap to shit—excuse the bluntness, but from junk to justification for learning—is a route that rewards persistence, invites experimentation, and invites others to join in the making. If you approach the project with curiosity and a steady hand, the resulting mini truck becomes more than a model. It becomes a portable classroom, a story of resourcefulness, and a reminder that creativity often begins with what others have cast aside.
Creating a Smart Mini Truck with Microcontroller Technology
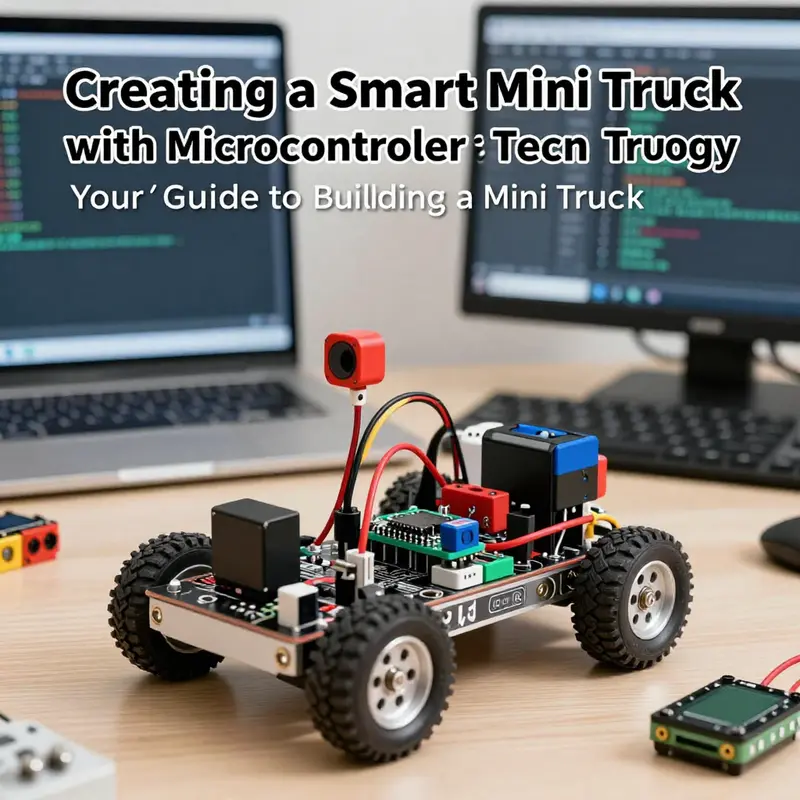
A smart mini truck sits at the intersection of hands-on fabrication and quiet, persistent computation. It is not just a chassis with wheels; it is a small system that blends mechanical artistry with programmable intelligence. The beauty of this project lies in treating the vehicle as a complete loop: you design the chassis, you choose the sensors, you wire the power, you program the behavior, and you test the outcomes in real environments. The goal is to build something that can move smoothly, sense its surroundings with reasonable accuracy, respond to simple commands, and adapt to modestly dynamic tasks like obstacle avoidance or semi autonomous delivery within a controlled setting. The journey is as much about learning the language of machines as it is about soldering, framing, and aligning components. When you approach a mini truck with this mindset, you begin to see how much of the final result comes not from a single clever trick but from a carefully arranged ecosystem of hardware and software that work in harmony.
At the heart of a smart mini truck is edge computing paired with cloud capabilities. In practical terms, the vehicle needs a fast, reliable way to handle core duties—driving the wheels, maintaining a stable speed, and keeping the vehicle on course. Those real-time control loops benefit from a compact computing module that can process sensor input and issue motor commands with low latency. Yet the richness of perception, planning, and learning increasingly benefits from cloud-based or remote inference when connectivity is available. A two-tier approach gives you the best of both worlds: the on-board system handles immediate tasks such as motor control, wheel synchronization, and basic obstacle detection, while heavier tasks like complex object recognition, route planning, or model updates can leverage more powerful resources when needed. It is a practical compromise stitched together with robust data flows and disciplined energy budgeting. The local layer keeps response times predictable, and the remote layer broadens capabilities without overburdening the on-board hardware.
To begin turning this concept into a build, you first clarify the mission and the scale. The chassis should be sized for the payload you anticipate, whether it is a mock cargo crate for educational demonstrations or a small sensor module for data collection. The power system must support not just wheels and sensors but also the processor, motor drivers, and any auxiliary components such as lights or buzzers. In the early stages, think in terms of modularity. Favor modular connectors, detachable sensor pods, and a frame that makes it easy to swap in a new computing unit or Different sensor packages. Modularity reduces repetitive work and keeps the project adaptable as your goals evolve. It also helps you evolve from a basic run-and-roll toy into a platform capable of more sophisticated behavior without a wholesale redesign.
The sensor package is the eye and ear of the vehicle. A modest smart mini truck benefits from a balanced set of sensing capabilities: a distance sensor to detect obstacles ahead, a camera or light sensor for basic scene awareness, a motion sensor like an inertial measurement unit to understand the truck’s orientation, and optional GPS for location tracking. The sensing suite informs a perception layer that can fuse data from multiple sources, producing a coherent understanding of the vehicle’s immediate environment. Perception is not a single-sensor story; it is a choreography of inputs that, when synchronized, yields reliable situational awareness. You will need to calibrate each sensor and ensure the timing of data streams is aligned so that decisions reflect a current scene rather than a stale snapshot. The practical effect is smoother starts and stops, more stable cornering, and safer operation when the truck encounters unexpected objects or surface irregularities.
On the software side, you migrate from a pure hardware mindset toward a modular, repeatable stack. A typical approach uses a lightweight, event-driven framework on the on-board unit to manage motor control loops, sensor polling, and state transitions. Separate modules handle perception, decision making, and actuation, and they communicate through well-defined interfaces. The decision layer should be capable of simple, deterministic responses for routine tasks, such as maintaining a selected speed or following a straight path, while also supporting higher-level commands and autonomous behaviors when the vehicle is in a suitable test zone. Template scripts provide a scaffolding that helps you iterate quickly. A basic template might implement the minimum viable loop: read sensors, compute a motor command, apply the command, and log data for later analysis. A more complete template could add obstacle avoidance routines, state machines for lane keeping, and a hook for voice or app-based commands. Even without naming specific brands or products, this structured layering makes the development process more predictable and repeatable, which is essential when you are learning and experimenting.
A crucial design principle is energy management. Small vehicles are often power constrained, so you must budget energy for propulsion, sensing, processing, and communication. Efficient motor control reduces wasteful torque while preserving enough headroom for safe acceleration and deceleration. Sensor power can be managed through duty cycling or selective activation, especially if your platform relies on high-end sensing like imaging, which can be demanding. The choice of power architecture—how you distribute voltage rails, how you protect against short circuits, and how you monitor battery health—affects reliability more than you might expect. A thoughtful power plan enables longer test sessions and reduces the frequency of recharging, which in turn accelerates learning. You will likely experience stages where the vehicle runs reliably on a bench yet encounters a new challenge outdoors. Each stage is a reminder that energy planning and thermal management are not afterthoughts but core to the craft of a reliable smart mini truck.
From a hardware perspective, the chassis and mounting strategy matter almost as much as the on-board computer. The frame should tolerate minor vibrations and allow straightforward alignment of wheels, sensors, and the control unit. A secure but adaptable mounting scheme keeps cables neat and reduces the risk of disconnections during movement. Wiring complexity is a common pitfall; therefore, aim for tidy harnesses and conservative routing. Modular connectors and color-coded harnesses simplify maintenance and upgrades. The actuation system—how the wheels are driven and steered, how brakes might be simulated, and how the vehicle achieves a predictable response to commands—should be designed with a clear separation between hardware and software. This separation not only protects the system from cascading failures but also makes it simpler to reconfigure the same vehicle for different tasks, such as a line-following educational demonstrator or a mobile data collector.
The educational payoff of a smart mini truck is substantial. Builders learn about edge computing concepts in a tangible way—a motivating antidote to abstract theory. You experience sensor fusion in real space, observe how latency affects decisions, and observe how cloud-assisted inference can broaden capabilities when connectivity is available. Even the act of designing the two-tier architecture provides a foundation for understanding how real-world robots operate inside cities, warehouses, or on campus. When a novice sees the system’s behavior improve after refining a single sensor integration or rebalancing the control loop, confidence grows and curiosity deepens. In this light, the project becomes more than a gadget; it becomes a small, teachable platform that can grow with the builder’s ambitions.
If you are seeking a broader sense of community and continual reference points, a quick visit to the Minitrucks blog hub can offer a constellation of ideas, projects, and discussions that complement the hands-on work described here. It is a useful resource for seeing how others approach similar goals, how they test their rigs, and what issues they encounter along the way. This kind of community input can illuminate practical shortcuts, safety considerations, and creative solutions that you might not discover in solitary tinkering. For those who prefer to skim through a library of examples before committing to a build, the blog hub serves as a friendly doorway into a larger ecosystem of mini trucks and compact robotics projects. Minitrucks blog hub.
Beyond the hands-on and community facets lies the potential to frame the smart mini truck as a platform rather than a one-off. You can imagine a family of vehicles—each tailored to a different role, yet sharing a common software backbone and a familiar sensor suite. A modular approach invites experimentation with different payloads, such as environmental sensors, light delivery modules, or tiny robotic arms, without starting from scratch each time. The vehicle remains a testbed for ideas about autonomy, resilience, and interaction with human operators. The pathway from simple motion to intelligent behavior is iterative: you test, you observe, you adjust, you re-test. Each loop teaches a bit more about latency budgets, sensor reliability, and how to write robust state machines that gracefully handle unexpected inputs. That iterative cadence is what makes the project both sustainable and deeply satisfying, turning a weekend build into a long-term learning platform.
For builders who want to explore practical pathways and reference implementations without becoming overwhelmed, the field offers a spectrum of starter kits and do-it-yourself guides that emphasize safe experimentation, measured complexity, and clear milestones. You can begin with a straightforward, safe chassis, add a basic obstacle sensor, and gradually layer in more ambitious features as confidence grows. The aim is to stay within a zone of achievable complexity while still challenging yourself to solve real-world problems. In time, the same scaffold can accommodate more sophisticated modules, from richer sensor suites to more nuanced decision logic. The arc is not about leaping to a fully autonomous system overnight; it is about cultivating competence, clarity, and confidence through careful, incremental work.
In closing, the smart mini truck project invites you to think cyclically and interdependently. Mechanical discipline, electronic reliability, and software discipline reinforce one another. If a single element fails, the entire system can falter; if all elements align, the truck becomes a patient, responsive platform capable of performing meaningful tasks within a controlled environment. This is the essence of building a micro-vehicle that is more than a toy and more than a gadget: a learning machine that demonstrates how intelligence can emerge from a well-engineered combination of hardware and software. The path is not a straight line but a thoughtful trek through prototyping, testing, and refinement—an experience that grows with every mile the vehicle travels and every sensor reading that informs the next iteration. For those who want to extend their understanding even further, consider exploring open frameworks and community-driven projects that provide templates, measurement practices, and shared challenges. The continuing conversation around smart mini trucks is as important as the hardware itself, because it helps new builders translate curiosity into capable, safe, and enjoyable machines. To keep the momentum going, revisit the core ideas: design with modularity, calibrate sensors carefully, manage power with discipline, and approach software as a layered, testable system. The result is not merely a working mini truck, but a small, reliable platform that invites imagination, experimentation, and the steady pursuit of improvement. For a broader pointer to the maker ecosystem and community-driven ideas, one can explore a general blog hub that curates related projects and discussions, offering a welcoming entry point for beginners and seasoned builders alike.
External resources can provide deeper technical grounding and broader perspectives. If you want to explore an open framework for autonomous vehicle projects in a practical, open environment, you can consult the following resource: an open-source autonomous vehicle platform.
Constructing a Mini Truck Model Kit for Detailed Assembly

Each detailed kit for a mini truck is more than a stack of parts. It is a compact invitation to understand how a full-size workhorse is laid out, piece by piece, and then translated into a precise, faithful replica. The essence of detailed assembly lies in planning a route through the build that respects the scale, honors the instruction set, and allows space for your own careful choices. In this realm, the journey from a jumble of parts to a convincing miniature vehicle becomes a quiet study of geometry, material behavior, and patience. The most common starting point is a kit scaled to either 1:25 or 1:10, a range that makes the proportions approachable without losing the sense of mass and presence. A 1:25 kit tends to resemble a classic, approachable workbench project with a chassis of plastic frames, a cab that invites meticulous painting, and a cargo bed that can be customized for display. A 1:10 project, by contrast, offers a bold surface for detailing, a heftier chassis, and the chance to show off working features if the kit provides them. Either path is an invitation to slow, precise work and, above all, to learning how these parts fit together in the real world.\n\nMaterials for a model kit are rarely just plastic or metal in a vacuum. Plastic kits typically require glue and a careful, methodical approach, while die-cast elements may provide durability and a more realistic surface but offer fewer opportunities for customization. The choice often comes down to your aim: a collector’s display piece that captures exact lines and weathered surfaces, or an interactive project where you can experiment with lighting, moving parts, and subtle mechanical storytelling. In the best builds, both approaches mingle. You may start with a plastic framework to learn the assembly sequence, then add die-cast accents where durability and a sense of weight enhance realism. Regardless of the exact makeup, the first contact with a new kit is always a moment for careful inspection. You check for mold seams, alignment marks, and any flux of glue residue that could interfere with the next step. A clean, well-lit workspace makes it possible to see the smallest misalignment before it becomes a stubborn gap later in the process.\n\nA central virtue in assembly is the discipline of dry fitting. Before you commit to cement, fit each part as the manufacturer intended. This means taking time to rotate, align, and even test-fit parts that may appear straightforward but can present challenges once glue is applied. The chassis, for example, often benefits from dry fitting to confirm that axles seats correctly and wheels rotate without rubbing. The same principle holds for the cab and the bed. When you remove parts from sprues, you should prepare them with a light pass of sandpaper or a gentle file to knock down any excess plastic or tiny burrs. This simple step prevents misalignment and reduces the risk of fragile joints fracturing under pressure. As you proceed, you’ll discover that the sequence of assembly matters as much as the parts themselves. Treat the build like a choreography: lay out the order, anticipate where a certain angle or a small shim may be required, and respect the way the kit wants to breathe as a complete system.\n\nWhen it comes to adhesion, precision governs success more than brute force. For plastic model kits, a suitable cement that fuses surfaces at a molecular level creates cleaner joints than a general-purpose glue. For metal or mixed-material kits, a high-quality CA (cyanoacrylate) adhesive often delivers the necessary bite without distorting delicate parts. The aim is to secure joints without leaving an obvious bond line or warping the surrounding areas. A steady hand and a thin, controlled bead make a big difference. As you join the first sections—typically the frame, then the suspension, and finally the body panels—wiping away any excess glue while it is still wet keeps the surface ready for primer and paint. Primer is your other essential ally. A light, uniform coat reveals tiny imperfections that would otherwise become conspicuous after the color is laid down. It also gives the paint something to grip onto, ensuring the finish remains smooth and even through multiple layers.\n\nThe painting phase is where the model starts to acquire its personality. Base coats set the overall tone, while color variations, subtle shading, and weathering bring depth. For many builders, acrylics are the go-to choice because they dry quickly, clean up easily, and accept washes that replicate the grime of the road. When choosing colors, think about the story you want your truck to tell. A common tactic is to apply a slightly lighter shade along the centerline of panels to simulate sun exposure and wear, then add darker washes in panel joints and recesses to emphasize depth. The cab’s interior, often a neglected area in a hurried build, rewards careful painting with a hint of upholstery color and a few tiny dials visible through a window. Decals, when provided by the kit, should be handled with tweezers and applied after a clear coat that protects the artwork. The decal solution helps the sticker settle into rivets and panel lines, but it must be used sparingly to avoid halos or excess moisture pooling in the corners.\n\nDetailing elevates a good kit to a convincing portrayal of a working vehicle. A grille, headlights, and taillights can become focal points when treated with careful chrome dry-brushing or metallic paints that mimic the reflectivity of real metal. Small parts like mirrors, antennae, and door handles demand patient handling and a fine brush. It is here that the kit nature becomes a laboratory for experimentation: you might build up a two-tone paint scheme with masking for precise edges, or you might weather the surface subtly to simulate exposure to sun and rain over time. The cargo bed, if your kit includes it, offers one of the most satisfying opportunities for customization. You can simulate lumber, crates, or tarps using simple papers, fabric scraps, or textured paints. The trick is to keep the bed emotional weight in balance with the rest of the model: a loaded bed should not overwhelm the cab’s lines, and a clean bed should still carry a sense of history, as if it has seen a few jobs in its day.\n\nFor builders who crave even more, some kits offer optional features that resemble real-world utility. A lift mechanism, an opening hood, or a moving tailgate can be included or added later with careful planning. If your kit contains these extras, treat them as you would a mini-diorama. The hood prop and the open-load bed can reveal the inner workings of the truck, from the engine block shape to the subtle routing of hoses and wires. If you choose to include lighting, the process introduces a new layer of precision. Tiny LEDs can be tucked behind the headlamps and tail lamps to simulate real lighting, while a battery pack and a switch must be placed in a safe, accessible location on the chassis. Wiring is an art in itself at this scale. It can be kept neat by running thin wires along the frame and securing them with small adhesive pads so nothing touches moving parts during operation.\n\nThe assembly journey is also a study in workspace etiquette. A well-ordered bench with good lighting becomes a silent tutor. A magnifying glass or a visor can help when you handle the smallest parts, especially those intended to pivot or lock into a frame. Keeping a small tray for loose screws, pegs, and decals prevents misplacement and makes it easy to return to a step without searching for lost pieces. As you progress through the build, you’ll likely create a small routine: dry-fit, trim, sand, prime, paint, detail, and seal. This cycle—repeated thoughtfully—turns what could be an overwhelming pile of pieces into a coherent object that reflects your choices and your restraint. Patience, not speed, becomes your most valuable tool.\n\nThe endgame is not just a finished shell but a presentation that respects the craft. Once the assembly is complete, the model deserves a display that complements the work you have invested. A clear-coated varnish protects the paint and decals from handling, dust, and moisture. A simple display case or a clean, well-lit shelf can frame the model without overshadowing it. If you enjoy storytelling, you can write a small caption that notes the scale, the kit’s era, and any custom choices you made, turning the assembly into a narrative rather than a mere object. The chapter you have completed becomes a microcosm of mechanical design: a small, tangible articulation of how chassis, body, and cargo relate to each other in space, weight, and visual rhythm.\n\nThe beauty of this hobby is its deliberate openness to interpretation. Some builders prefer to replicate a specific real-world truck as closely as possible, while others celebrate the act of construction for its own sake. Either stance invites a disciplined mindset: study the plans, respect the joints, and let your hands learn from repetition. As you gain confidence, you may find yourself returning to earlier steps to refine a seam, enrich a color transition, or adjust the balance of the model so that it sits firmly on its wheels without wobble. The sense of achievement grows with each small correction that brings the miniature closer to a faithful representation, and the overall experience becomes a personal archive of decisions—how you chose to approach the model, what you learned about materials, and how you translated a 2D drawing into a three-dimensional object.\n\nTo connect with fellow builders and share ideas on customization and display, many hobbyists find value in community projects and inspirational builds. For instance, a well-regarded online resource hosts a feature on a customized truck and camper project that demonstrates how a model can be extended with creative details, inviting suggestions on color, texture, and proportion. This kind of reference acts as a primer for your own exploration and helps you see possibilities you might not have considered on your own. If you’d like to explore further examples and next steps in customization, you can visit a related project page that discusses the evolution of a camber-free, stylized miniature and its adaptation for display and storytelling. The page offers practical ideas on scale accuracy, surface texture, and how to approach finishes that read well under display lighting. For a broader sense of the community’s approach to finishing touches and presentation, a quick look at that resource can be a valuable companion to your build process. You can discover it here: Godzilla Truck Camper customization (https://minitrucksocala.com/godzilla-truck-camper-review-customization/).\n\nThroughout this detailed assembly, remember that your kit is a bridge between theory and practice. The chassis layout mirrors how a real truck transfers power to its wheels, while the bodywork captures the lines, shoulders, and creases that define its character. The cargo bed, often a simple platform in a basic kit, becomes a stage for your design narrative: it might be loaded with corrugated crates for a weathered industrial scene, or it might hold a neatly folded tarp over a neatly stacked pallet. Each choice informs not only the visual impact but the balance of the final model. The acceptance of constraints—scale fidelity, part fit, and the limits of your tools—becomes the engine that drives your growth. And with every project you complete, you learn new techniques to apply to future builds, building a quiet library of skills that can enhance not just mini trucks but any scale model that interests you.\n\nIn the end, constructing a mini truck model kit for detailed assembly is less about racing to a finished product and more about extending your hands into a living process. The kit becomes a mentor, revealing how small pieces, aligned with care, can convey a sense of movement, purpose, and history. It is a discipline that rewards nuance: the precise mating of a hood panel, the careful weathering on a metal surface, the decision to accent or subdue a decal, and the moment when the wheels finally turn true and sit on a flawless stand. The result is not merely a replica but a record of your growing sensitivity to proportion, texture, and light. If you approach each kit with curiosity, patience, and a willingness to refine, you will find in this hobby a dependable method for translating the complexity of real trucks into a compact, vivid form—a small but meaningful achievement that keeps inviting you back to the table for the next build. \n\nExternal resource for practical, hands-on techniques in small-scale model building that can complement the detailed assembly process described here: https://www.instructables.com/Make-a-Mini-Electric-Car-from-Recycled-Materials/
Final thoughts
Creating your own mini truck is an enriching endeavor that connects creativity, sustainability, technology, and craftsmanship. Each method discussed—from LEGO constructions bursting with imagination to eco-friendly builds using recycled items, smart designs integrating tech, and detailed models rooted in artistry—offers unique insights and satisfaction. So grab your materials, unleash your inner builder, and embark on the delightful journey of mini truck assembly. The possibilities are as varied as your imagination!