Are you ready to unleash your creativity and draw your very own mini truck? Whether you’re a local small business owner looking to sketch your vehicle for marketing, a residential property owner wanting to customize a design, or an avid mini truck enthusiast, this guide is for you! Drawing a mini truck may seem daunting at first, but with a few simple steps, you can create a fun and charming representation of these beloved vehicles. Each chapter will guide you through the process, starting from the foundational shapes to the final details that make your truck design pop. Let’s jump in and start sketching!
Foundations First: Building a Mini Truck from Simple Shapes
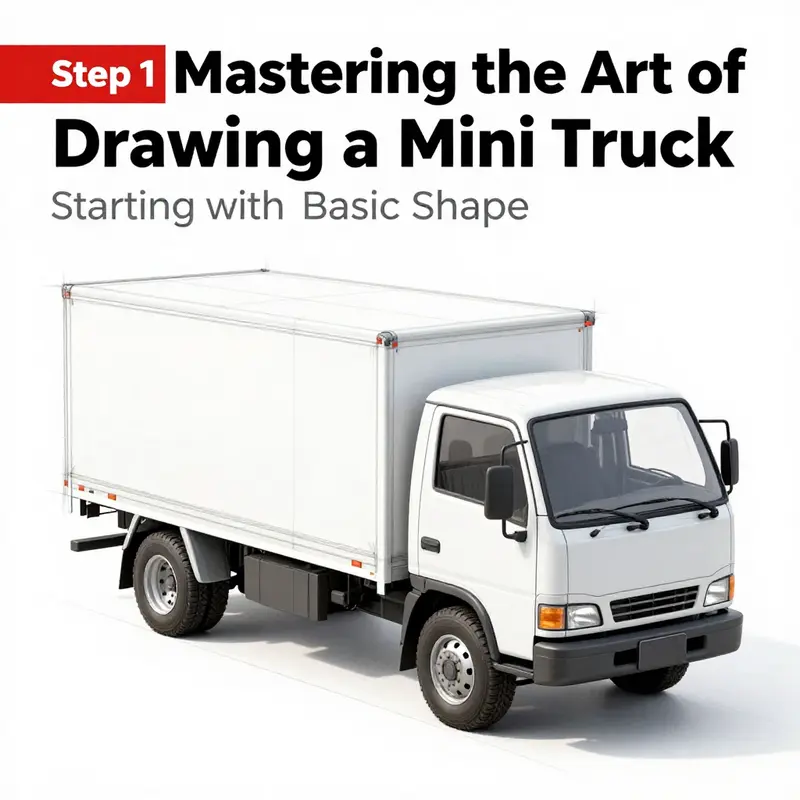
Begin by viewing a mini truck as a compact, friendly machine that can be drawn with simple blocks. Start with a large rectangle for the main body, which will anchor the drawing. Keep lines light at first to test proportions. The rectangle should be slightly taller than wide to reflect a compact silhouette. Place it on an implied ground line so gravity grounds the form.
Next, add the cab: a smaller rectangle or angled trapezoid above and slightly ahead of the main body. Make it feel connected but distinct, forward of center and a bit higher to create depth. Consider a three-quarter view where the front edge tilts toward the viewer. Keep construction lines soft so you can adjust later.
Block in the wheels as simple circles along the lower edge, two wheels, tucked slightly under the frame. Use a wheel diameter that harmonizes with the body. A light centerline down the middle helps keep symmetry for doors and windows.
Refine the outline: move from rough shapes to a readable exterior. The contour should be confident but approachable. Slightly soften corners or extend lines to indicate a cargo area. Maintain a balance between structure and playfulness.
Add simple features: windshield as a curved rectangle or inverted U sitting on the cab; tiny headlights; a simple grille line; subtle hood crease. Avoid over-detailing.
Darken the final outline: trace the outer shape with a bolder line, erase stray guides, and keep essential lines a bit heavier to anchor the form, especially at smaller scales.
Add personality: a gentle cab tilt, small mirrors, door seam suggestion, and a minimal bumper. The goal is a readable, friendly silhouette rather than realism.
Finally, practice variations: redraw from different angles using the same core shapes, preserving proportions while adjusting the cab angle and wheel positions to convey depth.
Wheel by Wheel Realism: Crafting the Heartbeat of a Mini Truck
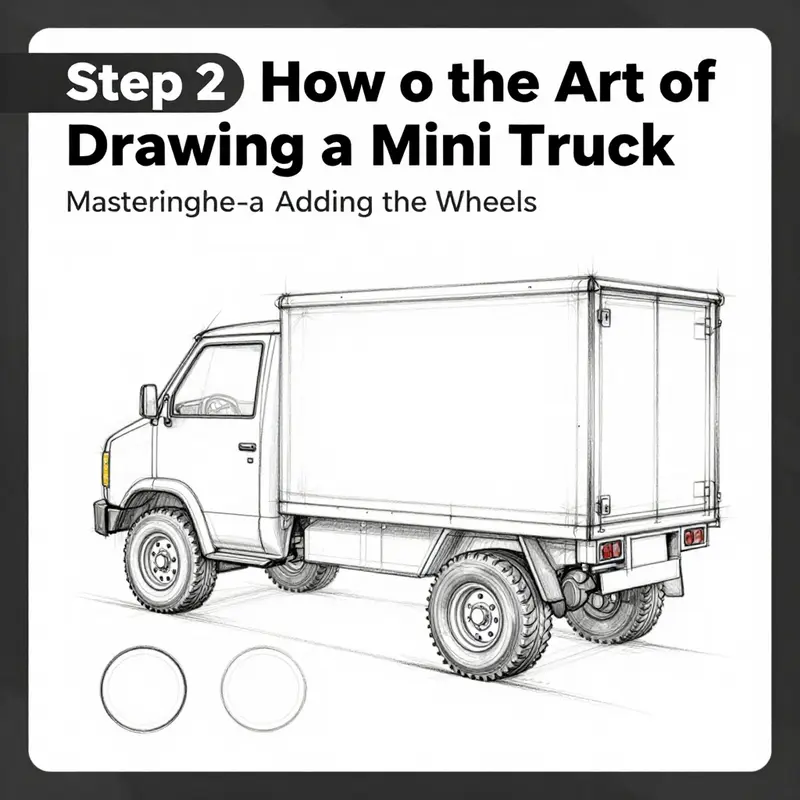
In the journey of drawing a simple mini truck, the wheels are more than just circles; they are the rhythm that brings the vehicle to life. This chapter keeps the focus on Step 2, but the approach is a thread through the entire process. You begin with a sturdy base, a main body rendered as a generous rectangle, and you let the wheels assert their place. The goal is not to perfect a mechanical replica in a single stroke, but to give the sketch a believable stance, a hint of weight, and a sense that this tiny machine could roll forward with a gentle push of your pencil. As you move from the broad shape to the tiny but telling details, you will discover that the wheels anchor proportion and perspective, guiding the eye along the body of the truck rather than distracting from it. The act of placing the wheels carefully is a small decision with outsized impact, and the simplest adjustments often yield the most convincing results.
Begin with two small circles at the bottom corners of the main body rectangle. The alignment here is crucial. The front wheel should be near the front edge, while the rear wheel sits toward the back, leaving a little space that suggests the wheelbase without turning the drawing into a rigid set of measurements. Aim for even spacing between the wheels, and make sure their centers line up along a common horizontal axis. This creates a natural, grounded feel, as if the mini truck is poised to travel rather than float above the page. The trick is to imagine the truck resting on a smooth road and to reflect that subtle contact with the surface in your initial placement: circles that sit squarely on the bottom line of the body, with just enough distance from the edges to imply a sturdy chassis and a realistic footprint.
Once the basic wheel positions are in place, refine the shape by letting the outer edge of each wheel peek just beyond the body. A tiny overhang suggests the tire’s breadth and hints at the wheel well without forcing a harsh boundary. If the wheel touches the side of the rectangle, lift the edge slightly with your eraser and redraw. This small maneuver, often done with a light touch, prevents the wheels from feeling cramped and keeps the overall silhouette clean. The idea is to preserve the playful charm of a cartoon style while grounding it in a believable geometry that a viewer can read at a glance. A clean outline matters here, because the more clearly you define the wheel positions, the more your picture communicates a ready-to-roll miniature, even before you add shading or finer details.
Inside each wheel sits a smaller circle, the inner hub that brings depth to the design. The hubcap or center cap is a tiny but telling touch; it breaks the monotony of a single ring and gives the wheel a sense of individuality. Draw the inner circle gently so it sits centered within the outer tire. If you wish, add a few short pips or dashes to represent lug nuts around the hub, but keep them light and evenly spaced. This restraint matters: too many lines can clutter a small wheel and strip away the crisp, cartoon-friendly energy that makes a mini truck appealing to beginners and seasoned doodlers alike. The hub detail acts like a tiny focal point that anchors the wheel visually, making the whole vehicle feel more complete.
The wheel itself should feel like a rounded object resting on a line that suggests the road. A helpful approach is to draw the tire first as a bold circle, then add the inner circle for the rim, followed by the hubcap. This sequence helps you manage proportion and keeps the wheel visually sturdy. If you find the wheel seems off balance, don’t hesitate to adjust: nudge the center a hair to the left or right, or tweak the radius slightly. Small shifts can remedy subtle asymmetries that become glaring when you compare both wheels side by side. In a simple cartoon, symmetry matters, but so does a touch of personality. If your wheels appear perfectly identical, you may have achieved balance; if one wheel feels a touch larger for effect, that can also read as a stylistic choice, as long as the result remains harmonious with the overall drawing.
Weight and perspective also come into play as you sculpt the wheel shapes. In a front view, you might see the wheels as perfect circles, but in a side glance, they can appear as rounded ovals. The exact view you choose will depend on the angle of your truck. For a straightforward, friendly mini truck, a straight-on wheel presentation works well, with the tires lying flat on the imagined road. If you tilt the chassis ever so slightly to give a wink of motion, the wheels will read as slightly foreshortened, which adds life without complicating the drawing. The key is to keep the lines light as you experiment with perspective. You will likely redraw once or twice before you settle on a placement that feels both stable and lively.
One practical tip emerges from repeated practice: mark the wheel centers with a light dot or a tiny cross before finalizing. This invisible cue helps you verify even spacing and alignment as you draw the rest of the body. If you notice a discrepancy after you add the cab, the windshield, or the grill, you can adjust with minimal disruption by erasing subtle lines and nudging the circle positions a fraction. Remember that the outline is your ultimate tool; it anchors all the details that follow. A crisp outer circle for each tire and a clearly defined inner circle for the hub keep the vehicle from looking top heavy or lopsided. This is especially important in a mini drawing where every inch of space is precious and every line must earn its place on the page.
With the wheels set and the hub details in place, you begin to sense how the vehicle will sit and how the rest of the features will interact with those two circles. The wheel alignment acts as a compass for the next steps: shaping the cab above the wheels, drawing the windshield with a gentle curve, and adding the tiny mirrors that peek from the sides. If your goal is a clean, cartoon style, the wheels can stay bold and simple in contrast to a lighter, more streamlined body. If you lean toward a more realistic vibe, you may add thin lines to indicate tire treads and a little shading to show curvature. Either path benefits from a solid wheelbase and true-to-life wheel sizes, because the wheels are the frame on which the entire drawing balances.
As you continue, you can introduce restrained shading to convey form without overcomplicating the scene. A light value along the bottom edge of the tires can suggest contact with the road, while a slightly darker tone on the upper portion hints at curvature. The shading should be subtle, especially in a simple mini truck, where the joy lies in the clarity of shapes rather than a heavy grayscale. The contrast between a darker tire surface and a lighter wheel rim can create a pleasing play of light that reinforces the three-dimensional feel without undermining the simplicity of the line work. If you are drawing on paper, consider selecting a pencil grade that allows you to layer softly. You want to be able to lift or smudge a touch if a line becomes too harsh while you are refining the form.
When you reach the point of finalizing the wheel details, pause and take stock of the overall silhouette. Do the wheels sit evenly with respect to the body and to each other? Are they visually aligned and does the wheelbase feel plausible in relation to the truck size you want to convey? If the answer is yes, you have earned a quiet triumph: you have established the heartbeat of your mini truck. If not, a patient rework of the wheel positions, a light touch on the outer circles, or a small redraw of the hub inside can restore balance. The beauty of this approach is that you can refine in small, controlled steps, preserving the charm of a simple, approachable technique while still achieving a sense of realism that invites a viewer to linger and smile rather than shrug. This is the moment where the practice you invested pays off. The wheel placement you established now serves as the stable platform for the cab, the windshield, and the other little features that define your character of a mini truck.
For readers who want a deeper dive into related projects, the practice of placing and detailing wheels translates well into other compact vehicle drawings. It is not merely a mechanical exercise; it is about reading space, proportion, and motion in a compact form. You learn to balance bold, readable shapes with the lighter cues that define individuality. The steps here are deliberately straightforward, designed to be repeatable and adjustable. You can replicate the same sequence with slightly different wheel sizes to explore variants like a compact delivery van, a dune buggy style, or a small work truck with a different stance. Each variation starts with two circles, aligned and proportioned with care, and then unfolds into a unique, cohesive whole. This approach keeps the exercise enjoyable while gradually expanding your repertoire of mini vehicle designs.
As you close the wheel chapter and prepare to transition to the next elements of the truck, celebrate the small truths you discovered along the way. The two wheels are more than decorative anchors; they are the structural cues that communicate weight, balance, and potential motion. When you look at the finished layout, your eyes should travel naturally from the lower corners up to the cab and windshield, guided by the rhythm of the circles that firmly ground the drawing. In that moment, your mini truck has a believable presence that invites a second look, a second pass of shading, perhaps a touch of color, and a renewed sense of play in the next steps of your creative journey. For further inspiration and drawing tips, you can explore more content at minitrucksocala.com/blog/.
External resource for reference and further practice: How to Draw a Truck – WikiHow
Carving the Compact Heart: Defining the Cab in a Mini Truck Sketch
The cab is not merely a place for the driver; it is the quiet heart of a mini truck drawing. When you give shape to this compact compartment, you set the tone for every other line that follows—the silhouette, the balance between front and rear, and even the sense of scale that makes a tiny vehicle read as intentionally designed rather than as a casual doodle. In a mini truck, the cab’s footprint is deliberately smaller than a full-size pickup. That reduction in size is not a cosmetic concession; it is a design truth. A compact cab forces you to think in clean, geometric terms. It asks you to translate a lot of function—the driver’s space, the controls, the windshield, the seating—into a pared‑down, legible outline that still feels believable. The result is a drawing that reads as a miniature of a real vehicle, yet remains friendly and approachable for practice, study, and quick sketching sessions.
To begin defining the cab, focus on a simplified, compact rectangular shape, or a slightly angled rectangle that sits above the imagined engine area. Keep the outline clean and geometric. This shape should be noticeably smaller than the overall vehicle footprint, reflecting the mini truck’s compact size. A good starting point is a form that suggests space for the driver and a modest amount of interior room without suggesting an exaggerated interior height. You are not building a luxury sedan inside a tiny body; you are creating a practical cabin that communicates function at a glance. Use light, loose lines at this stage. The goal is not to lock in every detail but to establish proportions and alignment so the cab sits naturally with the rest of the vehicle.
A cab‑over‑engine layout, or COE, is a design principle that recurs in many small utility trucks. In COE designs, the cab sits directly over the engine, which can maximize interior space for the driver and free up more room behind the cab for cargo. If your reference points lean toward this arrangement, emphasize a more vertical windshield and allow the cab to extend forward over the engine block. This verticality helps convey efficiency of space—the hallmark of the mini truck’s philosophy. It is a useful mental image to hold as you draw: the cab is not floating in front of the engine, but rather perched over it, forming a single, compact block that harmonizes with the bed behind it.
As you shape the cab, consider the relationship to the bed or cargo area that follows. The transition from cab to bed should feel deliberate and balanced. The line that connects the roof of the cab to the start of the cargo platform behind it is a hinge of the drawing’s emotional punch. If the bed appears too heavy or the cab too light, the whole vehicle can tilt into a cartoonish imbalance. The smoother the transition, the more the mini truck reads as a practical tool rather than merely a toy. You can test this harmony by lightly sketching the bed’s top edge and tracing it back toward the cab. If the two areas feel disconnected, nudge the roofline or the cab’s rear corner to create a more unified silhouette. In practice, many successful mini truck drawings use a slightly rounded top edge on the cab, which softens the line where the cab meets the cargo area while preserving the crisp geometry that keeps the design readable at small sizes.
Once the basic cab rectangle is in place, refine the features that give the space its character. The windshield is a crucial landmark. In the cab’s face, aim for a shape that suggests practicality rather than luxury: a large, curved window or a gently arced, almost U‑shaped front that communicates wide visibility for the driver. For COE-inspired designs, the windshield can lean toward a more vertical orientation, reinforcing the sense that the cab sits snugly atop the engine compartment. The roofline should feel continuous with the windshield; avoid abrupt changes that could disrupt the clean rhythm of the exterior. If you choose a slightly angled cab, the angle should feel purposeful—perhaps a touch of forward tilt to imply forward accessibility and ease of entry, common in small utility vehicles. Remember, the cab’s lines are not just the driver’s window and the door; they are the vehicle’s story written in geometry.
Details, when added, should be restrained and purposeful. Side mirrors—little protrusions that they are—should be sketched as simple, functional shapes that extend from the upper corners of the doors. The door panels can be suggested with a single, light line that hints at the seam between the cab and the rest of the body. A minimal window frame adds a touch of realism without crowding the design. The grille, if you choose to render one, lives below the windshield area and above the bumper; a few short lines can suggest slats or texture without overpowering the cab’s clean geometry. The goal is not to fill the cab with features but to ensure there is just enough information to convey mass, purpose, and the sense that this is a real, usable vehicle.
The act of refining the cab also means paying attention to how your pencil behaves when tracing a circle, a straight edge, or a gentle curvature. Use light, exploratory strokes to map angles and alignment. The shapes do not have to be perfectly symmetrical—small asymmetries can make a drawing feel more human and less machine‑perfect. After you are satisfied with the cab’s proportion and silhouette, you can intensify the lines with a darker stroke or pen. The final outline should be clear but not brittle; the edges shouldn’t look as if they were cut with a ruler to the last millimeter. Otherwise, the cab risks appearing rigid or disconnected from the rest of the vehicle. A well‑done cab communicates confidence in the sketch, inviting the viewer to imagine the door handles, the window glass catching light, and the cab’s interior space without requiring every nook and cranny to be drawn.
Understanding the structure behind the cab pays dividends in the realism of your drawing. The original guide you may begin with emphasizes that the outline is the key to a recognizable shape. A clean, confident outline can carry a simple cartoon figure into something with believable proportions. But even when the aim is a playful, approachable cartoon style, keeping the cab’s geometry consistent with the rest of the vehicle helps maintain coherence. The cab is not a stand‑alone shape; it anchors the front of the truck and sets up how the eye reads the entire silhouette. This is why so much attention is given to the cab during early sketching: get this block right, and the rest of the truck will harmonize more readily.
For those who crave additional guidance or a visual walkthrough, a comprehensive step‑by‑step reference can be helpful. While you sketch, you can also reflect on how to translate a real pickup’s proportions into a miniaturized form without losing the sense of capacity and practicality. A well‑timed pause to compare your lines against a simple reference can keep your proportions honest. In practice, the idea is not to copy a full‑size vehicle but to reduce it intelligently. The cab’s size, its angle, and the way it integrates with the bed behind it will determine whether your drawing feels like a nimble workhorse or a tiny caricature.
As you continue refining, you may wish to explore more examples and tips. To the extent that you want a broader repository of mini truck drawing approaches and inspiration, you can explore resources like the Mini Trucks Blog for related tutorials and discussions. Mini Trucks Blog can be a helpful companion as you fine‑tune techniques and observe how different cabs express character while staying faithful to the compact proportions that define a mini truck. Keeping that broader context in view can remind you that every line you place on the cab carries intention and meaning, from the windshield’s arc to the door’s edge.
In addition to internal practice and reference, see how seasoned artists handle similar tasks by consulting visual guides that walk through simple pickup truck construction. The core principle remains constant: start light, think in geometric terms, and let the cab’s size and placement dictate the rest of the drawing. The reshaping of a single block—the cab—often unlocks the correct stance for the entire vehicle. When you feel confident about the cab’s silhouette, you will notice that the bed’s height, the wheel arches, and even the bumper line begin to align more naturally. The next stage, drawing the cargo area and its relation to the cab, will feel less like guesswork and more like a logical continuation of the geometry you established at the cab stage.
In the end, the cab’s definition is a practice in restraint and measure. It’s about recognizing the cab as the vehicle’s core and letting its compact geometry steer the rest of the drawing. This approach yields a mini truck that looks both credible and approachable—a small, stylized tool with a clear purpose. The cab’s vertical windshield, compact footprint, and the clean transition to the bed behind it all contribute to a single, readable silhouette that communicates efficiency and practicality at a glance. If you stay faithful to these ideas, your mini truck will read as a deliberate design choice rather than a casual sketch, inviting curiosity about how it would function in real life and how your lines could translate into a finished, polished illustration.
External reference for visual pacing and technique can be found in a step‑by‑step drawing guide that demonstrates the general workflow for a small pickup style. This resource complements the principles discussed here and reinforces how to balance proportion, line weight, and silhouette when you’re rendering a compact cab. For broader practice and inspiration, consider visiting the referenced guide and its related examples, then return to your own sketch with fresh eyes. (External resource: https://www.youtube.com/watch?v=6t3VbQqKz9g)
From Silhouette to Shine: Mastering Details and Finalizing the Mini Truck
With the basic form sketched and the overall proportions settled, you stand at the threshold between a friendly cartoon outline and a polished little vehicle that carries personality as well as shape. This chapter moves you through the crucial moves that transform a simple silhouette into a confident drawing of a mini truck. The focus remains faithful to the practical, beginner-friendly approach that keeps the process approachable while allowing for a touch of realism. The lesson isn’t about turning your sketch into a blueprint; it’s about refining what you already have so the tiny truck reads clearly, looks balanced from all angles, and feels like it could roll off the page.
Begin by revisiting the outline itself. The most common stumbling block at this stage is unsteadiness in lines. You want a clean, smooth contour that reads as the truck’s outer shell without jagged edges or wavering curves. Lightly trace over the major boundaries first, then gradually increase the weight on the lines you want to emphasize. A consistent line weight helps the drawing feel intentional. If you find certain parts of the shape look off, step back and compare the cab’s size to the cargo bed. The cab should be clearly distinct from the back deck, but neither should dominate the other. A tiny truck still has its own sense of proportion; a well-balanced silhouette makes the whole vehicle feel composed rather than top-heavy.
The proportions you decide on now will echo in nearly every detail you add. Start with the cab’s height relative to the wheel wells. If the cabin sits too high, the truck can resemble a toy more than a believable compact hauler. If it sits too low, the profile may appear cramped. A good rule of thumb is to keep the cab sized so the windshield is easily readable and the grill area is visually grounded at the front. The cargo bed should extend slightly behind the cab, providing a sense of purpose and space. This creates a believable rhythm along the body, from nose to tail, and helps you place features with confidence later.
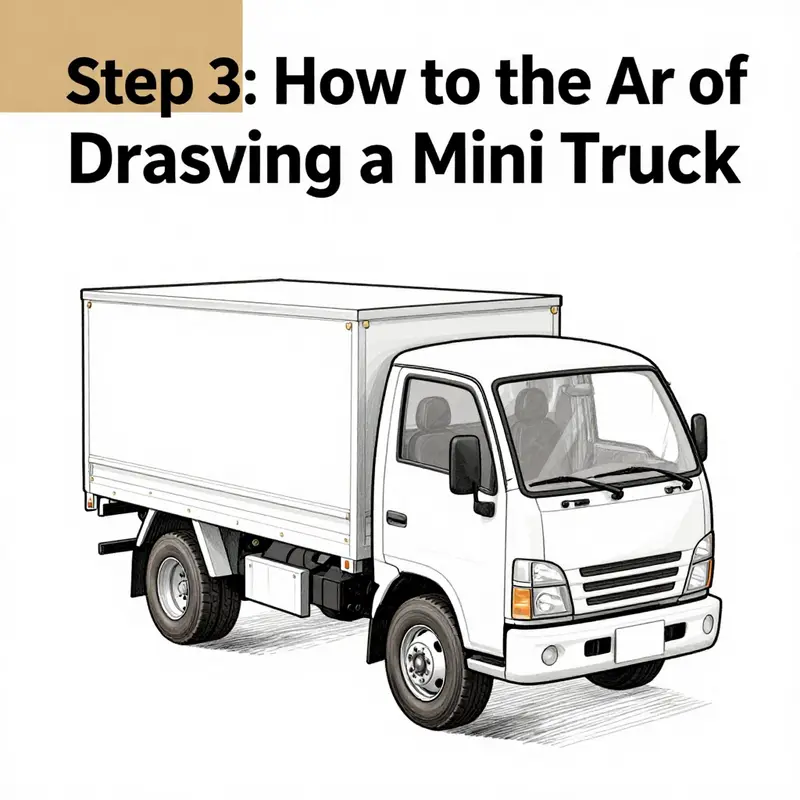
Once the outline feels solid, move to the essential features that anchor the truck in recognizability. Start with the headlights, taillights, and grille details. For headlights, a simple but effective choice is a pair of small rounded rectangles or slightly curved squares positioned near the front bumper. They do not need to be oversized; tiny lamps can carry a lot of character when placed with intention. Taillights mirror this logic at the rear, echoing the shape and keeping the design cohesive across the length of the vehicle. The grille deserves similar treatment. Rather than a dense mesh, you can suggest the idea of a grille with a few horizontal or vertical lines—thin, evenly spaced strokes that hint at metallic texture without complicating the linework. The goal is to guide the viewer’s eye and emphasize the face of the truck without turning the drawing into a technical rendering.
Next, turn to the wheels and their relationship to the body. The earlier step may have given you two circles, but the rims inside the tires deserve some attention. Draw the rims clearly inside the tire circles, using lighter lines to sketch a few hubcaps or spokes. A small set of spokes can imply motion and practicality without becoming a distraction. The rims should align with the wheel wells. If the wheel appears to sit too high or too low relative to the body, adjust the position a touch. In a cartoon-style mini truck, the wheels often carry a lot of personality; evenly spaced details around the rims can make the vehicle feel grounded and confident on the page. A couple of reflections or shading on the tires can also imply roundness and depth without complicating the overall look.
Windows and markings are the next clean steps that bring life to the truck without overwhelming the viewer. Outline the windows with a single, confident line that follows the contour of the cab. The windshield, in particular, is a signature feature; a gently curved rectangle or an inverted U shape communicates a forward-facing stance and adds to the friendly character of the scene. The side windows should align with the cab’s top edge, and their shapes should be consistent with the vehicle’s perspective. If you like, add a thin border to the windows to suggest glass and light. Distinctive markings—such as decals or logos—offer opportunities for personality without clutter. A small stripe along the cargo bed, a tiny emblem on the door, or a casual logo on the side can anchor the truck in a particular mood or setting. Keep these markings simple; in a mini truck drawing, subtlety often exceeds complexity.
With the major features in place, you can revisit the outline to sharpen the overall polish. Go over the entire drawing with a darker pencil or fine pen to finalize the lines. This step is about confidence. You want the lines to read clearly at a glance, not to fade under inspection. When you feel the contour is complete, erase construction marks and guidelines that are no longer needed. A clean surface gleams with the clarity of intent; the drawing appears ready for a little further flourish if you choose, or simply to stand as a neat, finished piece.
It’s worth emphasizing that the purpose of this stage is not to chase realism for its own sake but to establish a readable, friendly design. The knowledge base points out that understanding the structure and paying attention to the outline are key to achieving a more realistic look—but it also notes that for a simple, fun drawing, this basic approach works well. Keeping that balance in mind helps you decide how far to push the realism versus keeping the charm. In many cases, a slightly exaggerated proportion or a bolder outline can make a cartoonish mini truck feel more approachable, which is often exactly what beginners need to build confidence.
As you move toward finalizing, consider how light and shadow would interact with the surfaces. Even a minimal shading plan can elevate a flat line drawing into something that reads as a three-dimensional object. A soft shadow along the bottom edge of the cargo bed can imply depth, while a faint highlight along the cab’s curved roof can suggest a light source from above. The trick is to use shading sparingly and consistently. Too much shading or inconsistent light direction can distract from the clean, approachable vibe you’re aiming for. If you want to keep the focus purely on the line art, you can skip shading entirely. Either way, the choice should feel intentional and aligned with the tone you want for your mini truck.
To support your practice, you might seek additional visual references that walk through similar steps in a straightforward way. A comprehensive, beginner-oriented tutorial like the one from Doodle Art Club offers visual guidance that complements the procedural approach described here. It presents a simple, easy-to-follow sequence that reinforces the feel of stepping from sketch to finished line work. If a visual guide would help you consolidate the habits of clean outlines and confident detailing, exploring that resource can be a worthwhile complement to your own sketches. For a direct look, see the tutorial here: https://www.doodleartclub.com/draw-mini-truck/
Beyond the practical steps, a helpful habit is to engage with micro-improvements rather than sweeping changes. Each detail you add—be it a small mirror, a single grille line, or a precise wheel rim—should reinforce the truck’s identity while keeping the overall composition harmonious. When in doubt, simplify. Strive for a focal point, such as the cab’s windshield or the front grille, and let everything else support that center. A well-placed focal point often implies a lot about the vehicle’s character with modest means.
If you’re looking for ongoing inspiration or more practice materials, consider exploring related content that centers on compact transport concepts and how small vehicles carry big ideas in art. The idea is not just to replicate a mini truck but to internalize a workflow that can be applied to other small-scale vehicles, whether you’re drawing a delivery van, a compact pickup, or a toy-like render that still respects proportion and form. The consistency you build while refining the mini truck will translate to future projects, making your process more efficient and your outcomes more satisfying.
For a broader sense of ongoing practice and community ideas, you can visit the Mini Trucks blog, which curates a variety of related sketches, tips, and progress demonstrations. It’s a steady source of encouragement and practical shortcuts that can help you stay motivated as you refine your technique. Mini Trucks blog
In closing, the path from silhouette to shine is less about chasing perfection and more about cultivating a reliable method that turns a simple line into a story on the page. The steps outlined here—tightening the outline, aligning proportions, adding essential features, refining windows and markings, and finalizing with crisp line work—create a workflow that is accessible and repeatable. It’s the kind of practice that, over time, yields confidence in your ability to draw a mini truck in a way that feels personal and lively. If you choose to follow along with additional resources, you’ll find a visual companion in the suggested tutorials, and you’ll have a ready-made framework to adapt for future projects. For those who want to broaden their reference pool, the shared guidelines still apply: build from a solid shape, respect proportional relationships, introduce features with intent, and finish with clean, decisive lines.
External resource note: for a clear visual demonstration, you can consult a step-by-step guide at https://www.doodleartclub.com/draw-mini-truck/.
Final thoughts
Drawing a mini truck doesn’t just serve as a creative outlet; it’s a way to express your passion for these versatile vehicles. By following the simple steps in each chapter, you have equipped yourself with the skills needed to create your own unique representation. Don’t hesitate to experiment with colors and patterns to make your truck truly yours. Remember, every artist starts with a simple shape and brings their vision to life—so grab your pencils and let your creativity roll!