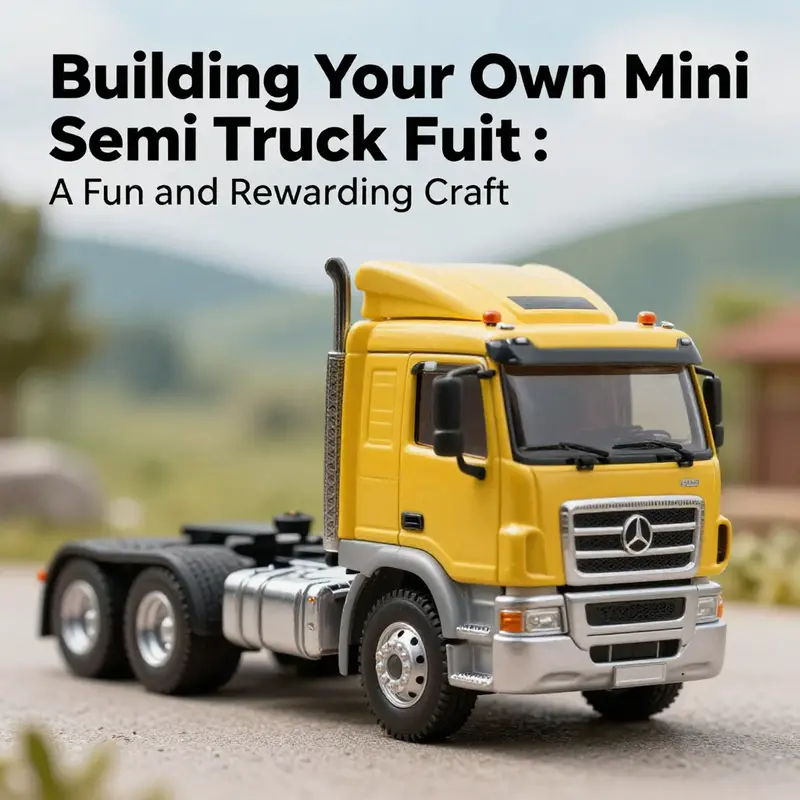
Creating a mini semi truck can be an exciting venture, whether you’re a hobbyist, a business owner looking to attract attention, or simply someone who loves miniatures. This guide will walk you through the steps involved in choosing between a static model and a functional miniature. In doing so, we’ll also detail the materials and tools needed for the project, alongside step-by-step assembly techniques that will transform your vision into reality. Join us on this creative journey as we unlock the art of mini truck building together!
Model or Machine: Deciding the Best Path to Your Mini Semi Truck

Choosing the right path—model or functional miniature—defines every choice that follows when building a mini semi truck. This chapter guides you through the trade-offs and practical steps that turn a concept into either a finely detailed display piece or a working, drivable miniature. Read this as the bridge between the idea of a mini semi truck and the hands-on work: the decisions you make here determine materials, tools, complexity, budget, safety, and legal constraints.
Decide what you want the truck to do. If you want a shelf-worthy replica with accurate paint, scaled logos, and realistic proportions, you will focus on scale, appearance, and finish. If you want a vehicle that moves under power and carries a light load, you will prioritize chassis strength, drivetrain layout, and controls. Both outcomes reward careful planning, but each demands a different mindset. The model-build is architectural and cosmetic. The functional build is mechanical and practical.
Begin with purpose, then pick scale. Purpose answers whether the cab must open, whether the trailer must detach, or whether the vehicle needs steering and suspension. Scale decides available detail, material thickness, and component sizing. Common scales like 1:24 or 1:32 balance detail with manageability. Large scales permit more functional components but require more space and resources. Smaller scales are often easier for display models because fewer moving parts are needed.
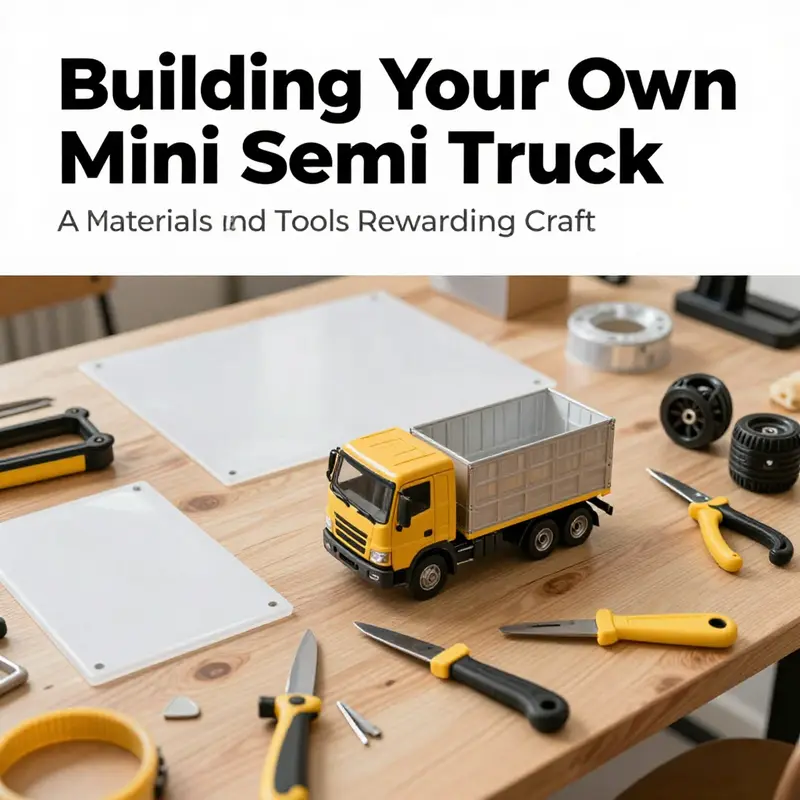
Materials and tools follow the chosen purpose. For a model, lightweight, easy-to-cut materials let you achieve crisp edges and tiny features. Thin plastic sheets provide smooth surfaces for paint and can be glued cleanly. Foam board and cardboard are forgiving for prototyping shapes and allow rapid iteration. For structural strength in a functional miniature, choose rigid materials: hardwood or high-density plastics for the chassis, thin metal rods or steel wire for axles, and sturdier sheet metal or thick plastic for body panels that will be handled frequently.
A clear parts list prevents wasted time. For models, list body panels, cab details, windows, wheels, and finishing supplies like primer and clear coat. For functional builds, list a motor, battery pack, gears or belts, axles, wheels, bearings, mounting hardware, switches, and wiring. Even if you plan to improvise with repurposed parts, having a shopping list keeps the build focused.
Design and planning are non-negotiable. Sketch the truck from multiple angles. Measure real trucks or study photos to capture proportions. Decide the wheelbase, cab height, trailer length, and coupling mechanism early. In a functional build, allocate space for the motor and battery within the chassis envelope before sizing body panels. Create scaled templates for key parts. Cut trial pieces from cardboard or foam to validate fit before committing to expensive materials. Accurate templates reduce errors and make assembly neater.
Consider structural strategy. A model benefits from an internal frame that keeps panels square and aligned. A minimal frame can be made from thin strips of plastic or wood glued at right angles. For a functional miniature, the chassis is the backbone. A simple boxed frame provides torsional rigidity and easier mounting points for axles, motor, and suspension. Reinforce high-stress areas, such as motor mounts and wheel bearings, with plates or thicker material.
Plan how components attach. For a model, use glue and small tabs in hidden locations to keep seams invisible. For removable sections like cabs or hoods, add small magnets or pins for repeatable alignment. In functional builds, bolted or screwed connections simplify maintenance. Use captive nuts or threaded inserts where small screws will be frequent. Design the body so internal components can be accessed for battery changes and wiring adjustments.
Wheels and axles deserve attention in both approaches. Small wheels define the truck’s stance in a model and should match the scale. For a functional miniature, choose wheels that offer enough traction and are balanced to minimize vibration. Axles must be straight and supported by bearings or bushings to prevent wobble. Spacers and washers keep wheels aligned. If using a gear-driven axle, ensure the gear mesh is correct to avoid binding and wear.
Steering and suspension are optional for a static model but critical for a drivable miniature. A simple mechanical steering rack or tie-rod system can be scaled down effectively. Use small ball joints or pivots that replicate steering geometry to keep tires aligned during turns. Suspension can be as simple as flexible mounts or as complex as scaled leaf springs or coil-over setups. The goal is predictable handling and durability rather than exact replication of full-size systems.
Electrical considerations for functional builds start with the motor and power source. Small DC motors provide ample torque for light loads if correctly geared. Battery selection balances capacity and weight. A lightweight battery with sufficient voltage and current output is essential. Route wires neatly and secure them to prevent rubbing on moving parts. Add a fuse or current limiting device to protect the motor and wiring from stalls or short circuits. A switch or remote control adds convenience and safety.
Drive systems come in two common styles: direct drive and geared drive. Direct drive is simpler: the motor drives the axle directly, often through a coupling or friction wheel. Geared drive uses a series of gears or a belt reduction to increase torque at the wheels. Geared systems offer better low-speed control and can handle heavier loads. Choose gear ratios mindful of motor speed and desired wheel speed. Test a few ratios on a benchtop before final assembly if possible.
Detailing makes a model come alive and elevates a functional miniature from crude to credible. For scale models, professional-looking paint, tiny decals, and realistic weathering create authenticity. Masking small areas and spraying thin coats limit runs. Use clear coats to unify the finish and protect decals. Interior details like a steering wheel, seats, and dashboard enhance realism even if they are only visible through windows.
For functional trucks, practical details matter more than cosmetic ones. Mirrors must be stiff enough to stay in place. Lights can be added for realism and safety; use low-current LEDs with current-limiting resistors. Mounting points for cargo must be secure and balanced to prevent tipping. Locking mechanisms for couplers and trailer hitches prevent accidental separation during use.
Safety and maintenance should be woven into the build from the beginning. Sharp edges on cut metal or plastic must be deburred. Moving parts need guards where fingers might meet gears or belts. For battery handling, follow safe charging practices and provide secure mounting during operation. Design for inspection access so you can check electrical connections and fasteners quickly. Routine tightening of screws and lubrication of bearings extend the lifespan of both models and working minivans—sorry, mini trucks.
Budget guides material choices and the level of finish. Lightweight foam and cardboard are inexpensive and fast for prototypes and display models. High-density plastics, metal sheet, and machined parts cost more but repay you with durability and precision in a functional build. Consider sourcing parts from hobby suppliers or repurposing components from discarded toys or appliances to cut costs—provided they meet strength and safety needs.
Time investment scales with complexity. A static model can be completed in a few weekends if you limit intricate moving parts. A functional miniature will take longer because you must design mechanical systems, test drivetrains, and iterate on fitment. Allow time for unexpected setbacks: miscut panels, motor mount misalignments, or gear misfits are common. Rapid prototyping methods like 3D printing speed iteration for both model details and functional brackets.
Prototyping reduces costly mistakes. Cut mockups from inexpensive material to check fit and clearances. For a functional build, test electrical components on a bench with temporary mounts. Run the motor under load and measure current draw to verify the battery can supply the required current. Prototyping also reveals weight distribution issues, which are crucial for stability when the vehicle moves.
Finishing touches differ by end goal. For models, invest time in paint prep: sanding, priming, and smoothing seams. Tiny details like simulated hinges, rivets, and weathering washes add depth. For functional trucks, focus on durability: robust paint that resists chipping, sealed electronics, and reinforced mounting points. A removable panel for battery access and service makes the truck easier to maintain.
Testing and iteration are unavoidable. For models, test fit all moving details like doors and hatches before final glue. For functioning vehicles, perform low-speed tests in a controlled area. Observe wheel traction, steering response, and motor temperature. Listen for unusual noises that indicate binding or poor lubrication. Make incremental adjustments and retest until performance is consistent and safe.
Legal and practical constraints affect whether a functional miniature can travel beyond private property. Regulations cover low-speed vehicles and small motorized machines in many jurisdictions. If your functional build is intended for public roads or shared spaces, check local rules regarding maximum speed, safety equipment, and licensing. Even on private property, prioritize predictable and safe operation.
Throughout the process, learning from others speeds progress. Community tutorials and build logs offer tested solutions for common problems. If you want a broader community perspective, consult curated blogs for inspiration and practical tips; one useful resource for ideas and customization guidance is this general mini truck blog. It highlights real-world builds and customization concepts that can spark improvements to your design.
Finally, reflect on the chosen path as you build. Model builders often find satisfaction in the smallest details—the sheen of paint, the crispness of a decal. Builders of functional miniatures find reward in a shift from static parts to moving systems that carry a light load or perform a task. Both paths require patience, planning, and careful execution. Make choices early, prototype smartly, and proceed with safety in mind, and you will end up with a mini semi truck that matches your original purpose—whether it sits as a showcase or moves under its own power.
For authoritative guidance on safety standards and low-speed vehicle regulations, refer to the official NHTSA resource on low-speed vehicles: https://www.nhtsa.gov/vehicle-manufacturers/low-speed-vehicles
From Plan to Proportion: Building a Working Mini Semi Truck with the Right Materials and Tools
The pursuit of a mini semi truck is really a study in balance—between fidelity to the real thing and the constraints of scale, weight, and budget. Whether your goal is a still-life display that captures the imposing shoulder of a highway hauler or a compact, drivable toy that can roll across a garage floor, the process starts with a clear decision about how deeply you want to engage with mechanics, electronics, and finishing. A well-made miniature can be a quiet homage to the design language of heavy tractors or a playful testbed for ideas about suspension, steering, and power distribution. The journey from plan to finished piece hinges on thoughtful planning, disciplined material choice, and a steady hand with the tools. It also invites you to lean on community knowledge, study real-world references, and gradually push the project from a static replica toward functional motion when you’re ready. In many ways, the mini semi truck mirrors the full-scale process, scaled down: you conceive, you materialize, you refine, and you test, then you repaint, reseal, and admire the result as a compact, convincing vehicle that carries your attention to detail as if it were the real thing.
Before you reach for a saw or a soldering iron, take a moment to decide your destination. Do you want a static model that is primarily a display piece, or a functional miniature that can move under its own power? The distinction matters far beyond the intended outcome because it shapes every choice that follows—from the frame material to the way you mount the cab, from the scale you commit to the thickness of your body panels to the kind of battery you can safely accommodate. A static model leans into light-weight means, easy fabrication, and forgiving tolerances. It invites clever use of simple sheets, foam board, or 3D-printed parts and emphasizes the illusion of depth: accurate windows, doors, headlights, and chrome-like trim. In contrast, a functional mini demands a reliable drivetrain, a compact electrical topology, a safe power source, and a chassis that can bear dynamic loads without wobble or drift. It is a small experiment in how power translates into motion, how gears mesh, and how a miniature steering system coaxes wheels to follow a line. If you start with a clear preference—display or drive—you can align your materials, your tools, and your timelines with fewer dead ends and fewer situations where you must retrofit later.
Once your aim is defined, the next essential step is planning and scaling. Real semi trucks are complex machines with multiple subassemblies, but a good mini need only capture the essence: a robust chassis, a cab that says ‘truck,’ a trailer or rear section that grounds the silhouette, and a set of wheels that convey mass and purpose. The scale you choose matters deeply for proportions and for the fit of every component. Common hobby scales range around 1:24 or 1:32, but the key is consistency. Start by choosing a scale and then translate major dimensions from reference images or blueprints into your plan. The old adage captured by one maker—“First is to understand, then determine the size, material estimate”—still holds true. When you understand the target size, you can break down each subassembly into a quick bill of materials, measure twice, cut once, and keep your build linear rather than a zigzag of detours. This planning phase also signals your material strategy. A static display will favor lighter, easier-to-cut substrates like plywood, cardboard, foam board, or 2mm ABS sheets. A functional mini can justify sturdier frames, such as light metal tubing or thick plastic profiles, because it must endure torque, vibration, and dynamic loads as it moves.
For the frame and chassis, your choice reveals your intent. If you are aiming for a static piece, a frame built from lightweight sheets or even a solid block of foam can be enough to support the cab and body panels without warping under display conditions. If you envision a drivable model, think in terms of a durable chassis that can flex and hold a motor, battery, and transmission. Aluminum tubing offers a compelling balance of strength and light weight. Steel can provide maximum rigidity but adds weight. In some cases, a hybrid approach works best: a rigid aluminum backbone with steel or brass cross-members to stabilize critical joints. Feeding into this, the main body panels are typically carved from plastic sheets, resin, or even plywood for rugged, non-load-bearing surfaces. The cab’s shape can be sculpted from plastic or 3D-printed parts that capture the distinctive silhouette of a real truck, while the trailer or rear section can be fashioned from flat panels that are gently curved or beveled to suggest volume. This is where planning aligns with technique: you are shaping a convincing form with panels that meet along crisp edges, creating the visual cues drivers expect—panels that align in lockstep with the wheelbase, doors that suggest real proportion, and a cab that sits invitingly over the front axle.
Materials decisions also hinge on the wheels and axles, the lifeblood of any credible miniature. Full-size semi trucks run on enormous wheel assemblies; your mini echoes that geometry on a dramatically smaller canvas. If you are modeling, you can scale down a standard wheel concept to fit. A practical route uses small-diameter wheels sourced from hobby suppliers or repurposed components such as compact gears and rollers that approximate the look and footprint of a real wheel. For a convincing scale, you might adapt 22.5-inch rims into miniaturized forms, acknowledging that the real-world provenance matters more for the silhouette than for exact engineering. Industry commentary notes that sourcing can be simplified by turning to suppliers in regions known for mass-production of rims, with ready-made, CNC-machined mini variants that preserve the wheel’s visual rhythm without demanding complex machining on your end. The tire compound matters less in a display model but still contributes to realism; rubber or polyurethane tires can be chosen to suit indoor or outdoor display, and even small-tire textures can catch the light in photographs or in a display cabinet.
In the realm of a functional mini, the powertrain becomes a compact laboratory. A small DC motor provides straightforward propulsion, and a compact battery pack powers the drive. The drivetrain can be kept simple: a single gear on the motor shaft engages a second gear that drives an axle, with the wheels mounted on that axle. A switch, a basic wiring harness, and careful routing of wires inside the chassis are essential for reliable operation. If you want to go a step further, you can introduce a simple transmission or a second gear stage to modulate torque and achieve smoother acceleration. The inclusion of a steering mechanism, even on a tiny scale, adds a delightful dimension of realism. A simple linkage from a small servo or a direct steering rack can translate a user input into lateral wheel movement. Power management for a functional mini becomes even more intricate—balancing voltage, current, and weight to ensure the motor spins the wheels without stalling or overheating. The battery choice matters here, too. While a USB power bank or a compact LiPo pack might suffice for a low-voltage, low-draw setup, you should design the system with safety in mind, including proper insulation and secure mounting to minimize the risk of short circuits or disconnections during operation.
With materials chosen, the stage is set for an integrated toolset that supports both assembly and precision. The tools you rely on are not merely means to an end; they shape the quality of your joints and the finish. Measuring tools—tape, calipers, and a ruler—keep your parts within tolerance and help maintain visual alignment across the length of the model. Cutting tools such as a fine craft knife for sheet plastic, a jigsaw for curved panels, or metal shears for tubular frames translate blueprint sketches into physical forms. A drill press or hand drill with a selection of bits enables clean holes for screws, pins, or rivets. If you are welding metal parts for a permanent frame, a basic MIG or TIG setup is helpful, though many hobbyists reach for simpler butt joints with bolts and brackets when the goal is a sturdy yet removable chassis. Sanding tools are indispensable for smoothing edges and preparing surfaces for paint, from simple sandpaper to a small orbital sander that helps you achieve professional chamfers and soft transitions between panels. That same attention to edge finishing matters in the interior: a crisp seam where cab and chassis meet reads as a deliberate, polished detail rather than a rough collage of pieces.
Safety is not an afterthought but a guiding principle. You will be working with sharp edges, hot glue, and potentially soldering irons or a small welder. Wear eye protection and gloves, and maintain good ventilation when working with solvents or sprays. If handling fine plastic or resin powders, a dust mask becomes important. When you tackle the electrical side for a functional mini, ensure all low-voltage components are insulated and that the battery pack is secured against jostling inside the chassis. The temptation to rush a build can lead to misalignments and safety hazards; patience pays off, especially when wiring a compact powertrain or fitting a small steering link that must operate without binding.
Incorporating details is where the mini semi truly starts to feel alive. For a static model, windows, doors, lights, and decals are the essential finishing touches. You can craft window masks to achieve realistic glass reflections, then paint the cab and trailer with the color scheme you love. Decals—logos, stripes, and subtle distressing—add character without overpowering the scale. Even tiny features, such as door handles or hitch pins, become focal points that reward careful work. For a functional model, detailing extends to the drivetrain and the steering system. A simple differential effect can be simulated by letting the wheels share a common axle in a way that looks right when you view the vehicle from the side. The aesthetics of the drivetrain also present opportunities to express your personal style: you may camouflage wires with neatly routed channels inside the chassis, use heat shrink to tidy connections, or mount the battery pack so it remains accessible for maintenance while staying visually discreet.
In many ways, the construction process becomes a conversation between plan and execution. You begin with a rough frame, mount the cab in place, and gradually introduce the body panels, test-fitting each piece as you go. It is tempting to cut and glue in rapid succession, but the best models emerge from iterative design. You cut, you dry fit, you adjust; you push a bit further on the next pass until the seams align and the weight balance feels right. Suspension, even a simple one, contributes enormously to the sense of realism. A lightweight suspension made from thin metal wire or plastic rods can mimic the give and play of a full-scale system, and it helps the model absorb minor bumps on a table or display shelf. The wheels should turn with minimal resistance and remain aligned under the weight the chassis carries. If you aim for a static display, you can accept a fixed axle with decorative pivots that suggest real suspension; for a functional unit, you want a more dynamic approach that can handle drive torque without binding the wheels or causing wheel slip.
One practical tip that often makes a significant difference is the scale and proportion of details, not just the size. Real trucks have nuanced curvature on the cab’s edges, generous radii on fenders, and precise window frames. Reproducing those subtleties—whether by sculpting curves from plastic, layering sheets to build up a three-dimensional form, or printing parts in separate layers and stacking them—transforms a simple block into a believable miniature. The same care applies to the cab’s interior or the trailer’s side panels. Even small touches, like correctly placed wind deflectors, mirrors, and taillamp housings, contribute to the overall impression of accuracy. The painter’s approach can reinforce this by applying base colors, then adding shading to suggest depth under the wheel arches, and finally applying a clear topcoat to unify texture and protect the finish. The result, when viewed from any angle, should evoke the presence of a real truck, albeit in miniature scale, and it should invite a second look where viewers notice the deliberate construction choices behind each line and contour.
In the spirit of shared knowledge, many builders turn to community resources as a source of tips, examples, and troubleshooting strategies. A chapter of the hobby’s collective memory is a treasure trove of practical advice on how to realize small-scale mechanics, how to cut and join sheet plastic cleanly, and how to populate a cab with simple, convincing details. For readers seeking a broad, step-by-step approach to toy-scale construction using common materials and accessible tools, a classic guide focuses on wooden toy trucks and emphasizes foundational techniques that translate well into plastic or resin builds. This kind of reference helps you start with proven methods and then adapt them to the scale and intent of your mini semi. If you want to see community-driven discussions and project logs, you can explore the Minitrucks CaLa blog, which hosts a variety of articles and user-generated content that reflect ongoing experimentation and shared learning in this niche. Minitrucks CaLa blog (https://minitrucksocala.com/blog/).
Careful planning, sensible material choices, and patient construction yield a miniature that does justice to the grandeur of its full-scale counterpart. The process rewards a calm, measured pace: sketch the plan, estimate materials, cut correctly, assemble with attention to alignment, and finish with a layer of color and gloss that preserves the surface for years of display or play. The same discipline—planning first, materials second, execution third—will carry you through both the static model and the functional mini. It is a discipline many builders return to again and again because it keeps the project within scope while still allowing room for creative interpretation. The mini semi truck thus becomes more than a toy or a decorative piece; it becomes a compact workshop where theories about geometry, balance, and aesthetics are tested in miniature form. The proud owner of such a model learns to see scale as a design constraint rather than as a limitation, and that mindset is what lets the craft grow with each new project.
To close this chapter, imagine the finished model perched on a shelf or tucked into a display case. It stands as a quiet testament to the synergy of form and function, of careful measurement and patient handwork. The mission you set at the outset—whether it is to create a simple, beautiful static model or a small, drivable replica—will have guided every decision along the way. The materials you chose, the tools you collected, and the techniques you practiced culminate in something you can hold, study, and show with confidence. And if you ever want a fresh stream of ideas, a quick search of tutorial content and community builds can offer endless inspiration. You will discover that the journey is not only about making a model but about learning how to translate the mass and momentum of a full-sized truck into a tangible, intimate piece of engineering artistry. This is the essence of building a mini semi truck: a careful balance of plan, material, and craft, guided by curiosity and patience, that yields a product you can be proud of and a process you can repeat with increasing sophistication. For ongoing exploration, the practical hub of ideas and updates can be found in dedicated hobby spaces, where sharing insights helps everyone move a little closer to the look, feel, and behavior of the big rigs we admire.
Internal link note: As you continue to explore this topic in depth, consider visiting the Minitrucks CaLa blog for community examples and creative approaches to similar projects. Minitrucks CaLa blog (https://minitrucksocala.com/blog/).
External reference for foundational techniques: For foundational woodworking and toy-truck construction methods that translate well to plastic and resin builds, see the practical guide to making wooden toy trucks, which outlines core techniques such as shaping, joining, and finishing in accessible terms. https://www.instructables.com/How-to-Make-a-Wooden-Toy-Truck/
From Blueprint to Bristle: Crafting a Realistic Mini Semi Truck Through Cohesive Assembly and Detailing
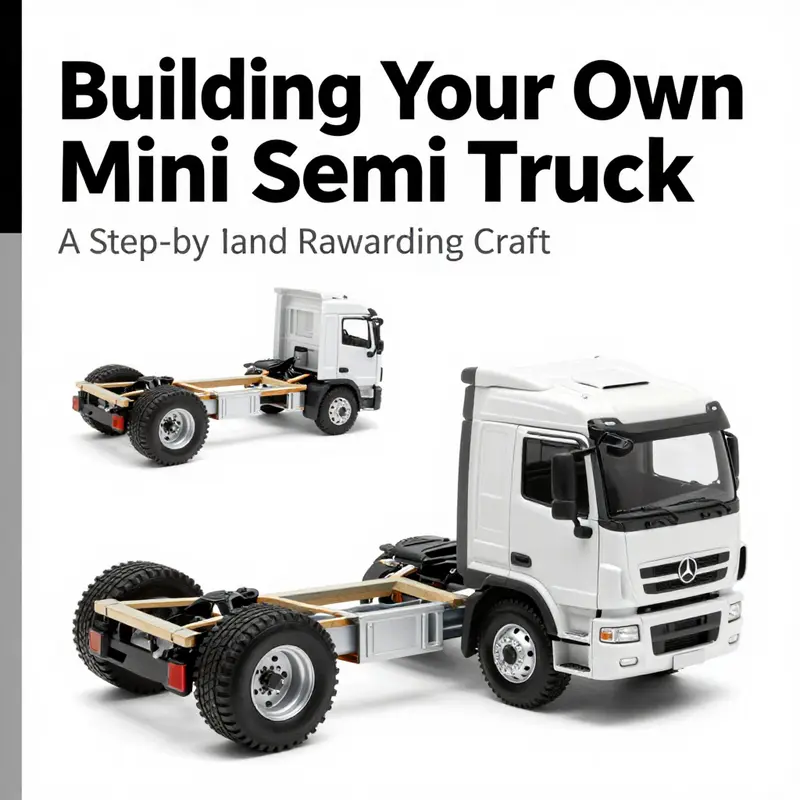
A mini semi truck is more than a scaled-down replica; it is a deliberate convergence of engineering concept, careful material choice, and patient artistry. When you embark on this project, you are balancing two aspirations: to capture the broad silhouette and function of a real truck, and to express it with the precise touch of a craftsman. The journey takes you from a first sketch and a determined scale to a finished piece that can stand on a shelf, on a display case, or in the hands of a curious observer who delights in the subtle cues that signal realism. Whether your aim is a static display or a small, working model, the heart of the process remains the same: plan meticulously, select materials with intention, and assemble with a steady rhythm that invites detail work to unfold naturally. The initial decision—static model versus functional miniature—shapes how you approach materials, tools, and the tempo of your build. A static model rewards careful cutting, alignment, and texture work; a functional version demands a compact drivetrain, reliable power, and a layout that tolerates motion. Either path begins with a clear map: the scale you will work in, the major silhouette lines you intend to reproduce, and the resource budget you have set aside for time and materials. The planning phase is not a mere preface; it is the backbone that keeps you aligned when the project becomes intricate. When you study real trucks online or examine existing models, the most valuable insight is not just the surface look but the relationships between parts—the way the cab angles meet the hood, the way the trailer frame supports weight, and how suspension details contribute to perceived realism. A practical maxim from builders who have walked this road is to first understand, then determine the size and material estimate. This emphasis on comprehension before execution is what helps beginners avoid the trap of rushing through pieces that later must be retrofitted or redone. As soon as the plan takes shape, you can identify the core materials that will yield the cleanest lines and most convincing texture. For a straightforward static model, lightweight sheets of plastic such as ABS, cardboard, or foam board are excellent starting points. A common approach uses 2 mm ABS sheets to form body panels and chassis components, balancing strength with ease of cutting. Cardboard remains a versatile fallback for quick iterations, while foam board offers a forgiving surface for early mockups. If you own access to a 3D printer, you can transition from concept to precise parts with relative ease, printing interior details, window frames, and small shrouds that would be difficult to achieve with hand-cut materials alone. The design phase thus evolves into a combination of scale planning, reference study, and a practical bill of materials. The scale itself—whether 1:24 or 1:32, for example—guides every subsequent measurement, from the length of the trailer to the height of the cab. Precise measurements are not merely a technical requirement; they enable you to maintain consistent proportions as you piece together disparate elements. A reliable workflow starts with a detailed plan that includes side profiles, top outlines, and cross-section views. Even simple drawings can serve as a double-check against the actual parts you will cut and assemble. The most successful mini trucks therefore emerge from a cadence of measurement, cut, test-fit, adjust, and refine. As you move from plan to practice, the construction process becomes a dialogue between structure and form. For a static model, the main structure—often the chassis and trailer frame—serves as a platform on which all other details will rest. Cutting the body panels and chassis with care is essential, because misalignment at this stage compounds later. The use of a sharp craft knife, a steel ruler, and a patient, precise hand is a recurring theme. Glue is your ally, though restraint matters; too much adhesive can squeeze out and obscure fine lines, while too little can leave gaps that break illusion. In many builds, a small amount of glue is enough to secure joints while allowing a tiny bit of flexibility as you add more layers. When you reach the detailing phase, the work shifts from assembly precision to surface storytelling. The exterior becomes a canvas upon which light and shadow play to suggest depth. Windows, doors, lights, and decals are not mere decorations; they function as visual cues that align with a real truck’s identity. Small wheels—often sourced from tiny components or repurposed hardware—anchor the model in truth. A popular method uses tiny wheels or even large headpins adapted for tires to reproduce the mass and proportion of the vehicle’s rolling counterparts. For realism, you may incorporate a simple suspension system using thin metal wire or plastic rods. This addition is not strictly necessary for a display piece, but it can dramatically improve how the vehicle sits and how light interacts with its underside. A well-planned paint job, whether with acrylic paints or spray coatings, should follow a careful sequence: base color, panel shading, and detail work such as window trim and decals. A clear coat is the final touch that seals color and adds that subtle gloss associated with a pristine finish. The difference between a decent model and a convincing one often lies in small touches—the slender lines along the cab, the accuracy of door handles, or the correct curvature of the wheel arches. Detailing, in this sense, becomes a form of storytelling. Exterior detailing begins with surface preparation. Even on a static model, a clean surface translates to crisper lines and more faithful reflections under light. An initial wash with a gentle soap helps remove oils or dust that might interfere with paint adhesion. For more committed finish work, exterior washing is not merely cosmetic; it prepares the surface for subsequent steps like polishing and waxing, which can dramatically elevate the model’s luminosity. Beyond washing, a clay bar treatment is a powerful way to tackle embedded contaminants that a simple wash might miss. Running a clay bar over the painted surface leaves a smoother, more uniform finish that enhances the sense of depth. After this decontamination, applying wax or a sealant adds a protective layer and intensifies the color. The choice between wax and sealant depends on the desired balance between ease of use, longevity, and the final sheen. Realistic detailing also invites decorative elements that evoke the real world’s branding and utility. Decals, trim pieces, and carefully placed lighting accents contribute to the story your mini truck tells. Whether you’re mirroring a real-world fleet color or crafting a bespoke livery, the decision to add decals becomes a moment where art and engineering converge. Lighting, in particular, offers a surprisingly effective way to bring a static piece to life. Small LED units behind translucent windows or cab lights can create the impression of an operational vehicle, especially when observed under ambient room lighting. If you are intent on accuracy, study reference images of real trucks in lighting conditions similar to your display environment. The fidelity of these details—how windows reflect light, how chrome trims catch highlights, or how taillight assemblies glow when viewed from the side—will have a disproportionate impact on perceived quality. For those who seek to push their build further, a structured approach to detailing is warranted. A recommended path begins with a solid foundation in the trailer structure. Start with the base of the trailer, ensuring there is ample space for the legs or support structures that will stabilize the model. The legs should be positioned according to design specifications and tested for balance. Then move to the axle and wheels, a critical juncture where stability and proportion meet function. The axle must be centered and securely attached, with wheels that rotate freely if the build includes mobility. In a detailed exercise, you might reference comprehensive guides such as those that provide explicit, step-by-step directions for assembling a scale semi truck with trailer. This helps you align your process with established, visual methods and avoid common missteps. When you conduct the detailing phase, the exterior wash, the clay bar, and the wax sequence become more than maintenance steps; they are part of the discipline of finishing. The clay bar’s gentle friction helps to reveal the underlying paint’s smoothness, making subsequent wax or sealant glaze more uniform. The final protective layer is not merely aesthetic; it safeguards the surface against smudges, dust, and micro-abrasions that accumulate during handling or display. If your project includes a functional miniature, the scope expands. The core principle here is similar to building a simple electric car: an electric motor converts electrical energy into motion. A small DC motor, paired with a compact battery pack, gears, and a chassis, can drive the wheels through an essential drivetrain. The approach holds in miniature form: design a sturdy chassis, secure the motor, attach a gear to the motor shaft, and connect a second gear to the axle so power transfers to the wheels. The wiring becomes a practical consideration, with a switch allowing control of movement. Power management is crucial; you want a reliable balance between compactness and endurance. A typical setup might use a modest 5-volt power source, such as a compact USB pack, to keep the system lightweight and easy to replace or recharge. The alignment of moving parts must be precise to minimize slippage and to ensure that the axle remains in proper contact with the geared drive train. Testing is not a single event but an iterative process: test, observe, adjust gear mesh, tighten a loose mounting, and recheck wheel alignment. Small adjustments can transform a hesitant, noisy drivetrain into a smooth, quiet drive that enhances the impression of a well-engineered miniature. As with any craft, the safety of your work environment should guide your behavior. Wear safety glasses when cutting plastics or metal, and use hot glue with caution. A well-ventilated workspace helps manage fumes from solvents, paints, and finishing products. Patience becomes a virtue, not a bottleneck. Building a convincing mini semi truck demands a steady rhythm of focus and restraint. You may choose to work in shorter sessions to preserve detail accuracy and to prevent fatigue from creeping into the fine work of panel lines and decals. The beauty of this project lies not only in its immediate outcome but in the discipline it cultivates: planning, measurement, trial, and refinement. To keep the project coherent from start to finish, you might adopt a simple rule: finish one major component before starting the next. For example, complete the trailer base and legs before you attach the cab. Once the fundamental structure is in place, shift to detailing. This approach reduces the cognitive load and helps you maintain accuracy when you introduce small parts. The social dimension of building is also meaningful. Engaging with a community of builders can provide both inspiration and practical troubleshooting advice. Reading tutorials and watching walkthrough videos often reveals subtle techniques that improve realism, such as creating weathered textures, simulating chrome wear, or reproducing the faint seams along the edges of panels. If you want to broaden your practice, seek inspiration from related build threads and showcase galleries. A useful habit is to collect references from a variety of sources, including real trucks and scale models, to build a robust mental library of shapes, proportions, and detailing cues. For ongoing reference and practical tips, see resources that gather detailing strategies and step-by-step workflows. If you’re curious about how other builders navigate the same challenge, you can explore a broad range of explanatory content on a dedicated blog hub that covers the spectrum from concept to finished piece. For readers who want a quick pointer to a curated archive of ideas and examples, consider visiting a general hub that aggregates posts about mini trucks and related projects. This kind of exploration can help you see how different approaches handle the same functional requirements and how small decisions amplify perceived realism. In addition to inspiration, a key part of the process is maintaining a record of your decisions. Take notes on the materials you use, the scale you commit to, and the assembly sequence that proved most reliable. A detailed journal becomes a practical reference for future builds, helping you reproduce successful outcomes and avoid repeated missteps. When you incorporate the trailer into the larger composition, the relationship between the trailer and the cab becomes a clue to the vehicle’s overall character. The trailer structure must be sturdy enough to bear weight if you intend to pose it with accessories or display stands. Provide a solid base with appropriately spaced legs that blend with the line of the trailer’s profile. The axle and wheels require precise alignment; a slight misalignment is enough to make the model sit awkwardly or roll unevenly. If you are documenting the process for others, a set of clear, photo-ready steps—without clutter—can be invaluable. But even without a formal guide, your narrative should convey the logic by which each part supports the next. Consider how a reader might approximate your approach: starting with the base frame, then the axes, then the body, and finally the finishing touches. A cohesive build remains coherent because each stage informs the next, and the finishing touches tie the entire piece together. As you near completion, the model’s life can be enriched with small, telling details: the subtle reflections on a glossy surface, the crispness of window outlines, and the delicate texture of weathered tires. The goal is not to counterfeit a full-size truck but to evoke the same sense of scale and purpose that motivates the original machine. If you choose to publish your work or share it with a community, an honest, reflective write-up can illuminate the practical realities of the build—the challenges faced, the compromises made, and the techniques that delivered the most satisfying results. You may want to reference published step-by-step directions that offer reliable methods for assembling scale semi trucks with trailers. These guides can serve as a benchmark for accuracy and a source of technique you can adapt to your own materials and constraints. Speaking to the broader practice, the art of building a mini semi truck blends three threads: the craft of assembly, the discipline of finishing, and the patience to iterate. The static model rewards careful alignment and surface fidelity, while the functional version tests spatial reasoning and power management. Regardless of path chosen, the core principles remain resilient: plan with clarity, select materials that suit your scale and budget, and proceed with steady hands and attentive eyes. In this sense, the project becomes an extended exercise in translation—from the vastness of a real truck down to a controlled, tangible form that still speaks with the language of engineering. For readers seeking an additional practical resource that delves into high-detail finishing and professional techniques, a respected external guide offers an organized, experience-driven method for detailing. It emphasizes product quality, methodical application, and the discipline required to achieve a professional-grade finish. Finally, the chapter would not be complete without inviting you to explore related ideas and examples within a community of makers who share similar passions. If you want to peek into a broader universe of builds and see how others stage, paint, and finish their mini vehicles, a well-curated hub of articles and project logs offers a treasure trove of techniques and inspiration. For ongoing practical inspiration, you can visit a general platform that curates posts about mini trucks and related projects. This resource helps you compare approaches, notice subtle shaping differences, and discover new tricks that translate well to your own build. To keep the narrative grounded in hands-on experience, one useful reference is a community-driven collection that presents a sequence of real-world examples and annotated photographs, which illustrate how professional modeling teams approach the same challenges. If you are seeking further guidance on detailing and finishing, and you want an external authority to consult, consider following a trusted detailing guide that compiles practical tips, product recommendations, and proven techniques for achieving a showroom-quality finish. External resources can extend your knowledge and provide a tested framework for applying the final touches that give your mini semi truck its lifetime impression. For inspiration and practical guidance, you can consult the following external resource: https://www.autos.com/detailing-guide-semi-trucks. This reference underscores the value of systematic preparation, careful material selection, and disciplined finishing—principles that translate well to any scale project.
Internal link reference: For ongoing inspiration and a repository of related builds, you may explore the Minitrucks Cali blog hub, which collects a variety of examples and tutorials that can complement your own drafting and execution. See: Minitrucks Cali blog.
In sum, the craft of building a mini semi truck weaves planning, fabrication, and refinement into a single, continuous practice. It rewards patience and curiosity, inviting you to test ideas, measure outcomes, and refine your touch until the final piece resonates with the crisp honesty of a well-executed miniature that honors the real machine it mirrors. The end result is not merely a display object but a narrative in miniature—a collectible that captures proportion, tone, texture, and movement in a form you can hold, study, and admire. If you keep this mindset—balance of function and form, attention to surface texture, and respect for scale—your mini semi truck will stand as a testament to what happens when careful planning meets steady hands and a patient eye.
Final thoughts
Building a mini semi truck can truly be a rewarding experience, allowing you to express creativity while developing your skills. Whether you opt for a static model that decorates your shelf or a functional miniature that takes to the road, following the outlined approach will help ensure success. Remember, every builder starts at a different level, so embrace the process, learn as you go, and enjoy each moment of creation. The pride of seeing your mini masterpiece complete will be well worth the effort!