
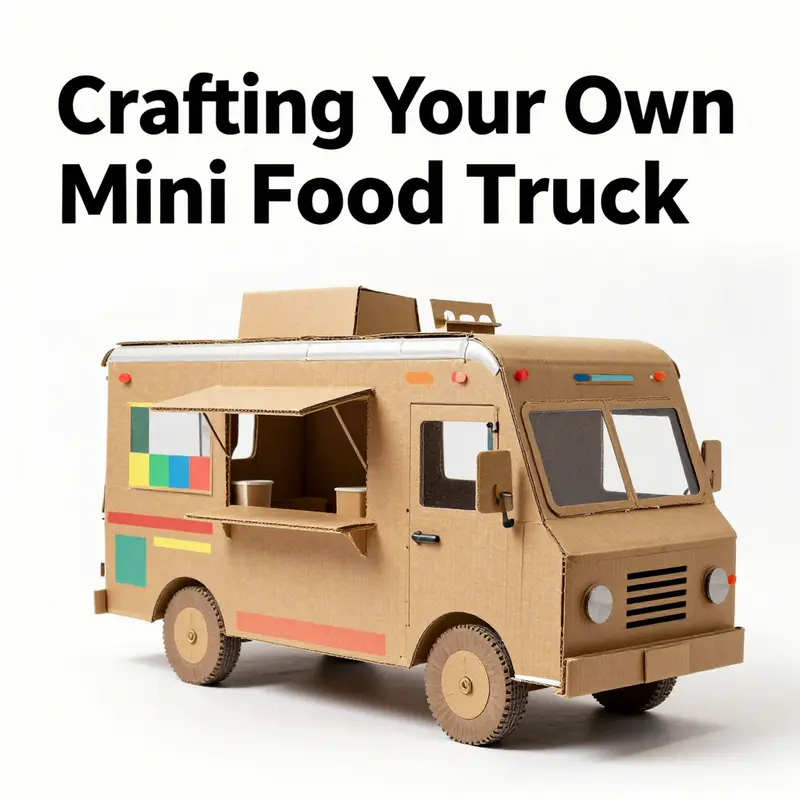
Imagine turning a simple piece of cardboard into a vibrant mini food truck! Not only is this a delightful project that sparks creativity, but it can also serve as an engaging prop for small business marketing, children’s play, or hobbyist displays. From conceptualizing your design to the final decorative touches, each step will guide you in transforming your vision into a tangible masterpiece. Whether you run a food business looking for a model to showcase or you’re simply a mini truck enthusiast, let’s dive into this creative journey together!
From Sketch to Street-Ready: Planning a Cardboard Mini Food Truck with Purpose and Play
A cardboard mini food truck begins not with a finished shell but with a purpose, a plan, and a willingness to iterate. In many ways, design here is a translation of imagination into a tangible, testable model. The aim is not merely to create something that looks the part, but to shape a small-scale system—a compact kitchen, a serving window, a portable stage—that behaves like a real business moment in miniature. This chapter follows that thread: how to plan with clarity, how to choose materials that hold up under curious hands, how to map an interior that feels functional, and how to surface details that spark storytelling as much as they spark delight. The planning phase is the quiet engine that makes the rest of the build feel effortless, because it anchors creativity in practicality and sustains momentum when ideas start to multiply.
First, define the purpose and scale. A cardboard food truck can serve as a display piece for a classroom exhibit, a prototype for a design project, or a playful promotional model for a shop window. The scale you choose should reflect how you intend to interact with the model. If the goal is to invite hands-on exploration, a 1:24 or 1:12 scale often feels approachable: large enough to display a believable interior, small enough to transport and reassemble. The scale matters because it governs how much space you reserve for a working counter, how deep your interior shelves can be, and whether forks and napkins become appreciable props or mere suggestions of detail. As you sketch, keep a running sense of human scale—how a viewer might reach the serving window or glance inside the cabinet—and let that guide your dimensional choices.
Sketching becomes a practical conversation between idea and constraint. Start with rough front, side, and top views. The objective is not perfect lines but a clear distribution of space: where the kitchen lives, where the counter invites a hand to place a pretend order, where windows open or close, and where signage can tell a story about the menu. In a compact build, the serving area and the kitchen zone are neighboring rooms: the counter becomes a threshold between service and preparation, while the interior brackets offer a sense of organization even if you later simplify some details for durability. The sketches should also mark potential access points. A foldable counter that can swing down for display, or a removable roof that makes the interior easy to view, adds depth to the design and expands the play or display value of the model. The visual plan thus doubles as a blueprint for how you will handle the model during assembly and during any future refinements.
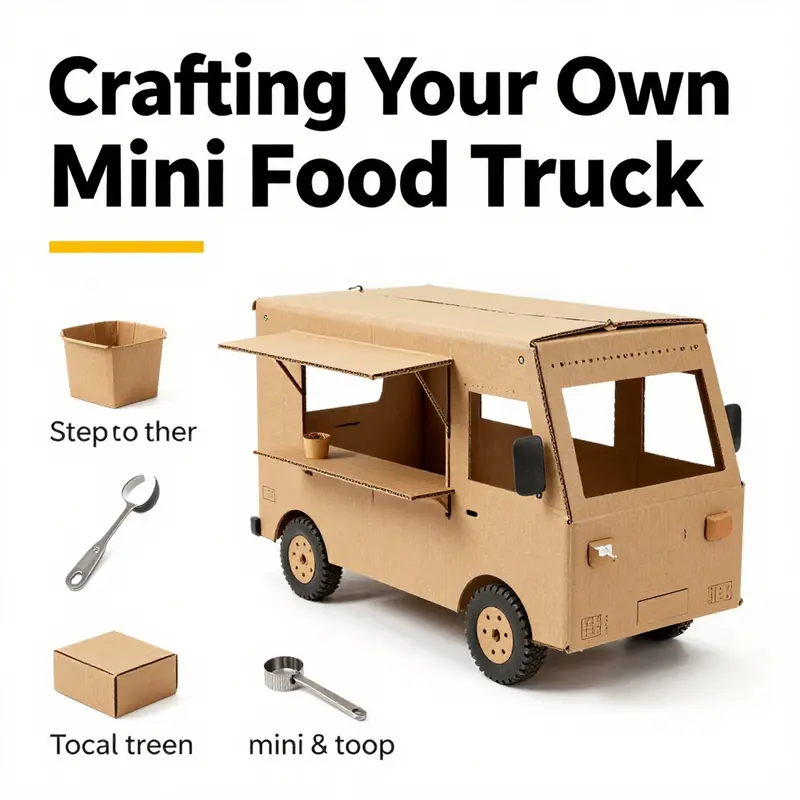
Material choice follows purpose. Corrugated cardboard—preferably sturdy and at least around 3 millimeters thick for major walls and panels—provides a reliable frame without becoming prohibitively heavy. The decision to reinforce corners and high-stress zones with extra layers or with stiffening elements like wooden skewers or dowels is not a luxury; it is a necessity if the model is expected to withstand regular handling, transport, or display in a classroom setting. The subtle art here is to balance weight, strength, and flexibility. You want enough rigidity to maintain the shape when the model is picked up, yet enough give to allow gentle adjustments to the door or window placements without cracking everything apart. Sealing the surface with a waterproof layer—such as a water-based sealant, a clear acrylic spray, or a matte Mod Podge—adds durability, particularly if the project is to be moved across a classroom, desk, or shelf over time. This protective coat does more than deter moisture; it also enhances color fidelity, allowing paints and markers to look crisp and consistent.
As work begins in earnest, plan the interior with intention. A compact kitchen layout can still feel complete if you treat the space as a miniature floor plan. A stovetop can be suggested with small circular pieces representing burners, perhaps fashioned from bottle caps or paper circles. A sink might be a cut-out shape in a shallow tray within the base, framed by a tiny shelf or a narrow groove that evokes a drainboard. Shelves can be small cardboard boxes or stacked tubes—compact storage that reads clearly from the outside while remaining accessible from above or behind. The counter is not simply a line along the front; it is a functional threshold. A long, narrow rectangle glued to the base front can serve as a serving lip where pretend items sit, while a fold-down tabletop offers a stage for real or crafted items you want to display. If the design leans toward education or display, consider a removable roof or a hinged roof panel that exposes the interior for demonstration purposes. These features don’t merely decorate; they encourage interaction, teach spatial reasoning, and demonstrate how a small space accommodates multiple tasks.
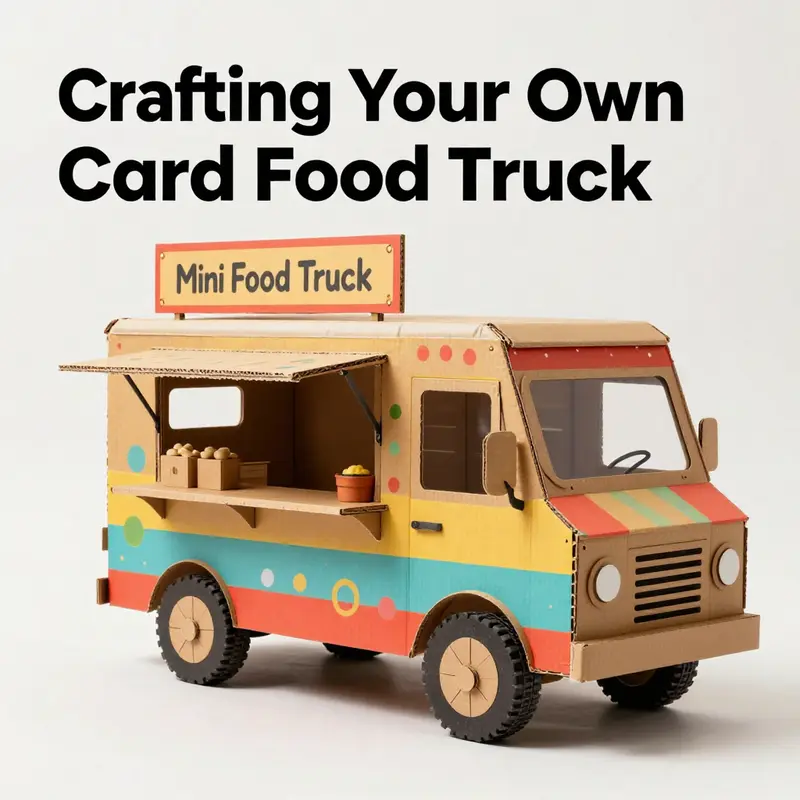
Details do the heavy lifting when it comes to believability. Color helps immediately convey character—bright reds, sunny yellows, and fresh blues can suggest a cheerful, approachable food stall—and the same palette can drive internal consistency. Non-toxic paints or markers are essential, especially if kids are involved or if the model will be handled by students. Decals, printed labels, or hand-drawn menu boards amplify branding and narrative. A string awning or a thin wire can simulate an overhang, while small wheels—whether bottle caps or foam spheres—anchor the model in mobility and story. The wheels deserve particular care: they should rotate smoothly and be anchored securely so the truck can roll on a desk or shelf without tipping. The signboard above the truck’s face, the menu text, and the name of the stall should reinforce the narrative you want to tell. Branding is a storytelling device as much as a design cue; the same colors and shapes repeated across the exterior and interior unify the model.
If you want to ground your approach in a broader practice, your design notes can live on a shared hub. For readers seeking a community perspective on planning and execution, a visit to the Minitrucksala blog can offer related reflections on the lifecycle of small-truck projects and the ways hobbyists translate plan into product. See the blog for broader context and examples that echo the planning mindset described here. Minitrucksala blog.
The planning process also invites you to consider how your model will be assembled and tested. A strong plan specifies not only what pieces exist but how they connect. A corner brace, for example, might be designed as a tab-and-slot joint reinforced with glue, or as a simple glued seam that bears the load of a door or window. Think about joints that can be disassembled if a part needs to be replaced or reconfigured later. It’s helpful to build a small, separate mock-up of a critical area—the counter edge, or the connection between the base and the upright wall panels—to verify that the proportions are right and that the assembly will remain stable as you proceed. When you test, do so with the same care you would use for any prototype you intend to refine. Move the truck, tilt it slightly, open the counter, and examine where the stress concentrates. If a joint flexes or a panel warps, add a reinforcing layer or adjust the angles, even if it means sacrificing a little original slant for long-term durability.
Now, with the blueprint of purpose, scale, interior rhythm, and exterior grammar in your hands, you turn to the actual construction sequence. The first step is to cut out the major components: the front face, two side panels, the rear panel, and a roof that spans the top of the U-shaped frame you will create by attaching side panels to the front. The base becomes the platform that anchors all the other elements; its flat surface must be true and even to avoid a wobbly model. The “U” you form is more than a visual shape; it is the skeleton of your truck. Glue the side panels to the front at right angles, ensuring the joints are clean and the interlocking lines crisp. Allow each seam to dry before adding the roof piece. The roof should be slightly wider than the front panel, creating a small overhang that enhances the sense of scale and adds a hint of realism. The counter, when added, is the soul of the serving moment. A long, narrow rectangle glued to the lower front edge specifies where items will rest during display or play. If space allows, a foldable counter can be designed with a hinge or a simple cut-and-fold method so it can be tucked away when not in use and unfolded for presentation.
With the shell taking shape, the surface becomes your canvas for character. Windows and doors can be cut from the same cardboard, with additional panes or frames added from thinner scraps. For a more polished look, insert a clear plastic piece cut from a recycled container to mimic glass in the window; this is a small step that adds a surprising sense of realism. Signage can be a separate panel or a signboard attached to the front; you should plan its dimensions so it reads comfortably at eye level when the truck sits on a display surface. A simple color wash over the outside helps unify the palette. You might choose two or three colors that harmonize and add a bright accent color for the serving counter or the signage. The goal is a finished surface that feels cohesive rather than patchwork. If you are teaching a class or guiding a younger maker, encourage them to name the truck and craft a tiny logo that can be painted or drawn onto the sign. Even a simple logo can anchor the entire project in storytelling and purpose.
As you finalize the structure, reinforce the base and corners to guard against daily handling. A few layers of extra cardboard along edges or a light internal frame with skewers can transform a fragile shell into a robust display. If you anticipate more frequent manipulation, consider using a waterproof topcoat to repel moisture from spills during pretend play or demonstrations. The aim is not perfection but resilience: the model should endure repeated handling on a classroom desk or a shelf without crumbling into dust. At this stage, you may also add interior details that elevate the sense of function without overburdening the build. Small shelves or compartments can be crafted from thin cardboard boxes or slices of tubes, offering a place to “store” toy condiments or menu cards. These touches turn a simple shell into a functioning miniature world, inviting observation and interaction from viewers rather than simply admiration.
Testing and refinement emerge as a natural part of the design dialogue. A confident test considers balance, weight distribution, and the ease with which the model can be moved, opened, or displayed. Push gently to confirm stability, check the alignment of the counter edge with the window, and verify that the roof sits firmly without pinching the sides. If the truck tips or wobbles, adjust the base or add small support braces at the corners. If a door or window refuses to align, trim the edges slightly and re-glue with fresh adhesive. The best refinements are often small: a minor adjustment to the overhang, a slightly deeper groove for a sliding lid, or a brighter color for the counter that makes the display feel more inviting. At this point, the model is no longer a sketch in cardboard but a presentable piece: something to photograph, to show to a classroom, to embed in a display case, or to gift to a young maker who loves to imagine serving customers on a sunny street.
Documentation and presentation complete the design cycle. Take photographs from multiple angles, documenting both the exterior charm and the interior organization. Write a concise narrative that explains your design choices—why this scale, why a fold-down counter, why bottle-cap burners—and how the materials contributed to the final result. If presenting in a classroom or competition, prepare a short verbal explanation that highlights the planning phase, the structural decisions, and the ways the model embodies sustainability and creative problem solving. The story behind the build matters as much as the object itself because it communicates intent to observers who may not be familiar with the intricacies of cardboard modeling. The documentation becomes a bridge to future projects: a reference for a new version with different branding, a different kitchen setup, or a new set of colors that reflect another culinary concept.
In keeping with a philosophy of sustainability and skill-building, embrace revision as a positive force. The plan can evolve as you gain experience with the material. You might realize that a different shape for the base yields greater stability or that a certain combination of colors conveys a more cohesive brand narrative. The beauty of a cardboard mini truck lies not in a flawless first try but in the opportunity to refine ideas through hands-on experimentation. This approach mirrors real-world design work, where concepts travel from rough sketch to working model through cycles of testing, feedback, and improvement. The project, thus, becomes a small-scale studio that teaches spatial literacy, material science, and storytelling in equal measure.
If you’re seeking further inspiration and practical demonstrations, you can explore additional step-by-step tutorials and community insights that echo this planning philosophy. The shared nature of such projects helps learners see how others solve common challenges—like keeping a model light yet sturdy, or choosing a color scheme that communicates a clear brand identity. These exchanges expand the workshop’s value beyond a single build and into a repertoire of ideas that learners can remix for future projects. For more context on how design thinking translates into cardboard models and to see a broader spectrum of approaches, consider visiting the Minitrucksala blog, which offers related perspectives on small-scale vehicle projects and their construction journeys. Minitrucksala blog.
As you conclude the planning phase and approach the assembly, remember that the heart of the project is not only the finished truck but the process of planning itself. The careful attention you give to purpose, scale, layout, materials, and details will shine through in every aspect of the build, from the tactile feel of the counter to the visual rhythm of the signage. The model becomes a bridge between imagined commerce and tangible craft, a small stage where creativity meets engineering and where children and adults alike can imagine, try, and learn. The value of this approach goes beyond the object: it cultivates a mindset that seeks efficient, elegant solutions, respects materials, and celebrates the power of making as a pedagogy. In this light, the cardboard mini food truck ceases to be merely a decorative piece and becomes a doorway to inquiry, collaboration, and sustainable problem-solving.
External reference and inspiration can expand what you see during the planning phase. For readers who want to explore a richer tapestry of cardboard building techniques and step-by-step visuals, the instructive guide at a well-established hobby resource offers a detailed walk-through that aligns with the principles outlined here. External resource: https://www.instructables.com/How-to-Build-a-Cardboard-Food-Truck/.
From Cardboard to Caravan: A Thorough, Immersive Build of a Mini Food Truck
A cardboard mini food truck is more than a playful object; it is a compact workshop that invites you to think in three dimensions, to problem-solve with real-world constraints, and to watch an ordinary box transform into a tiny, rolling stage for imagination. The beauty of this project lies not in complexity but in clarity: a sturdy plan, careful cutting, and deliberate assembly can yield a vehicle that actually rolls, serves, and sparks storytelling. The journey begins long before the first crease, with a design idea that lives in the mind and on the page. A good plan feels simple, almost minimal, but it carries the weight of future reliability. You want a base that sits flat, walls that stand square, a roof that stays aloft under gentle play, and a counter that can hold tiny pretend delicacies without wobbling or tipping. The planning phase is a quiet but essential act of translation: turning a two-dimensional surface into a three-dimensional object you can touch and move, with doors that open and windows that frame a small, bustling counter where imagined customers line up for orders.
As you sketch, think about proportion. The height of the box should feel comfortable when placed on a table, and the width should accommodate a serving counter that’s visually convincing without becoming heavy or unwieldy. If you start with a large box, you have room to carve out a raised front section that evokes the distinctive profile of many street carts, where the driver’s cab sits slightly above a generous serving area. The plan is not a rigid prescription but a living map: it helps you decide where to place the window, where the door should swing, and how the roof will overhang to create a little porch-like feel. In this sense, the project becomes a primer in spatial thinking, teaching you to anticipate the ways cardboard behaves when cut, folded, and glued. Cardboard offers resilience but also vulnerability; it resists the wrong kind of force, yet with careful reinforcement it can endure hours of play, light handling, and occasional bumps during display or storytelling.
When you prepare the base, you begin wiring the project to the real conditions of materials you have at hand. Removing the top flaps of a box creates a generous, flat canvas, a stage on which the sides will rise. If you’re using a shoebox or a similarly compact form, you gently trim away the lid and allow the body to sit in a natural, open frame. With the base ready, you move into crafting the front and the sides. Two identical side panels establish a sense of depth, while a front panel anchors the truck’s character. The math here is straightforward but critical: the height has to match the box’s height so that all components align, while the width of the side panels needs to be just generous enough to produce a subtle overhang. The moment you glue the side panels to the front, forming a safe, right-angled nook, you are not merely assembling cardboard; you are shaping a narrative frame that will hold the counter, the dashed lines of a tiny menu, the glint of pretend glass, and the possibility of motion.
A small roof completes the core structure and is more than a decorative cap. It creates a visual balance across the truck, giving the top a sense of continuity that helps the whole piece feel more like a complete vehicle than a loose collection of panels. The roof should be cut to fit the U-shaped body in a way that leaves a clean, even overhang. This subtle overhang matters. It communicates a sense of shelter and hospitality, a cue that the truck is ready to serve whatever imaginative fare you design for it. As you work through the assembly, you find that each piece has a function beyond its immediate geometry. Windows and doors are not merely decorative; they shape how light plays across the surface, influence how the interior space can be imagined, and provide logical points for attaching accessories like a small serving counter and a tiny signboard.
The counter, a central feature, anchors the truck’s purpose. Cut a long, narrow rectangle from a smaller box or a strip of cardboard, and secure it to the lower front of the base. The counter becomes a stage for your miniature menu, a place where pretend pastries, toy burgers, or plastic scoops can sit with a sense of ceremonial display. The act of gluing the counter in place is a reminder that practicality must meet aesthetics: the counter should be flush enough to provide a believable serving area, yet light enough that the entire assembly remains manageable and safe for children who may be guiding the project through its stages. A well-positioned counter also becomes a natural anchor for any additional details you wish to introduce later, such as a little cash drawer, a tiny tip jar, or a row of pretend condiment bottles made from cut pieces of cardboard coated with paint.
Details are where the imagination truly takes hold. Windows can be simple, rectangular cutouts, but you can heighten realism by adding small frames from scraps of cardboard and, if available, a translucent plastic sheet cut from a milk jug to simulate glass. Doors can swing or remain as fixed panels, depending on how far you want to push the project’s interactivity. The signboard, often mounted on the front, completes the storefront feel. A menu written in markers or painted with bold, cheerful colors invites onlookers to read, imagine flavors, and engage with the truck as if it were a real, running business. The sign is not merely decoration; it’s a narrative device that communicates personality. Whether you opt for a playful name or a clever pun, the sign becomes a focal point that encourages kids to think about branding and presentation, even in a tiny, cardboard universe.
Once the main structure exists in satisfying three dimensions, you turn to mobility. Wheels are the heart of the project’s kinetic identity. Small wheels—whether bottle caps, small toy wheels, or cut cardboard circles—need proper axles to roll smoothly. The classic approach is to fashion axles from drinking straws or wooden skewers, inserted through the base with enough clearance to prevent rubbing against the sides. The wheels must spin freely and align in a straight line, so the truck can glide with minimal effort. The balance required to keep the vehicle stable is delicate: if the axles are too tight, the wheels won’t turn; if too loose, the truck may wobble. A little careful testing—rolling the truck across a tabletop, adjusting gaps, and ensuring the wheels are evenly spaced—transforms the assembly from a decorative object into a fully functional toy.
At this point, it’s natural to pause and consider durability. Cardboard can endure a lot, but the joints must be reinforced. A small amount of glue at the critical seams, along with a few strips of tape running along the inner corners, can dramatically improve longevity. If you foresee outdoor display or heavy handling, a light spray of a water-resistant finish can protect the surface and help maintain color integrity. The objective is not to create a museum piece but to craft something sturdy enough to withstand play and display, while still being easy to repair or reconfigure for future projects. A seasoned approach is to treat the build as an evolving object: you might discover a new window shape that better frames the miniature counter; you may realize that a longer roof supports a hanging awning; you may decide to add shelves made from scrap cardboard to display pretend goods.
Decoration is the stage where technique and storytelling merge. Painting the truck in bright, appetizing colors can evoke the sensory environments of street vendors—the sun-drenched gloss of a sunny afternoon, the glossy sheen of a fresh pastry, the warm glow of a well-lit counter at dusk. If you prefer a more tactile finish, use colored paper to cover panels, then layer on small details drawn with markers. Markers, crayons, or paints can be used to craft a menu board, outline the windows, or create decorative stripes that suggest branding. The choice of materials here feeds the project’s soul: bold contrasts can signal a bold business, while pastel tones might convey a sweetness-driven concept. You can also harvest small scraps—fabric pieces for an awning, a tiny flag on a toothpick mast, or a folded strip of paper to simulate a sunshade—adding texture and depth to the surface. Each choice, no matter how minor it seems, contributes to the sense that this cardboard vehicle is alive with character and purpose.
The final phase of construction centers on testing and refinement. A gentle roll across a table ensures that the wheels track true and the weight is evenly distributed. If the truck wobbles, you can adjust the position of the counter or the wheel axles, or add a small brace at the rear to stabilize the base. The serving area should be at a comfortable height for pretend customers and caregivers alike; if the counter feels awkward or unbalanced, revise its attachment to the base and perhaps add a supporting strip beneath to keep it rigid. Playtesting is not a luxury but an opportunity to learn. Observing how a child might try to load the counter with pretend goods, or how a caregiver might guide the vehicle around a pretend curb, helps you refine the build so it behaves in ways that feel intuitive and satisfying. The ultimate reward is a robust, roll-ready micro-merchant that can become the centerpiece of a tiny world: a test bench for creativity, spatial reasoning, and even early project management, as kids learn to plan, execute, and adjust in response to how the toy behaves.
The educational payoff of constructing a mini food truck extends beyond manual dexterity. It invites conversations about recycling, material use, and sustainability. Every step of the process emphasizes making do with what’s at hand: a sturdy cardboard source, scrap pieces for detailing, and a careful approach to cutting and gluing that reduces waste. In a broader sense, the activity models a maker mindset: you start with an idea, you test, you iterate, and you celebrate the moment when concept becomes tangible object. This is not merely a craft for children; it is a learning moment for anyone who wants to explore how simple materials can be reimagined into functional forms. As you contemplate the finished truck, you notice that its surface carries the marks of its creation—small imperfections that tell the story of choices made, measurements checked, and patience exercised. And that narrative, captured in a rolling, serving canteen on wheels, is what elevates the project from a weekend pastime to a meaningful, memorable experience.
The project also offers a gentle gateway into broader ideas about design and narrative structure. The truck’s counter becomes a focal point for imagining menus, pricing, and service flow, even if those ideas stay in the realm of make-believe. Kids can practice counting pretend money, describing flavors, or inventing a brand identity, which strengthens literacy, math readiness, and communication. In a classroom setting, the same model can become a shared origin story for a collaborative display, where several mini trucks each tell a different tale of culinary invention. In this sense, the cardboard vehicle transcends its material simplicity. It becomes a microcosm of creation and community, a tiny, portable platform on which imagination can travel and grow. The joy of such a project lies not only in the end product but in the pathways it opens—the chance to fail gracefully, to improvise with the materials at hand, and to celebrate the moment when a rough box yields something that feels complete and capable of serving up stories as much as snacks.
For readers who crave a visual reference or a broader walkthrough, a well-composed video guide can illuminate the practical details while preserving the sense of hands-on exploration that makes this project so rewarding. Seeing a real-time demonstration of cutting, gluing, and assembling can demystify some of the trickier aspects, such as achieving a stable rolling base or forming a convincing roof overhang. The video is a companion rather than a substitute for the tactile experience: it invites you to pause, replicate, and then adapt the design to your own space, tools, and materials. In many ways, the cardboard food truck project embodies the spirit of DIY learning: a blend of instruction, experimentation, and personal expression that proves how ordinary resources can yield extraordinary results when paired with curiosity and patience. If you wish to explore related ideas and see how similar cardboard transformations unfold, you can turn to the Minitrucksala blog for a broader catalog of projects and ideas that honor reuse, creativity, and hands-on making. Link: Minitrucksala blog.
As you close the lid on the final stage of this build, you might notice how the truck’s appearance changes with lighting and perspective. A late-afternoon glow can bring out the warm tones in the cardboard and highlight the texture of painted surfaces, while a bright interior lamp can make the counter feel inviting, like a real corner stall. You can also adapt the finish to suit different play scenarios: a sunny outdoor fair day, a rainy street corner, or a bustling indoor market. These variations underscore a central truth about cardboard projects: flexibility is their greatest strength. The same truck that serves as a toy can become a storyboard for a creative lesson, a prop in a family story, or a centerpiece in a classroom display celebrating sustainable making. In every case, the act of creation remains the same—an exercise in turning everyday materials into a meaningful object that invites interaction, imagination, and learning. The tiny vehicle becomes a reminder that ingenuity often begins with a simple idea, a few practical tools, and a willingness to experiment with what’s at hand.
If you want to keep the learning loop active beyond the construction phase, consider inviting others to contribute. A family member might design a second truck with a different color scheme, a friend could draft a mini menu for a mock day of service, and a child could write a short sign in their own words. The project then evolves into a shared artifact, a collaborative testament to invention and play. The cardboard food truck is more than a toy; it is a catalyst for conversation, creativity, and a hands-on sense of making that children and adults can return to again and again. By paying attention to the balance of form and function, and by approaching the build with curiosity rather than haste, you cultivate a confidence that carries into other DIY endeavors. And wherever the road of imagination leads next, this small vehicle—crafted from a box, reinforced with care, and brought to life with color and light—will remain a cheerful beacon of what can be achieved when practical craft meets inventive spirit. For those who want to trace this thread of ideas to further examples and related explorations, the journey can continue at the broader makers’ hub linked above, which hosts a variety of projects built from simple, repurposed materials.
External reference: For a visual reference that complements this narrative, view a video guide at https://www.youtube.com/watch?v=example123.
From Plain Cardboard to Colorful Showroom: Decorating Your Mini Food Truck with Imagination and Texture
The cardboard box, once a mundane carrier, becomes a small theater for color, texture, and story when you give it a clear purpose and a dash of personal vision. Decorating a mini food truck is more than adding pretty paint; it is about building a believable, playable scene that invites touch, storytelling, and shared moments of creativity. When you approach decoration as a cohesive process rather than a grab-bag of tricks, the truck turns from a static object into a character with charm, personality, and a hint of whimsy. The design choices you make—colors, patterns, materials, and the placement of tiny details—signal the world inside the box and set the tone for the kinds of stories that can unfold there. Whether you are decorating with a child who loves bold stripes or with a grown maker who wants a retro feel, the path from blank surface to bustling storefront is anchored in deliberate planning, forgiving experimentation, and a playful readiness to revise as you go. This chapter guides you through a harmony of color, texture, display ideas, and tiny but telling features that transform a simple cardboard chassis into a miniaturized, engaging food service scene.
One of the most powerful starting points is color strategy. Paint or markers can carry the spirit of the truck long before any menu or signage is added. You can lean into a bright, eye-catching palette with a couple of bold hues that work well together, or you can pursue a more nuanced, retro look by combining two complementary tones with an accent color. The techniques recommended in the best DIY tutorials emphasize not just painting across flat panels but also creating visual rhythm through patterns. Stripes can elongate the form and lend a sense of movement to the truck’s surface, while polka dots can inject playfulness. A gradient or wash executed with watercolor pens or diluted acrylics can give the surface depth, mimicking the painted patina of a real vehicle. The beauty of color comes not only from the hue itself but from how it interacts with light and shadow on the ridges and corners of cardboard. When you plan the color plan, you also design the lighting in a sense—where light will hit the curved roof overhang, where the sun would rest on the serving counter, and how a glossy seal might reflect a friendly glow in the display area. This is the moment to let color inform form, rather than painting blindly and hoping for cohesion later.
As you begin to fill the truck with miniature life, the interior becomes a stage for tiny displays that anchor the eye and invite a closer look. A miniature food display, built from colored cardstock shapes cut into burgers, fries, hot dogs, or scoops of ice cream, offers a playful way to showcase what the stand might serve. These shapes don’t need to be perfect replicas of real food; they are stylized, friendly versions that fit the scale of the truck and the imagination of the viewer. Attaching them to the interior kitchen area with a little glue creates a sense of realism inside the toy. The more you vary the shapes—rounded fries in one corner, a burger with a sesame-like speckled top in another—the more the display reads as a bustling, ready-to-serve counter. The display also gives you a practical function: a place to rest miniature props or pretend money, a tiny receipt pad, or even a chalkboard-style menu drawn on a small piece of cardstock. In short, the interior display becomes a microcosm of a real operation, inviting kids and adults alike to imagine the rhythm of a service day.
Details are where the craft spirit shines. Tiny touches—door handles, hinges, a chimney or antenna, and wheels that roll—bring the cardboard creation to life and make it feel more complete. You can fashion door handles from toothpicks or thin wooden skewers, primed with a dab of glue and finished with a small bead or rounded end. If you add a movable door, you can secure it with a simple paper fastener, letting the door swing just a touch when you open or close the counter to take orders. Wheels are a classic finishing touch; bottle caps have the right weight and footprint in a mini world, and they can be attached with glue gun or durable craft glue to the bottom corners. The little motion you feel when the wheels spin is not just a mechanical delight; it contributes to the sense that this is an active business rather than a static sculpture. For an added layer of realism, you can string a thin thread or wire to simulate an antenna or radio dish on the roof, then anchor it with a dab of glue so it can stand upright without tipping the truck.
To create a believable exterior, you can also lean into texture through the roofline and walls. A simple overhang, created by gluing a slightly larger piece of cardboard above the front panel, hints at a shade-worthy serving area and catches the eye with its extra dimension. Consider adding a faux awning using fabric scraps or a painted strip of card attached with double-sided tape. These small touches do more than decorate; they suggest a space where people gather, talk, and place orders. The signage on the front can be a plain board or a carefully drawn menu, but it can also be a story in itself, announcing a playful personality—perhaps a silly, imaginary name that reflects a child’s favorite color or a familiar character from a story. When you treat signage as a narrative device rather than a mere label, it becomes a focal point that anchors the entire scene and gives the world inside the truck a voice.
A thoughtful way to unify the truck’s look is to consider the base environment—a tiny, stylized street or parking lot that grounds the vehicle in a scene. As you build the base, use textured greens to mimic grass, or a textured gray for a road surface. The “parking lot” can be created on a sturdy, flat surface by layering green-dyed cardstock to create a grass-like texture, or by painting tiny specks of stones and cracks with a fine brush. A little scene base adds context and story: a family of figures waiting in line, a small dog at the curb, or even a street sign with a punny instruction. The scene base helps the eye travel from the truck to the ground and back again, creating a cohesive world where the customer and seller interact. If you enjoy adding life to the scene, consider drawing tiny shadows beneath the wheels with a soft pencil to anchor the truck to the base and make the composition feel less two-dimensional. The effect is subtle but powerful, turning a cardboard model into a stage set that invites imaginative play.
Themed decoration kits, when used thoughtfully, can accelerate the transformation from plain to polished without compromising the handmade feel. A themed kit—think banners, tiny flags, and decorative elements—can give the truck a festive look with just a few additions. The key is to tailor the kit to the story you want to tell. A cart that serves ice cream might benefit from cool-toned streamers, pastel flags, and a small cone-shaped topper glued to the roof. A retro diner-inspired truck could use bold geometric shapes, black-and-white stripe patterns, and a neon-like sign cut from cardstock. The goal is to use these kits as accelerators, not as crutches. Integrate them with your colors, display items, and base scene so nothing feels like an afterthought. When you pull these elements into the project with a light touch, the final piece reads as cohesive and lived-in rather than a collage of separate ideas.
In pursuing decoration, you also embrace the value of ingenuity over expense. Cardboard invites resourceful solutions: you can reuse scraps from the same project for window frames, table legs, or small counter supports. A section of an older box can become a storefront sign, a narrow strip of cardboard can morph into a vent, and bottle caps saved from a previous craft can become wheel hubs with very little effort. The sense of satisfaction grows when you realize that your device for play is also a small sculpture that respects materials and reduces waste. This mindset aligns with a child-friendly philosophy of making, where the process matters as much as the product. It is a reminder that creativity can flourish in resourceful ways, turning everyday leftovers into something bright and new.
As you approach the finishing layer, think about how the truck will be perceived from different angles. A child playing with the model may explore the front windows, the serving counter, or the wheels, so ensure that the most visible surfaces are clean and well-decorated. A simple approach is to calculate the visible planes from the most common vantage points the viewer might have while playing or presenting the project in a classroom display. A small, glossy coating on the exterior can mimic the real-world shine of painted surfaces and provide a durable gloss that resists smudges during play. If you choose to seal with a light clear layer, test it on a scrap piece first to ensure there is no warping or color bleed. The point is not to remove the tactile joy of cardboard but to protect the decoration long enough for hours of creative, shared activity. The result is more than a pretty model; it is a crafted space where color, texture, and story converge in a way that encourages curiosity and conversation.
Importantly, decoration should feel like collaboration. Invite a child or a fellow maker to participate in choosing colors, placing the display items, and deciding where the sign should hang. The process becomes a dialogue rather than a one-sided activity. You may start with a plan, but the best results often come from playful adjustment—the kind of adjustments that happen when a line of a stripe doesn’t quite match its neighbor or when a tiny window needs to be shifted to ensure the display line remains legible from the front. These small revisions are the texture of skilled craft: they demonstrate patience, willingness to experiment, and the joy of improving a design through hands-on tinkering. The chapter’s beauty lies in its openness to change and its celebration of human touch. The cardboard toy becomes a testament to collaborative craft, where looking at the same object from different angles reveals new possibilities and new stories to tell.
To keep this momentum going, you can reference broader ideas and ongoing inspiration from related creative communities. For ongoing ideas and guidance, you can visit the Minitrucks CaLa blog, which offers a range of tutorials and project notes that echo the spirit of turning plain cardboard into character-rich displays. minitrucksocala.com/blog/. This touchpoint invites you to think of the mini truck as part of a longer conversation about DIY storytelling through cardboard sculpture, where each new project builds on the lessons learned from the last. The blog serves as a quiet reminder that decoration is a continuing practice, not a single end product. You are always free to return to the basics—color theory, pattern, texture, and narrative signage—and adapt them to your own evolving ideas. A well-decorated mini truck becomes a small workshop of imagination, where play, craft, and design blend into a single, cohesive moment of creation.
In the end, the value of decorating a cardboard mini food truck lies not in achieving perfection but in crafting an atmosphere that invites exploration. The surface becomes an invitation to touch, to imagine, to role-play, and to tell small, joyful stories about food, community, and color. A child can recreate a busy street scene with a line of customers and a vendor behind the counter, or an adult can build a retro glow that hints at a bygone era of roadside stands. Whatever your aim, the decoration anchors the truck in a world that feels real enough to walk into and playful enough to stay for a moment or two longer. This is the heart of the project: turning a simple box into a doorway for imagination, a stage for tiny commerce, and a reminder that creativity thrives where materials are seen as pathways rather than barriers.
If you’re hungry for more practical techniques and fresh ideas, there are abundant resources online that explore similar craft processes and offer fresh angles on how to structure, decorate, and finalize such miniature builds. For a broader sense of how to approach hands-on projects and to see more examples of how mini builds can come together, you can explore additional creative communities and tutorials. The key is to keep testing: swap colors, adjust the angles of signs, and rework the display until every element feels like it belongs in the same story. With a little patience and a lot of imagination, your plain cardboard truck can become a vivid, welcoming storefront that invites play, wonder, and a little bit of magic in the craft room. For further techniques and inspiration, see external resources that showcase practical, step-by-step craft methods and material experiments, such as instructional craft projects that extend the same principles of scale, texture, and storytelling to a wide range of cardboard builds. See also a broader range of hands-on projects at Instructables, which offers new methods for shaping and finishing cardboard works while preserving the charm of handmade craft. https://www.instructables.com/.
Final thoughts
Building a mini food truck out of cardboard is more than just an arts-and-crafts project; it’s an opportunity to express your creativity, engage your community, and even promote your business in a fun and interactive way. With careful planning, construction, and decoration, the result will be a charming representation of your vision that you can proudly display or play with. So gather your materials, get your creative juices flowing, and let your mini food truck dreams take shape!