
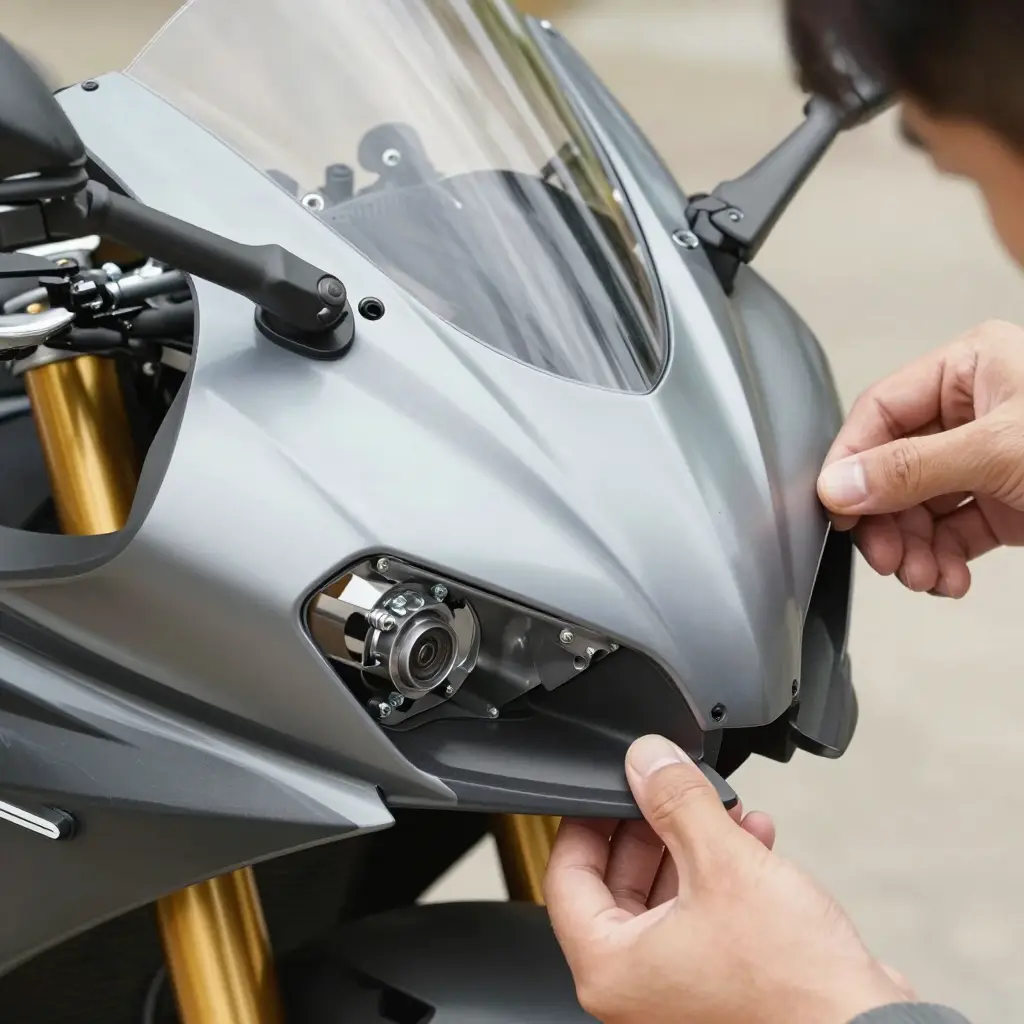
Why Motorcycle Fairing Fitment Matters More Than Anything Else
When you buy aftermarket fairings, the result comes down to one thing: how well the panels fit the bike. Fitment decides whether a set looks factory-clean and survives a season of real riding, or rattles at speed and cracks around the mounting tabs.
Fitment means the fairing and every mounting tab, grommet, and bolt hole line up with the frame and with the other panels. When those points align, the fairing sits under even tension, the gaps stay consistent, and wind load spreads across the whole structure instead of concentrating on a few thin tabs. When they don’t, the pressure has nowhere to go but into the plastic.
I’ll keep this practical: first the mechanical reasons mounting tabs crack, then how to run a fairing alignment check before you spend money, and finally how to judge a seller before you buy.
- Why mounting tabs crack: the stress, vibration, and material factors that break even premium sets.
- How to do a fairing alignment check: measuring panel gaps, tab positions, and bolt-hole spacing before installation.
- How to evaluate a seller before you buy: reading fitment claims, warranty terms, and owner reviews critically.
By the end you should be able to shop for fairings with a checklist instead of hope.
Why Mounting Tabs Crack: The Mechanical Root Causes
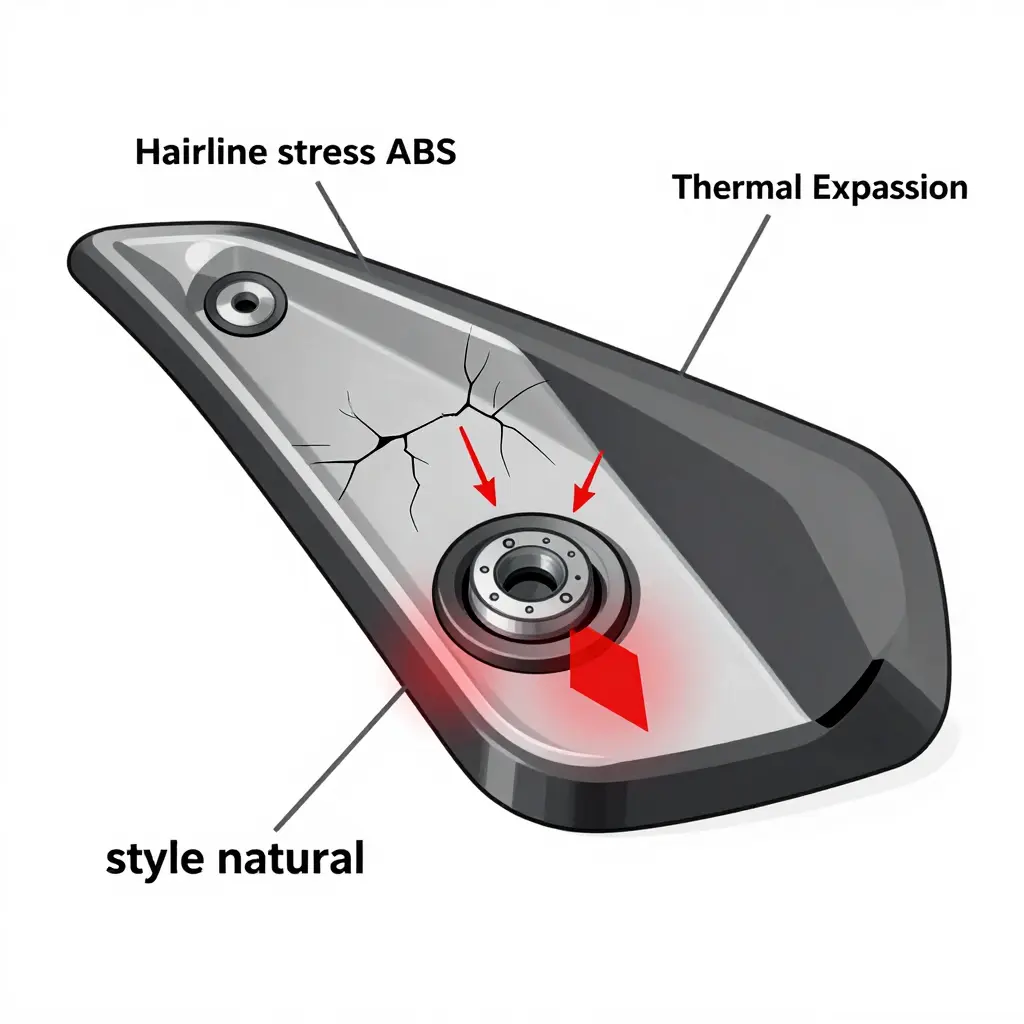
Mounting tabs usually crack because of how they’re installed and how they’re shaped, not because plastic is weak. A tab is a small load-bearing bridge between a flexible panel and a rigid frame. Squeeze, twist, or force that bridge and it fails at its weakest point. The causes below keep producing the same failure.
Over-torqued bolts
A bolt is a clamp, not something you make sure of by tightening harder. Every extra pound of torque pre-loads the tab and concentrates stress at the edge of the bolt hole, already the weakest point in the geometry. Once the plastic yields, a crack starts and runs along the load line. Torque to the manufacturer’s spec with a torque wrench, not with your wrist.
Vibration and stress cycles at the tab
One ride doesn’t break a tab; repetition does. Road vibration feeds thousands of tiny load reversals into the mounting point every trip. This is ordinary fatigue: hairline cracks form at the hole edge, grow with each cycle, and finally let go. Most of the damage accumulates in a few grams of material. If a tab cracks gradually rather than all at once, vibration is the prime suspect.
Thermal expansion and contraction: ABS vs OEM plastic
Two materials that expand at different rates fight each other when bolted together. An aftermarket ABS panel and the OEM panel next to it can have different coefficients of thermal expansion: on hot days the ABS grows more, on cold mornings it shrinks more. Clamp the tab rigidly and that movement has nowhere to go, so it works the material loose. Rigidly bolting mismatched materials together invites a slow, seasonal crack.
Misaligned bolt holes force the panel into tension
The worst cracks begin before the engine starts. If the holes don’t line up, the installer pulls or pushes the panel to meet the bolt. That leaves the tab in permanent tension, often with a slight twist, so it lives under load from day one. The panel is “installed”; the tab is already straining. This is why so many cracks trace back to alignment rather than abuse.
Thin or unsupported tab geometry
Some tabs are built to fail. Too little material, a sharp internal corner, or no supporting webbing lets the tab flex and concentrate stress at its base. Add vibration and the flexing becomes a crack. Geometry, not just thickness, decides how long a tab lasts.
Poor-quality resin or fiberglass layup
Material quality sets the ceiling. Resin-starved fiberglass, air pockets, or weak bonding leave internal voids that act as built-in cracks, so a tab can look fine and still fail early. A good layup forgives small mistakes. A bad one punishes even a perfect install.
Fatigue crack vs. installation crack: how to tell them apart
| Feature | Fatigue crack | Installation crack |
|---|---|---|
| When it starts | Slowly, after weeks of riding | Immediately, during or right after fitting |
| Crack path | Progresses gradually, often jagged | Sharp break, sometimes a fresh white mark |
| Surrounding signs | Worn edges, dirt worked into the crack | Clean break, no wear |
| Usual cause | Vibration and stress cycles | Misalignment and over-torque |
The takeaway: it usually comes back to alignment
Notice how many of those causes overlap. Over-torquing, mismatched materials, and thin geometry all get worse when the holes don’t line up. Alignment feeds the others: get the panel sitting flat and unloaded, torque it gently, and you remove most of the reasons tabs crack. If you’re picking up used parts, or a whole vehicle, this is the kind of fit you want to inspect when checking a vehicle over before you buy.
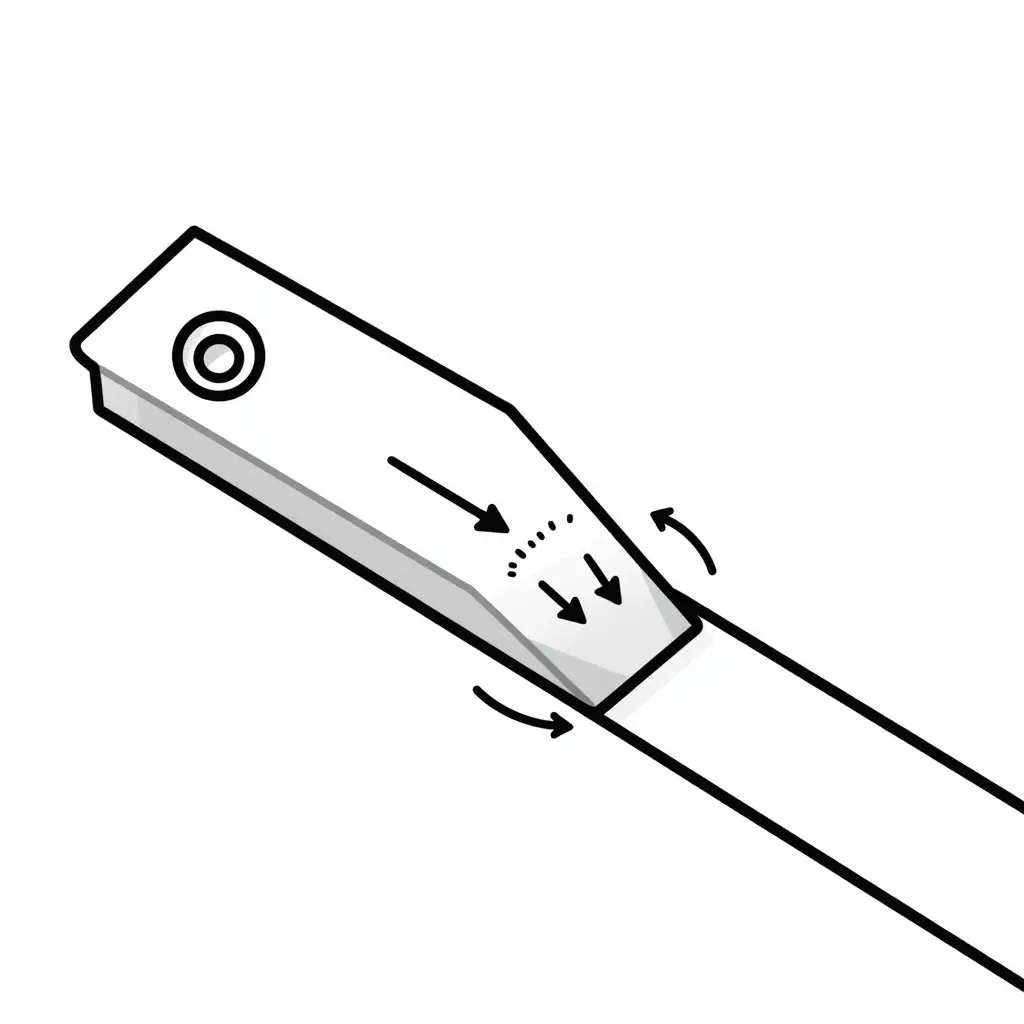
The schematic maps the three zones where a fairing tab usually fails: the base where it meets the panel, the rim of the bolt hole, and the contact surface where the tab meets the frame. Shaded regions and converging arrows show how force concentrates at each point, and the gap at the contact surface shows how a mismatch turns the tab into a lever that pries itself apart. A small alignment error can load a tab far beyond what it was designed to carry. Before buying, it also helps to know how to inspect pre-owned vehicles before you buy.
Warning Signs of Misaligned Fairings
Before you tighten a single bolt, spend five minutes seeing how the panels sit together. Poor alignment usually announces itself before a tab snaps. Watch for these:
- Uneven panel gaps that vary in width along a single seam, running wide at one end and pinching shut at the other.
- A tab that will not seat into its slot without force, or that pops back out the moment you release pressure.
- Mounting bolts that thread hard because the holes are offset; you feel resistance and cross-threading instead of a smooth, spinning fit.
- Paint contact lines that touch or overlap where two panels meet, rubbing away the finish as they vibrate.
- Panels that flex, flutter, or buzz at certain engine speeds or highway speeds, a clear sign the mounting points are fighting each other.
- Stress whitening, hairline cracks, or spider-webbing around the base of the tabs, the last stop before a tab fails completely.
When several of these show up together, they rarely mean one loose screw. They point to a fitment problem: the panels, tabs, and mounting points were never molded to sit in the same place at once. Good fairing alignment gives you even panel gaps, bolts that spin in by hand, and tabs that seat with a soft click and no pressure. Consistently sloppy gaps and stressed tabs mean the aftermarket fairings fitment is off, and forcing assembly only accelerates the cracking. Catch the clues early and you can return or rework a bad set before it costs you a tab mid-ride.
Fairing Material and Fitment Comparison
Material shapes how a fairing fits, flexes, and survives vibration. The table below breaks down how the common options affect fitment and tab durability.
| Material | Weight | Flexibility | Vibration Resistance | Tab Durability | Fit Consistency | Typical Cost Level |
|---|---|---|---|---|---|---|
| ABS | Moderate, sturdy | High (flexes without cracking) | Very Good | Excellent – absorbs shock and bends rather than snapping | Good to Excellent when mold quality is high | Low to Moderate |
| Fiberglass | Moderate to heavy | Low (rigid, brittle) | Fair | Moderate – tabs can crack under stress or over-torque | Moderate – depends heavily on hand-laid quality | Moderate |
| Carbon Fiber | Very light | Low to Moderate (stiff) | Good | Good, but brittle if struck sharply | Good, but pricey and less tolerant of misalignment | High to Very High |
| Injection-molded OEM-style | Light and uniform | High (engineered flex) | Excellent | Excellent – precise tabs with consistent thickness | Excellent – matched to factory mounting points | Moderate to High |
The pattern is hard to miss: materials that flex and are molded precisely, ABS and injection-molded OEM-style fairings, hold alignment best because their tabs bend under vibration instead of snapping. A rigid fiberglass fairing can hold a line beautifully once seated, but its brittle tabs punish even slight misalignment. If reliable fitment is the priority, ABS and OEM-style injection-molded panels generally give you the most forgiving tabs.
How Vibration and Stress Cycles Slowly Wear Down Fairing Mounting Tabs
Every ride sends energy through the fairing. Engine buzz, wind buffet, and road chop all feed vibration into the plastic, and it has to go somewhere. Usually it travels down into the mounting tabs, the small thin points where the fairing bolts to the frame. This is the fatigue behind the cracking above, seen from the ground up.
Each bump, gust, and engine pulse is one stress cycle. A single cycle does almost nothing. Millions of them work like a tiny saw, opening micro-cracks at the tab base until the plastic gives way. That’s mounting tab fatigue, and it’s cumulative. Damage doesn’t reset overnight, and it doesn’t heal on its own.
Three conditions turn a gentle hum into a hammer:
- Higher speeds raise wind pressure and buffet frequency, multiplying the load on every tab.
- Rough roads deliver sharper, larger impacts in quick succession, so stress arrives faster than the plastic can recover.
- Loose hardware lets the fairing chatter, so each bolt rattles instead of holding firm and repeatedly slams the tab base.
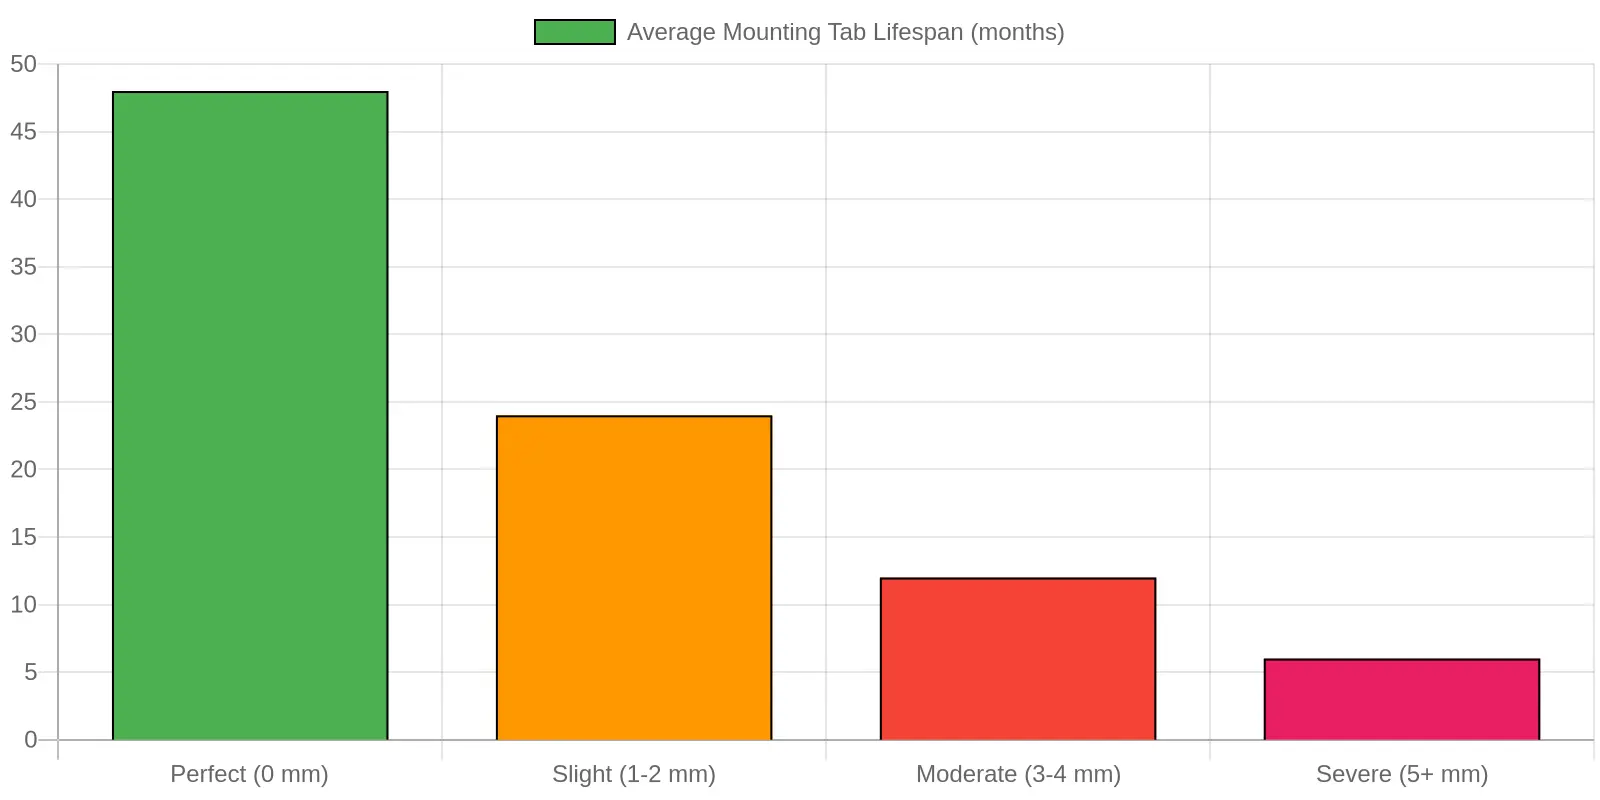
Alignment matters here too. A misaligned fairing never sits relaxed. Its tabs are pulled into constant tension before you start the engine, so they begin every ride pre-loaded and primed to fail. That static strain is why two identical bikes can show very different tab lifespans on the same roads.
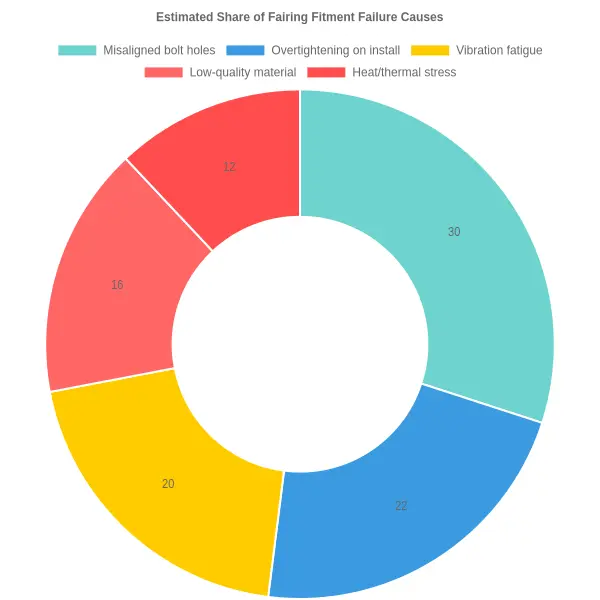
This is why alignment quality is the biggest variable in motorcycle fairing fitment, and why it deserves more attention than any torque spec. The chart below shows how steep that relationship gets.
Why Alignment Problems Dominate Fairing Fitment Failures
When tabs crack, riders blame flimsy plastic or rough roads. But by my own rough estimate, misaligned bolt holes alone account for about 30% of fitment failures, more than any other single source. The numbers in the doughnut chart below are estimates, not lab data, but the ranking is the point: alignment-related issues outweigh material quality and thermal stress combined, which is why a quick fairing alignment check before you buy pays for itself.
What the Biggest Slice Means for Buyers
The 30% slice is the headline: nearly one in three failures traces back to panels that never lined up, not to the plastic they’re molded from. Add overtightening on install (22%) and you find that human error and poor factory tolerances, not rider abuse, drive more than half of all tab cracks. For buyers the lesson is simple: if you’re shopping for used equipment, apply the same panel-gap inspection you’d use when buying pre-owned vehicles, and never force a bolt that doesn’t thread freely by hand.
| Failure Cause | Estimated Share |
|---|---|
| Misaligned bolt holes | 30% |
| Overtightening on install | 22% |
| Vibration fatigue | 20% |
| Low-quality material | 16% |
| Heat / thermal stress | 12% |
The chart sets the priority order: fix alignment first, control torque second, and only then worry about upgrading materials.
How to Check Fairing Alignment Before You Buy
Buying used or aftermarket bodywork is a gamble unless you know what to look for. A cracked mounting tab is rarely an accident; it’s usually the symptom of panels that were forced into place. The same discipline you’d apply to buying a pre-owned vehicle applies here: trust the fit, not the listing. A proper fairing alignment check before money changes hands saves you from vibration, whistling gaps, and stress cracks later. Here’s the order I follow.
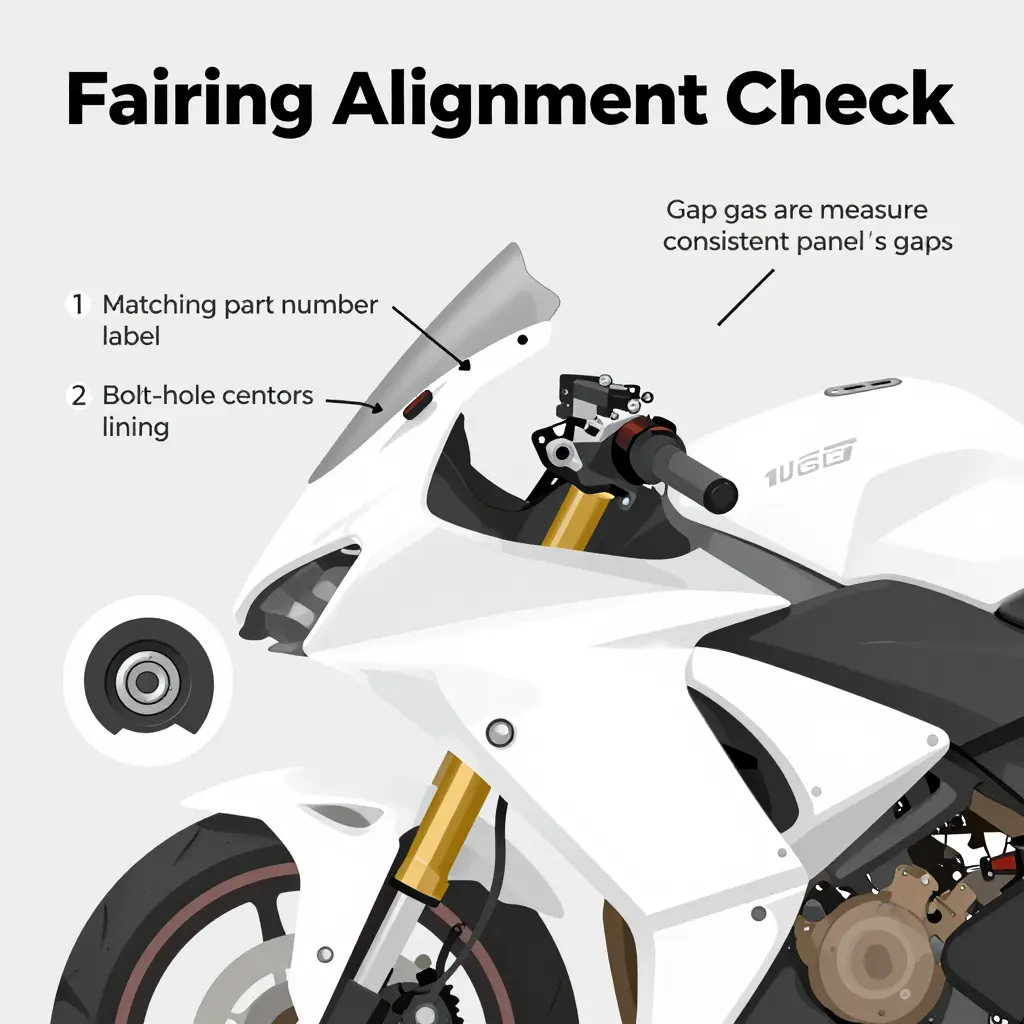
The Step-by-Step Alignment Walkthrough
-
Confirm the part number matches your exact model and year. Panels that look identical can differ between model years; a 2016 and a 2018 side fairing can share a silhouette yet shift bolt-hole centers by several millimeters. Check the stamped number first, or you’re testing the wrong part.
-
Dry-fit every panel with all bolts loose. A dry-fit shows a panel’s natural resting position. Tightening one fastener first pulls the surrounding holes out of register. Assemble loosely, then snug the hardware only after every hole engages by hand.
-
Check that bolt-hole centers line up without forcing. Resistance is the loudest warning you’ll get. Holes that need a screwdriver to pry into place are already loading the plastic. If the centers don’t align freely, the panel is wrong. Walk away.
-
Inspect tab thickness and base reinforcement. Thin or unreinforced tabs are the weak point in any motorcycle fairing fitment. Factory tabs usually carry a thickened gusset where they meet the panel. Flimsy, flat tabs signal a cheap copy that will crack under vibration.
-
Test grommet and bushing condition. These soft parts absorb vibration so the plastic doesn’t have to. Hardened or missing grommets let bolts buzz directly against brittle tabs. Replace worn grommets and bushings before they cost you a panel.
-
Look for consistent panel gaps. Even gaps mean even stress. A gap that’s wide on one side and tight on the other means the panel is twisted. Run your fingers along each seam; uniformity is your pass mark.
-
Confirm the mounting hardware matches OEM spec. The wrong bolts quietly destroy good panels. Oversized or over-long substitutes strip threads and crush tabs, so match the length, thread pitch, and shoulder style of the OEM mounting hardware to the original.
Work through these seven checks in order and you won’t discover a hairline crack after the invoice is signed.
The infographic runs through the same checks as a linear sequence: confirm the model and year, dry-fit the panels, check bolt alignment, inspect tab reinforcement, verify grommets and hardware, and finish with even panel gaps. Doing all of them before money changes hands helps you spot a mismatched or poorly reinforced fairing, so a cracked tab doesn’t become next season’s headache.
Related Reading
If you buy aftermarket parts, learning how to evaluate buying pre-owned mini trucks is a useful starting point. Before you commit to a fairing or mounting kit, review managing finances as a first-time truck owner so you can budget for quality parts instead of cheap ones that crack again. For real-world fitment advice, the Ocala mini truck community is a good place to compare notes with other enthusiasts and retailers. And if you would rather inspect parts in person, visit the Truck Camper Garage’s new showroom to compare mounting tabs, brackets, and alignment tools up close.
Fairing Fitment and Mounting Tabs: FAQ
These are the questions riders ask most about how fairings fit and why tabs fail.
Why do fairing mounting tabs crack so easily?
Mounting tabs are thin, often unsupported plastic that absorbs vibration, heat, and stress while you ride. Every bolt that’s overtightened or misaligned pushes force straight into them. Over time, fatigue wins. Keep fasteners snug rather than cranked, and inspect the tabs regularly before small stress fractures grow into full breaks.
How tight should fairing bolts be?
Snug, not torqued like engine hardware. Most factory specs land between 5 and 9 Nm. Many riders crack tabs simply by over-tightening. Use a torque wrench where you can, add rubber washers, and recheck the bolts after the first few rides. Gentle, even pressure holds panels firmly without fracturing plastic.
Can a misaligned fairing be fixed after purchase?
Usually. Loosen all the related bolts, realign the panels by hand, then tighten gradually in a crisscross pattern so each point shares the load. Sometimes you’ll need to enlarge a hole or add a shim. A careful alignment check after installation prevents the stress that eventually cracks tabs.
Do aftermarket fairings fit as well as OEM?
Sometimes, but not always. Quality aftermarket fairings from reputable sellers often match OEM tolerances closely, while budget sets may need trimming, shimming, or new holes. Cheap plastic warps with heat and thin tabs fail fast. Before buying, ask for real customer photos and a fitment guarantee. A good set can look flawless; a bad one fights you through the entire install.
How do I check if a fairing set fits my motorcycle before buying?
Match your exact model, year, and submodel. Cross-check part numbers, read the return policy, and study buyer photos of mounted panels. Ask whether the set includes new hardware and grommets. As with any pre-owned purchase, verify before you commit; a few minutes of checking saves hours of drilling and returns later.
Should I reinforce mounting tabs proactively?
For high-stress bikes or track use, yes. Fiberglass, plastic epoxy, or metal backing plates around the tabs spread vibration and extend their life. Even on a street bike, reinforcing known weak points before they fail is cheap insurance, far less than replacing a cracked panel and repainting it.
Conclusion: Making a Confident Fairing Buying Decision
The reasons mounting tabs crack are rarely mysterious. The damage almost always traces back to one of three things: poor alignment between the fairing and the frame, constant vibration that fatigues thin plastic, or over-torquing that stresses a tab the moment a bolt tightens. Understanding that trio changes how you shop. Instead of buying on looks, you judge motorcycle fairing fitment by how precisely a product matches your make, model, and year, and by whether the tabs are reinforced to survive real roads.
A disciplined fairing alignment check before you buy prevents most of these failures. Confirm the seller lists exact model fitment, check that OEM-style hardware and grommets are included rather than left for you to find, and read reviews for signs of reinforced tabs and accurate mounting points. When the product arrives, dry-fit it, tighten gradually, and never force a bolt that fights back. These habits protect both your fairing and your frame, and turn a risky purchase into a dependable upgrade.
For buyers weighing aftermarket fairings, prioritize sellers who:
- List precise model fitment instead of vague, one-size-fits-all claims
- Include OEM-style hardware so installation is truly bolt-on
- Reinforce the mounting tabs to resist vibration
- Answer fitment questions quickly
Sellers who meet those standards and still sell a wide range of styles at lower prices are worth your money. Choosing carefully up front and checking alignment before you buy is the surest way to keep your tabs intact and your bike looking sharp. You can apply the same research-first approach to other vehicle purchases; see this guide to smart buying decisions.